Overviews of Aliens (EU2012)
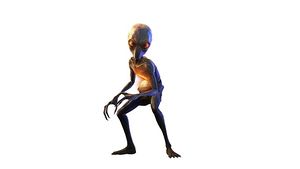
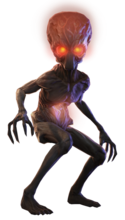
Sectoid
Sectoids are the first enemy you will meet. They are a low HP unit with a weak ranged attack. They are known to be extremely aggressive in numbers and timid / cowardly (i.e. start camping/overwatch) if their number is few. They are capable of some limited psionics in the form of Mind Merge. Killing a unit that is performing Mind Merge will also kill the unit receiving the merge.
- Mind Merge: the merged ally receives +1 hit points, increased will & increased critical hit chance.
Killing a sectoid will leave behind 2x weapon fragments.
Sectoid Soldiers are basic alien peons. They use Mind Merge to try and make up for their shortcomings. However, their reliance on the mind merge ability makes them potentially vulnerable because killing the Sectoid performing the merge will also kill the one receiving it, giving an opportunity for a double kill (the soldier will receive the kill count and EXP for both).
The Sectoid and their Commanders are the only source of the useful Plasma Pistol (once captured, you can then research and manufacture them yourself), and if you wish for a full armament, recovery is required before both Sectoid breeds are phased out of front-line combat. Capturing and interrogating a Sectoid Soldier will provide a bonus to laser weapon research.
As cannon fodder for all but in the beginning of Impossible difficulty, Sectoids begin to be phased out a few months into the campaign. The only exception is the Council Mission at the truck stop (the Spokesman will mention "a truck carrying unusual cargo"), which can appear at any time.
Thin Man
Thin Men use a Light Plasma Rifle, which does much higher damage than a Sectoid's Plasma Pistol. On Classic try to make sure your troops have enough HP to not be one-shot by a lucky hit. Thin Men's high movement means you have to be very careful of flanks from them. If they have a low hit chance they will often use Poison Spit for a guaranteed hit, which will do 3 damage over 3 turns and wreck your soldier's aim. If they have a low hit chance on a soldier equipped with a Medikit or wearing Titan Armor, they will often use suppression on that soldier to reduce that soldier's aim for the turn. While their HP is nothing remarkable, it is enough to survive a grenade on Classic. Finally, beware of their leap ability, which they can surprise rooftop snipers with. Be careful when fighting around a building where you don't have the roof covered because Thin Men can leap on to the roof and then drop in for a flank on the next turn.
The Council Missions will almost exclusively be Thin Men, so before engaging these missions, it is recommended to give your troops either Medikits or Titan Armor, both of which will make them never use posion spit (though it is also a decent strategy with more armored/high HP soldiers to be spat at, making Thin Men 'waste a turn' on what will only end up being 3 points of damage. However, since the spit attack rarely, if ever, misses, they probably will not leave cover for this). In the Escort and Bomb Disposal missions, Thin Men will periodically appear in the mission area. They will drop out of the sky (the game will show you where even if you can't see it) and then immediately go on overwatch. Dropping in counts as a move, so any troops on overwatch who see a Thin Man appear will take a shot (though on rare occasion where only one drops during Alien Activity, this may not happen). They will also appear in all Asset Recovery missions, save for the helicopter crash (which will be all Mutons) and the one at the truck stop (all Sectoids). In all other missions, they will appear for most of the game, but will apper less and less once Mutons and their iterations seem to replace them.
Their capture yields Light Plasma Rifles, which themselves are arguably the best weapon for fighting Thin Men (damage is sufficient, and the +10 Aim is helpful, as a Thin Man's high move rate means they are almost never out of cover once a squad is activated). The subsequent interrogation reduces time for UFO Tech research, which directly helps in researching/building for the Firestorm interceptor, and indirectly with late-game armor, several Foundry projects, the EMP Interceptor weapon (and thus, sellable and useable reasources), and the Satellite Nexus.
As Council Missions will always appear about once a month, and with their low HP and damage rates, Thin Men-infested Council Missions are excellent places to train new Psionic soldiers, as Mind Fray is a very accurate one-shot kill on anything but Impossible difficulty.
V.I.P. Escort In V.I.P. escort missions Thin Men will aim for the target you are trying to extract, regardless of whether or not there is an XCOM escort soldier at their side. As well as regular groups seeded on the map, extra Thin Men will periodically drop out of the sky on you on your way back-- but only as the VIP moves, so you can place your troops ahead of time to intercept. Be sure to scout with soldiers before moving the V.I.P. to the Skyranger; the entire mission will be a bust if the V.I.P. dies. They don't appear to ever use their Poison Spit attack on the V.I.P., even though with their 3 HP (on all difficulties- only with Damage Roulette activated might a VIP have a chance of surviving a hit from a Plasma shot), it would be sufficient to kill them, or force your soldiers to potentially move out of cover to heal them. Fortunatley, they will only begin to target the VIP once you have reached them and are able to control them.
Bomb Disposal In bomb disposal operations, it is not rare to see an entire alien force consisting of purely Thin Men, though there may be Sectoids in the first or second month. Some thin men will venture away from the main bomb and protect its power sources but you will find the highest concentration of Thin Men protecting the bomb. Just be sure to quickly dispatch the Thin Men before the bomb goes off and deactivate it. More Thin Men will drop down from the sky after disarming the bomb, so if you have time, take up defensive positions and go on overwatch before deactivating it.
Asset Recovery Notable in that maps include a reversal of several escort maps, such as the pier and the Astronomy/Monitoring Station. Additionally, these mission will only be non-wandering Seeded groups, allowing you to take your time moving through the map. Lastly, you do not need to actually find the Mission's asset (Astronomy Station: telescope. Truck Stop: hidden inside the last 16-wheeler is a big metal... something. Pier: crates inside the last building. Highway: crashed helicopter, just outside the acessable area, at the far end of the map) to win, merely kill all aliens.
Outsider
Outsiders are relatively fragile alien units that are only encountered on UFO missions. They are the early commander type units that will remain in their chamber on the UFO until discovered. Their purpose seems to be to defend that position, as they will not go far beyond it. They will be replaced by Sectoid Commanders after you assault the alien base.
On Easy and Normal, Outsiders only have 3 health, so you can mostly use whatever means you please to take them down. This also makes it much easier to perform a Stun on them. However, on Classic and Impossible, they are upgraded to 5 health. It is strongly advised to fight them with a Shotgun Assault if you purely intend on killing them, and a soldier with an Assault Rifle if you plan on setting up a capture - then, go in for the stun with whoever has the Arc Thrower. If it fails, flashbang the Outsider and/or use a Ghost or Smoke Grenade on everyone else to keep them safe, and make sure all your backup guns are safe in full cover a medium distance away from the fighting.
Unless you are running from a much greater threat (such as a Berserker or Sectopod), it is strongly recommended to save the Outsiders in a mission for last, particularly if you intend on capturing one.
Floater
A fast and aggressive flying unit with a light plasma rifle. They prefer to use their mobility to outflank your squad, and their high mobility grants them an innate defensive bonus while flying. They can be especially dangerous to Snipers.
If there are Floaters you know to be lurking around, consider a few turns of overwatch from your entire squad. Floaters of all kinds are very rash and will fly recklessly into ambushes. They are quite hard to hit because of their evasion ability but of an entire XCOM squad firing at them some shots are bound to hit. (Unless you get terribly unlucky.)
If a Floater or a group of Floaters decide to drop in behind you during a battle with other alien ground troops, move your soldiers to deal with the Floaters first instead as their flanking positions will give them better aim than any other aliens you may be fighting.
They carry Light Plasma Rifles early on, and may change to Plasma Rifles, changing the +10 Aim for more damage. Depending on your luck of getting hit at all, this may be good or bad for you. Even once Heavy Floaters appear, they will still make regular appearances, though less and less as time goes on. The interrogation of the normal Floater reduces research time for Carapace Armor and the Skeleton Suit. While less of a priority on easier difficulties, this may be an early necessity on Impossible difficulty, as the penalties to you and the bonuses to the aliens make it a certainty that you will not kill all aliens in the first round of engagement, and your soldiers will be hit in return.
Chryssalid
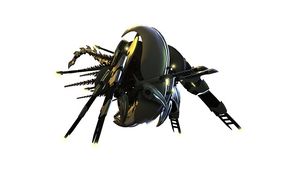
Chryssalids are fast melee units. Their Implant attack is particularly dangerous. Their corpses can be used to make Chitin Vests, an equippable item that makes your soldiers tougher and more resilient to melee damage. Since melee attacks ignore cover, Chryssalids are best fought by abandoning cover completely, falling back into the open, and concentrating your fire. Chryssalids are where the changes in the action system are most notable. While not fundamentally different from their counterpart in the original, so long as you are far enough away to force them to dash they are significantly less dangerous, often running right up to your soldiers and ending their turn there.
A priority when facing Chryssalids is to stay well away. If your squad members can hear Chryssalids running around you should put your squad on Overwatch. If a Chryssalid or two moves within your range a few extra hits before your turn will really help you in the fight.
They appear on Terror Missions, later UFOs, the Alien Base (if you've already had the first Terror Mission: if not, they will not appear) --- and fortunately NOT on Council Missions, like VIP Escort (save for one when escorting Zhang and another on the special Battleship, both in the Slingshot DLC).
Chryssalids have good HP for when you first encounter them, but they usually charge at your squad out in the open, sometimes the fact that they often ignore cover is enough to negate their large amounts of health. Nonetheless, trying to kill Chryssalids with conventional weapons is difficult, making developing laser or light plasma weapons before your first terror mission a good idea.
However, for all their dangers there is one game mechanic that really makes Chryssalids suffer. Dashing. Chryssalids will often often completely ignore the moving and action mechanics of the game, dashing straight up to your soldiers without considering whether they can still attack in that turn. This reduces the power of the Chryssalid dramatically, as they have a habit of dashing up to point blank range and ending turn, giving you easy hits. They have no long-range attacks, so as long as you are out of attack range, you might risk getting out of cover to get a clear shot, if it means downing it that much faster.
As always, keep a sniper or two around to quickly finish them off when they appear.
Concentrated attacks will be your tactic for their first appearance (which fortunately only has 3, and will stay that way if you move fast). Snipers with Headshot, Assaults with shotgun-type weapons (especially when at point-blank with Rapid Fire), and Heavies (especially with bullet storm, just in case) can kill them in one move, and a Heavy with a Blaster Launcher can 1-Hit Kill a whole squad. Your Support troopers are thus most at risk, as their best weapon, the Plasma Rifle, may leave Chryssalids at 1 health (still 1 too many). For them, Ghost Armor's Ghost mode is the best bet, as either it will kill with a critical hit, or a miss lets them remain invisible (in which case, at least a cloaked Support will remain unharmed, allow you to monitor the Chryssalid's actions, and they can spot for Snipers with Squadsight).
If you're clever and lucky, what you can do is if an activated squad of them stays in proximity to each other, is whittle them down with regular attacks, and have a low-ranking soldier finish them all off with a(n alien) grenade; certainly worth a promotion.
As a note, Chryssalids have no artifacts of value save for their cold dead bodies. Therefore, you should not hesitate to use explosives on them, and this can be a lifesaver if you've been a little neglectful on your research and find yourself facing down a host of Chryssalids with sub-par weaponry.
Note that killing zombified soldiers or civilians no longer hatches a Chryssalid. They will only hatch after 3 turns. Chryssalids hatch at the beginning of the aliens' turn and can move and attack immediately after emerging. This can be a nasty surprise if you've not been keeping track when a slow, lumbering zombie you thought you were a safe distance from suddenly turns in to a 20 move chryssalid and covers the distance easily. You are given warning at the end of the Zombie's third move: if it ends with vomiting a massive amount of blood, then that is the tell that it will burst into a Chryssalid at the start of the next Alien Action.
Chryssalids are at their most dangerous in terror missions, where they can convert civilians in to zombies and if you advance too slowly you can find yourself overwhelmed by sheer numbers. In fact, some Commanders find it worthwhile to use explosives to kill the civilians within a Chryssalid's range, rather than risk a zombie, with powerful melee, that may survive long enough to form another Chryssalid. And, since civilians have only 1 HP, a Chryssalid may ignore a trooper that may survive an attack, and prioritize attacking civilians (as do most aliens during Terror Missions). So if there are equal or more civilians than Chryssalids between you and these insectoid horrors, opening fire is the most worthwhile action.
Chryssalids are at their most dangerous in enclosed spaces such as UFOs and the alien base. Rounding a corner or opening a door and seeing Chryssalids immediately behind it can be very difficult to handle, as they will immediately charge next to your soldier with their free move, who with only one action left can't possibly run far enough away to be safe from them - your only choice is to kill the Chryssalids in one turn or face that soldier being caught and attacked. If you're exploring a structure and can hear Chryssalids, you may want to sit tight and overwatch for a few turns and hope that they come to you.
Chitin Plating, made from dead Chryssalid bodies, is the best defense against their melee attacks, providing 4 HP as well as 50% reduced melee damage. In larger terror missions it is an almost essential piece of equipment for your front-line assault soldiers. Titan Armor further reduces risk of death (and another zombie to your now-reduced forces), as well as prevents poisoning.
Chryssalids have high will so they are resistant to psionic attacks. Avoid using psionic powers against them.
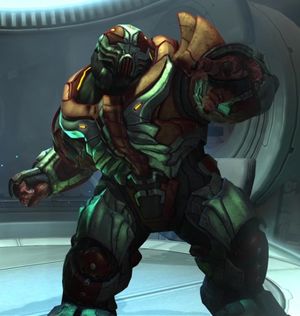
Muton
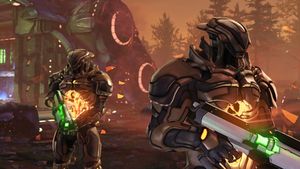
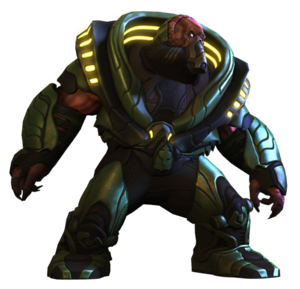
Mutons are very strong units and carry a respectably powerful Plasma Rifle, though they are susceptible to psionics. They are the aliens' version of XCOM's Heavy/Assault class and will aggressively use tactics such as Flanking, Overwatch or Suppression against your soldiers. Wounding a Muton without killing it can intimidate your soldiers and potentially cause panic.
The main assault force of the alien collective, their corpses are the most expendable for sale on the grey market. Heavily armored, they are difficult to take down with conventional weapons (though basic grenades can at least rob them of their cover). When facing regular or Elite Mutons, never have soldiers within a few squares of another (at least not visibly clustered to the Muton), as a Muton will usually use its grenade to do 5 damage to your troops, and remove their cover, while its squadmates finish your now-exposed troops.
Once the first Mutons appear, they will almost always be found in all missions, and you may find UFOs as large as Abductors staffed only by Mutons (besides the commander alien). When Berserkers appear, they will often be accompanied with one or two regular Mutons, and fortunately not with other Berserkers in the same squad-- though if you encounter one Berserker in a mission, odds are that one of the other Muton squads will have another.
Their one weakness is their very low Will rating, making them vulnerable to Mind Control. You can either MC their frontline troops, which will almost always be set upon by the others first and may possibly even ignore two of your troopers standing together to kill the traitor, or one in the back (which will then be your trooper in a flanking position. FYI; you may activate any other alien squads behind them, so be careful), forcing them to scatter first. Keep track of the "reload" timer of MC on the Controlling trooper's Ability tiles: if it reads T-3, that means the controlled alien will be free at the start of the next turn. If you have no further use for a Muton and don't want to fight it once Mind Control wears off you can make it kill itself by tossing its own alien grenade at its feet, assuming it has not been used already.
Interrogating a Muton will give a bonus to plasma weapon research. Since a captured Muton will yield a Light Plasma Rifle, a bonus to research of that rifle and an Alien Grenade, a Muton is a good choice for a first capture target if you haven't made a capture before they appear.
Cyberdisc
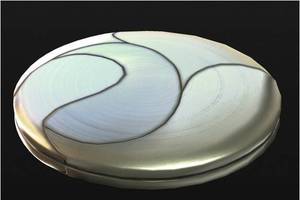
When a Cyberdisc appears you should prioritise them over other aliens you may be fighting. The disc will likely charge in to your midst and take a flanking shot.
Discs aren't very subtle, and will use their move when you first see them to charge at you. Try to burn them down on the turn you see them, because they are very fast and can often get a flank on their next turn unless you fall back. HEAT ammo Heavies can do heavy damage to Discs and the fact that they tend to fly high means your snipers will probably have a good shot immediately. A closed disc is Hardened, so is very difficult to crit, but otherwise is hit and damaged normally. When the Disc attacks it will open up in order to fire, making them more vulnerable. The cyberdisc will close up again on your turn when hit, so make sure to hit it with something high damage for the first shot to make the most of the opportunity for a critical.
Also note that they do carry an Alien Grenade, so keep your troop's proximity to one another appropriately in mind.
Drones only repair the Disc they spawned with for 3 HP, so as long as you kill the Disc quickly enough, Drones should be more of an annoyance than a serious problem. The drones usually start close to the Disc, so using a rocket on the group is a good way to take out the drones while also dealing damage to the Disc itself. A Cyberdisc's death explosion will also often destroy or damage its attendant drones.
Interestingly, Cyberdiscs are fairly uncommon in Impossible difficulty: for as soon as Sectopods begin to appear, they will be launched en masse, making Cyberdisc appearances infrequent.
Cyberdisc autopsy will give you access to the Tracking Module for your Interceptors, a one-use item that extends the amount of time of an air engagement. Not too necessary, as the only time you may require them is when attempting to take down Battleships or the Overseer UFO, and you have only one ready interceptor on that Continent (but, if you have two or more interceptors on a continent: the subsequent Interceptors can be launched when the previous one is either returning to base, or is destroyed, thus reducing the need of this item).
An interesting quirk in how hit chances are calculated makes an Assault with a shotgun, Rapid Fire and Lightning Reflexes one of the quickest ways to deal with Cyberdiscs. If you run into a Cyberdisc and it activates its Overwatch as it usually does, use Run & Gun and get right up in the Cyberdisc's face (or, preferably, a strategic cover position close to the Cyberdisc but not too close). The Overwatch will activate and miss due to Lightning Reflexes, clearing it for the rest of the squad to move in if backup guns are needed. Then, use Rapid Fire on the Cyberdisc. Because Rapid Fire calculates both hit chances and the overall end result all at once, the hit-and-crit chance for the first and second shots will be the same, thus bypassing the Cyberdisc's increased defense and Hardened trait while closed. With enough luck and a strong enough gun (a Scatter Laser will typically be enough for the job, although a Plasma Rifle offers better odds), the Cyberdisc will crumble. Just be careful with the explosion.
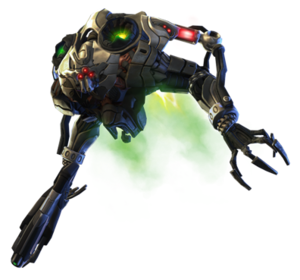
Drone
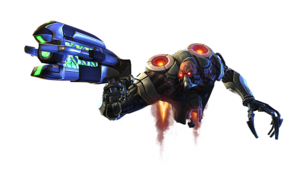
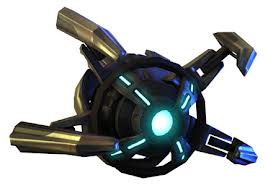
Drones are weak flying robotic units with a weak ranged attack. Their purpose is to repair accompanying Cyberdiscs and Sectopods during combat.
- With Foundry Upgrades, the Arc Thrower can be used to 'hack' Drones and seize control of them for the duration of a mission.
- Captured Drones can not repair a friendly SHIV unit. However, they can self-detonate, dealing damage similar to frag grenade.
There isn't much to fighting Drones. They have a pretty small frame so it may be difficult hitting them, though even if you miss they really can not do much in the way of retaliation. While not particularly dangerous, they take considerable time to destroy and can end up causing injury while your squad is preoccupied with bigger threats.
Be advised that they will almost always appear alongside stronger robotic units such as Sectopods. This makes drones easy targets for rockets and grenades. Heavies with HEAT ammo in particular can destroy drones with a single grenade (on classic or below) or shredder rocket/alien grenade (on impossible). This makes it easier for the rest of your squad to focus on the heavier machines.
They will repair their accompanying Cyberdisc/Sectopod for 3 HPs each time, and seem to only ever do so for their Cyberdisc/Sectopod, and not one another, nor any other spawned Cyberdiscs/Sectopods/Drones. Most of the time, they will stay near their Cyberdisc/Sectopod, save for on Terror Missions, where their significant movement will make short work of many civilians in each turn if not quickly taken out (often while you're busy engaging their Disc/Pod). They do tend to make repairing the main unit a higher priority than attacking, though.
Hacking Mechanics & Hacked Tactics
You will need the Foundry, the Drone autopsy completed, and some of their wreckage for the Foundry Project (don't worry, you'll be destroying plenty of them), and, once all that is complete, a soldier equipped with an Arc Thrower. The biggest danger is that Drones will almost always be in the company of Cyberdiscs (which may kill the drones upon their death), or Sectopods (which if you rely on Heavies with rockets and the HEAT ability to destroy, you might destroy the drones in the process).
Unlike with capturing aliens, damaging them first is not required (and is not desirable in this case), and has a 100% success rate. Fortunately for your troopers, the range to hack is several tiles larger than an attempted stun. Once Hacked, you have full control of them for the rest of the mission, and they will effectively be counted as additional troopers (and thus, excellent for Snipers with Squadsight), for as many Drones (and Arc Thrower uses) as there are left. Hacking may be most worthwhile in Impossible difficulty, when their 7 HP may help them survive an attack or two. Getting two or more is ideal, as you can use them to heal one another indefinitely. As they can fly, their best use is as scouts/distractions, flying high above an alien; which if it tries to fire in retaliation, may have a high chance of missing the shot. Their own meager shot attack can still help whittle aliens down, and is useful to assist in corralling Berserkers. Lastly, having 1 or 2 Drones following and supporting/repairing (their repair beam has a very large range) your own S.H.I.V.s makes for a near-indestructible force, and is deliciously ironic.
They can not use cover. When the mission ends, they are apparently dismantled for the Weapon Fragments and Alien Alloys, and will not be available for further deployment.
Sectoid Commander
Sectoid Commanders have much more health than normal Sectoids and better aim with their plasma pistols, but their true danger is their much stronger psionic abilities.
These elite leaders of the Sectoid race have the ability to Mind Control your troops for three turns. Sectoid Commanders will be the first aliens you encounter with "proper" psionic attacks. Sectoid Commanders first appear in the alien base, and will replace Outsiders as UFO commanders after the alien base is destroyed. Sectoid Commanders will be replaced by Ethereals once you assault the Overseer UFO.
Generally when one of your soldiers is mind controlled your best bet is to kill or stun the Commander as quickly as possible to release them, possibly disabling the soldier with disabling shot or suppression while you do it. Mind Control has a three turn duration and five turn cooldown, so you can try to retreat until the effect wears off, at which point you'll have two turns grace before the commander can MC again. In extreme circumstances you can kill the controlled soldier.
Since the Sectoid Commander has only a plasma pistol, Alloy and Hover S.H.I.V.s can attack them almost with impunity. If you find Sectoid Commanders alone (which is often the case unless they're escorting Mechtoids) a S.H.I.V can quite safely take them out, at the cost of some repair time afterwards. In practice however, it's usually superior to attack them with your whole squad and kill them quickly.
Sectoid Commanders can also perform a Mass Mind Merge, giving the benefits of Mind Merge to all Sectoid soldiers near the commander. Sectoid Commanders will rarely use this ability, preferring to Mind Control your troops instead given the chance. Also, unless you assault the alien base quite early, Sectoid soldiers will likely have been mostly phased out by the time you encounter Sectoid Commanders.
Researching the creature's corpse allows access to the Psi Labs, through it you gain the ability to test your soldiers in Psionic aptitude. Capturing a Commander will give a bonus to psionics research. Sectoids and Sectoid Commanders are the only source of the Plasma Pistol, so if you want these and didn't capture a Sectoid Soldier before they were phased out, be sure to capture a Commander before assaulting the Overseer UFO.
Berserker
Berserkers are extremely strong and very tough melee units, susceptible to their own bloodlust; they have a habit of chasing after whichever unit damaged them last. Although aggressive in nature, they can exhibit some tactical decision to fall back and regroup with other mutons.
Berserkers do much more damage than their regular Muton brethren, so you should make killing them a high priority. Their distinctive Bloodlust ability is a double edged sword, and "managing" it is essential to beating them. Attacking a Berserker but not killing it can be deadly, because the free movement it gets from Bloodlust will almost certainly allow it to melee you in its next turn. On the other hand the predictability of it allows you to easily draw the Berserker in to a killing zone where your whole squad can gun it down at point blank range. As such, if a Berserker is far enough off to be unable to melee you next turn, you should avoid hitting it unless you're prepared to focus fire and kill it in that turn. Bloodlust does not activate when hit by overwatch fire.
Note that unlike most Mutons, Berserkers are very resistant to psionic attacks. Do not expect much success when trying to flay their minds unless your soldier is equipped with Psi Armor and a Mind Shield. However, if you can successfully Mindfray a Berserker; the massive loss to it's move greatly weakens its threat level.
Unlike Chryssalids, Berserkers do not have the Leap ability, so soldiers in inaccessible elevated positions can fire on them with impunity. For example: standing on the upper tile landing of a drainpipe, ladder, or Elevator Beam will block access to it, and leave the Beserker helpless at the bottom.
However, like Chryssalids, they have no artifacts save for their cold, dead bodies, so blowing them up will not hamper your research efforts in any way.
Be careful when attacking Berserkers near the end of your turn. Although Berserkers will not use their Melee to retaliate against a soldier that attacks it while right up in its face, they will attack when their turn rolls around. Try to focus-fire Berserkers to get them downed as quickly as possible. This is especially important in the midgame, where a Berserker can easily one-shot your soldiers. If the turn is about to end and you have no hope of downing the Berserker before it does, use Ghost or Flashbang grenades to (hopefully) avoid an attack from the Berserker, and if you can, hit the Berserker with a soldier far, far away from everyone else (such as a Squadsight sniper) to make it leave your other soldiers alone. In the XCOM Base Defense mission, you can also offer up security personnel as bait, since they aren't your real soldiers.
Heavy Floater
A tougher version of the regular Floater with considerably more hit points than a Floater, and a more powerful variant of the Plasma Rifle. They also carry an Alien Grenade.
Their skill and efficiency is at a margin far higher than that of their little brothers. They have a large amount of health and carry much better weaponry than Floater Soldiers, doing double the damage to us and receiving half the damage when compared to regular Floaters. They carry Alien Grenades, so keep troop position in mind.
Thankfully they appear very late game, and by then we should have deadly plasma weaponry of our own. Apply the tactics you would use against regular Floaters, but expect a tougher battle.
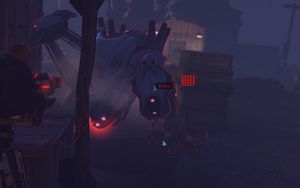
Sectopod
All of the Sectopod's weapons do area effect damage, so make sure your squad is spread out in order to minimize the damage it causes. Even if an attack from them misses there is still a huge chance it will take out your cover. This makes having two soldiers directly next to each other almost guaranteed disaster, because the Sectopod can fire at one, destroy their cover and fire at the other with no cover bonus. Be sure that any front line soldiers are backed up by Snipers or Heavies.
The Sectopod's overwatch is enabled for each turn it fires its main cannon. In particular this means a Sectopod will not overwatch fire on you immediately after you see it, or on a turn its preparing a Cluster Bomb.
Heavies in particular are brilliant Sectopod hunters. Their HEAT ammo power makes their weapons far more effective against Sectopods. The HEAT ammo also applies to rockets and the Blaster Launcher. A hit from either with HEAT Ammo does 16 or 24 points of damage to Sectopods. A HEAT ammo Bullet Swarm Heavy with a Heavy Plasma can kill a Sectopod in one turn.
After you get Ghost Armor just send a pair of Assaults equipped with it, together with Rapid Fire and Alloy Cannons - you'll need to either hit all 4 shots or get at least 1 critical hit though to kill it. Alternatively, Lightning Reflexes can also replace Ghost Armor to avoid the Sectopod's powerful Overwatch weapon. With Damage Roulette, an Alloy Shotgun, the right abilities, and a hell of a lot of luck, it is possible to "One shot" (rapidfire, but still 1 move) a Sectopod, even on Impossible.
Use suppression to make their attacks less accurate, it will help a bunch. Snipers may also use disabling shot against their weapons. Make as much use of Smoke Grenades, Heavy Cover, and Psionic Fields as you can if you do end your turn within their sights.
Using Plasma / Heavy weapons or Mind-controlled cannon-fodder against this unit is also recommended: an excellent tactic is to MC an alien with high move (like a Heavy Floater) or high HP (like a Berserker Muton), and have them stand point-blank right next to the Sectopod. Since it ignores cover anyways, it will not move before firing it's chest cannon. Since the MC'ed alien will receive a full blast out of cover, it will likely receive and die of heavy Critical damage. As the Chest Cannon does splash damage, the Sectopod will also receive heavy Critical damage.
If you see Cluster Bomb being prepared, kill the Sectopod quickly or reposition. While Cluster Bomb takes a turn to charge and fires on the aliens' next turn, the Sectopod can move and fire after firing the cluster bomb on that turn. Cluster Bomb has no range limit and can be fired if another alien sees you (like sniper's squad sight, except it doesn't need a line of sight). This means after triggering a Sectopod it should be your first priority, because if you retreat out of its sight range to deal with other aliens first you'll find cluster bombs raining down on you (and without being able to see the Sectopod you can't tell when or where they're coming). While a bit difficult to predict, there are some rare cover situations where the Cluster Bomb can actually be ignored: if cover will intercept all the bombs beforehand (ie, the targeted trooper is indoors, while the 'Pod is outside, they will explode harmlessly on the roof). A Flying unit might also be targeted, only to have the bombs pass harmlessly around them.
Note that, even though their death animation includes a massive explosion, it is not a damaging explosion, like the Cyberdisc's death, and thus, their drones may still be a problem (if a minor one at that) if not taken out the same turn.
WARNING: The Sectopod is very different in Enemy Within. The Cluster Bomb is now the only of its attacks that does AOE damage thus invalidating the MC-suicide strategy mentioned above, the death explosion now does 5 damage in a 3-tile radius instead of nothing, and most importantly of all, Sectopods now have the Reinforced Armor trait which halves all damage taken from all sources. This raises their effective HP to 60, as well as doubling the amount of healing they receive, not to mention decimal damage is rounded down - so, for example, hitting with a Plasma Rifle for 7 damage will do 3 damage against a Sectopod. This makes them significantly more durable and essentially almost impossible to kill in one move. This also makes it impossible to one-shot a Sectopod now. Due to these changes, it is recommended that you approach these behemoths much more carefully than before - use Shredders and HEAT Ammo to make them more vulnerable, use Disabling Shot, Suppression and Smoke or Ghost Grenades if things get hairy, and always stay in high cover unless you know for absolute certain that you're about to get the kill.
It is still possible (though incredibly demanding) to get a one-turn kill on a Sectopod using a clever combination of attacks as mentioned above. A useful combo is to open with a Shredder Rocket (preferably from a Blaster Launcher), then take two Heavy Plasma shots with a Heavy that has been given HEAT Ammo and Bullet Swarm - next, batter the Sectopod with shots from Plasma Snipers (you can theoretically get two shots off with a Double Tap sniper, then remove the Drones with an ITZ sniper and get another shot with that), and finish them off with whatever you have left (usually, Alloy Cannon / Close & Personal / Rapid Fire assaults work best for this job). It is also advisable to hit the Sectopod with a Disabling Shot or keep a Support with Ghost or Smoke Grenades handy in case the plan does not fully come to fruition, and keep your soldiers in high cover and at a safe distance unless you're desperate. A MEC Trooper's Electropulse also works.
Elite Muton
An even tougher version of the regular Muton, armed with a powerful Heavy Plasma. Their powerful weapons and good aim and the fact that they appear in groups means they can severely punish you each turn they're allowed to fire, while their ridiculous innate defense and ability to use cover makes them difficult to beat in a conventional firefight. Their major weakness is to psionic attack.
Muton Elites serve primarily as guards to Alien command units. However they are sent out on abduction and terror missions as much as any other alien creature. They are clad in a red suit of armour and a helmet that protect them from heavier damage levels than that of a regular Muton. Muton Elites, combining their innate defense bonus with the ability to use cover are some of the toughest units in the game to take down.
They use devastating heavy plasma rifles and carry grenades like regular Mutons, but with their Bombard ability they can fling their grenades great distances. It pays to have a sniper nearby to provide accurate fire upon them. Using explosives will bypass their defense bonus. Be warned that they are often encountered in groups of three and they also guard incredibly tough units in UFO assaults, so sometimes the main threat does not come from the Elites themselves. Apply the same tactics against Elites as you would against regular Mutons but expect a tougher battle. Squads of Muton Elites will not contain Berserkers.
Elites are hardly more resistant to psionic attacks than normal Muton troopers, so feel free to add their strength to your own through mind control. Muton Elites' high defense means you may have better luck using Mind Fray on them than trying to shoot them unless you can flank. A Muton Elite guarding an Ethereal is a prime choice for a Mind Control attack, as the Ethereal's next move will almost always be to kill that Elite first. Additionally, an MCed Elite drops their Heavy Plasma intact when killed, giving you a very powerful weapon to use, and Council sales requests of them often exceed your monthly paycheck.
Ethereal
When you face these ancient aliens prepare for a very tough fight. Do not expect SHIVs to be immune to them. Ethereals can use pure psionic force against their foes instead of purely mind centered attacks. These attacks actually do more damage to SHIVs than to regular humans as SHIVs have no Will to defend them.
Ethereals are entirely absent from the game until you assault the Overseer UFO, at which point they will always be found at the helm of a UFO. You will only ever face one Ethereal at a time and they will never wander from their spawn positions until provoked. This gives you ample time to prepare for the fight beforehand, like by using Psionic Inspiration and other beneficial abilities before engaging the Ethereal. Just be sure you have neutralised any other wandering aliens before attacking them. Make sure everyone has a full weapon and a meaningful turn to work with. When you discover the Ethereal you should take control of the Muton Elites guarding it if possible, they make useful fodder units and provide a fair bit of firepower against the Ethereal. Because of their low Will the Ethereal will often Psi-Lance a mind controlled Muton in preference to attacking one of your soldiers.
To be able to successfully use Psionics against an Ethereal you will need a soldier with a very high Will rating, which can achieved through the use of Psi Armor, Mind Shields, and the Psi Inspiration buff, otherwise it has a very high chance to fail. Successfully Mind Fraying the Ethereal (itself a challenge, but much less than the Mind Control) before attempting the MC will also help. With some or all of those it can be possible to mind control an Ethereal, which is required for the "Xavier" Achievement. Given the difficulty and preparation required, using psionics on Ethereals is impractical for purposes other than the achievement.
All Ethereals have a chance to reflect shots back at the attacker, fortunately for much less than the weapon's normal damage.
A squad at full capacity shooting at the Ethereal will usually be enough to bring it down in one turn, though if you're unlucky on reflects it can survive even that.
In Enemy Within, the Ethereal has a chance to appear during the XCOM Base Defense mission provided you delay the Alien Base Assault for a very long time and have bad enough luck with alien spawns during the mission.
It is advisable to attack Ethereals indirectly due to their Reflection ability. Explosives (such as Rockets and Grenades) cannot be reflected, so have a go with those. Additionally, you can mind control any Muton Elites that come with the Ethereal and use them to do your dirty work, as losing a mind-controlled enemy is significantly preferable over risking the death of an XCOM soldier. Always remember that, while Reflection does not do much damage, it also means you won't be doing anything to the Ethereal, potentially allowing it to use mind control, Psi Lance, Psi Drain or - worst of all - Rift on the exposed soldier. Despite all this, it is still strongly advised that you DO NOT USE SHIVS to attack Ethereals; while they cannot be mind controlled, they are susceptible to the Ethereal's other Psionic attacks, and as SHIVs have no will to resist the attacks, you'll be in for a rude awakening when you see just how much damage Ethereals can do to SHIVs. Despite all this, however, it is still mostly safe to attack Ethereals directly if you have strong enough backup firepower and/or a reliable means of escape such as a Ghost Grenade. Just don't rely too heavily on direct attacks.
Uber Ethereal
The final boss of Enemy Unknown's singleplayer campaign. This is what you have been working towards this whole time. Take it out, and the war is over. Good luck, Commander.
Surprisingly, it is not in any way an "ultimate enemy". In fact, it is tactically very similar to regular Ethereals, but with some small differences.
The Uber Ethereal has exactly 5 more health than regular Ethereals on all difficulties, also having slightly higher Will (150 on most difficulties and 160 on Impossible) and an extra 10 defense on Impossible. Only one of these spawns in the entire game, that being as the pilot of the Temple Ship and final boss of singleplayer. Thus, it is immune to Stun and Mind Control (not that you would ever want to do either of these things), and the game immediately ends in an XCOM Victory upon the Uber Ethereal's death. Otherwise, the Uber Ethereal possesses the same abilities and exhibits the same behaviour as regular Ethereals.
Upon reaching the final stage of the Temple Ship, the Uber Ethereal will appear just within sight at the helm of the ship, and upon being detected, he will spawn 2 Muton Elites in front of him and 2 Ethereals to the sides. The Ethereals cannot immediately be seen, so the Muton Elites are typically more pressing.
Much like regular Ethereals, it is quite straightforward (though risky) to down the Uber Ethereal in one turn, or otherwise without much resistance from the aliens. Some methods are provided below.
- When preparing for the final battle, place two heavies at the front just before the threshold, and have two different soldiers with Mind Control right behind them. Detect the boss with one of the psi operatives, and move in the other to a spot where they can also see the Muton Elites that get spawned (seeing the boss is not entirely necessary). Mind-Control both Muton Elites using the psionic soldiers and use the Mutons as fodder / suicide bombers to distract the boss and his assistant Ethereals, perhaps even soften them up. After this, you can ignore cover (except for breaking line of sight with the Ethereals, or triggering Mimetic Skin). Use Rockets from a Blaster Launcher to deal guaranteed damage to the boss (lead with a Shredder for extra damage), and finish off the boss and thus the game with a Squadsight + Double Tap Sniper.
- You will need: 2 Mind Controls, 2 Heavies with Blaster Launchers (one with Shredder), any Sniper (Squadsight + Double Tap preferred)
- You may require an additional rocket or two after killing the boss to finish off the Muton Elites; the game does not end until they are eliminated too, and mind-controlled enemies do not go down with the boss when it is killed.
- This specific build of Sniper is recommended because although it is not entirely necessary, there is a chance the boss will reflect the first shot, so backup is certainly something you will want.
- Set up your soldiers similar to in the previous strategy. Activate the final battle with your Volunteer, then kill the Muton Elites with Rift. Batter the Uber Ethereal again with a Shredder and a regular rocket, and if they aren't dead yet, finish them off with a Squadsight + Double Tap Sniper.
- You will need: Much the same as before, but without the Mind Controls
| Aliens: | Sectoid • Floater • Thin Man • Outsider • Muton • Chryssalid • Zombie • Sectoid Commander • Cyberdisc • Heavy Floater • Berserker • Sectopod • Drone • Muton Elite • Ethereal • Uber Ethereal (*Spoilers*) • Mechtoid (EW DLC) • Seeker (EW DLC) |
| Alien Corpses: | Sectoid Corpse • Floater Corpse • Thin Man Corpse • Muton Corpse • Chryssalid Corpse • Drone Wreck • Cyberdisc Wreck • Sectoid Commander Corpse • Heavy Floater Corpse • Berserker Corpse • Muton Elite Corpse • Sectopod Wreck • Ethereal Corpse • Seeker Wreck (EW DLC) • Mechtoid Core (EW DLC) |
| Data: | Overview of Aliens • Alien Stats • Alien Objectives • Alien Deployment |
