Difference between revisions of "ADVENT Sergeant (LWOTC)"
Jump to navigation
Jump to search

(Created page with "Back To Main Page {{Toc_(LWOTC)|40}}<div style="padding-left: 20px; float:right">256px|left</div>The '''ADVENT Se...") |
(update stats and add tips) |
||
| Line 1: | Line 1: | ||
| − | [[Long_War_of_the_Chosen|Back To Main Page]] | + | [[Long_War_of_the_Chosen|Back To Main Page]] | [[ADVENT_(LWOTC)|Back To Units Page]] |
| − | {{Toc_(LWOTC)|40}}<div style="padding-left: 20px; float:right">[[File:ADVENT_First_Sergeant.jpg|256px|left]]</div>The ''' | + | {{Toc_(LWOTC)|40}}<div style="padding-left: 20px; float:right">[[File:ADVENT_First_Sergeant.jpg|256px|left]]</div> |
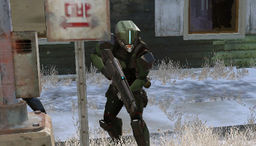
| + | The '''Advent Sergeant''' is a more elite trooper variant that sometimes acts as a substitute for the more advanced officers. | ||
| − | == | + | The Advent Sergeant are a more elite trooper, being much tougher, well trained and have higher awareness of the field. They can sometimes act as the substitute for officers, leading groups of ADVENT in place of the traditional officers and boast similar capabilities. |
| − | {| class="wikitable" | + | |
| + | ==Advent Sergeant (Rank 1)== | ||
| + | {| class="wikitable" | ||
|- align="center" | |- align="center" | ||
| − | ! Difficulty !! [[File:LW2_Health.png|36px|Health]]<br>Health !! [[File:Status_armor.png|36px|Armor]]<br>Armor !! [[File:LW2_Aim.png|36px|Aim]]<br>Aim !! Crit Chance !! Flanking Crit Chance Bonus !! [[File:LW2 Defense.png|36px|Defense]]<br>Defense !! [[File:LW2 Dodge.png|36px|Dodge]]<br>Dodge !! [[File:LW2 Mobility.png|36px|Mobility]]<br>Mobility !! [[File:LW2 Will.png|36px|Will]]<br>Will !! [[File:LW2 Hacking.png|36px|Hack Defense]]<br>Hack Defense !! [[File:Status overwatch.png |36px|Detection Radius]]<br>Detection Radius | + | ! Difficulty !! [[File:LW2_Health.png|36px|Health]]<br>Health !! [[File:Status_armor.png|36px|Armor]]<br>Armor !! [[File:LW2_Aim.png|36px|Aim]]<br>Aim !! [[File:Icon_CriticalChance.png |Crit Chance]]<br>Crit Chance !! [[File:Icon_CriticalChance.png |Flanking Crit Chance Bonus]]<br>Flanking Crit Chance Bonus !! [[File:LW2 Defense.png|36px|Defense]]<br>Defense !! [[File:LW2 Dodge.png|36px|Dodge]]<br>Dodge !! [[File:LW2 Mobility.png|36px|Mobility]]<br>Mobility !! [[File:LW2 Will.png|36px|Will]]<br>Will !! [[File:LW2 Hacking.png|36px|Hack Defense]]<br>Hack Defense !! [[File:Status overwatch.png |36px|Detection Radius]]<br>Detection Radius (tiles) |
|- align="center" | |- align="center" | ||
| − | | '''Rookie''' || 7 || 1 || 70 || 0 || 33 || 5 || 0 || 12 || 70 || 125 || | + | | '''Rookie''' || 7 || 1 || 70 || 0 || 33 || 5 || 0 || 12 || 70 || 125 || 9 |
|- align="center" | |- align="center" | ||
| − | | '''Veteran''' || 8 || 1 || 75 || 0 || 33 || 10 || 0 || 12 || 75 || 125 || | + | | '''Veteran''' || 8 || 1 || 75 || 0 || 33 || 10 || 0 || 12 || 75 || 125 || 9 |
|- align="center" | |- align="center" | ||
| − | | '''Commander''' || 8 || 1 || 75 || 0 || 40 || 10 || 0 || 12 || 75 || 125 || | + | | '''Commander''' || 8 || 1 || 75 || 0 || 40 || 10 || 0 || 12 || 75 || 125 || 9 |
|- align="center" | |- align="center" | ||
| − | | '''Legend''' || 9 || 1 || 75 || 0 || 40 || 10 || 0 || 12 || 75 || 125 || | + | | '''Legend''' || 9 || 1 || 75 || 0 || 40 || 10 || 0 || 12 || 75 || 125 || 11 |
|} | |} | ||
| − | {| class="wikitable" | + | {| class="wikitable" |
|- align="center" | |- align="center" | ||
| − | ! Weapon !! [[File:LW2Damage.png|36px|Damage]]<br>Damage !! [[File:LW2CritDamage.png|36px|Crit Damage]]<br>Crit Damage !! [[File:Ammo.png|x32px|Clip Size]]<br />Clip Size | + | ! Weapon !! [[File:LW2Damage.png|36px|Damage]]<br>Damage !! [[File:LW2CritDamage.png|36px|Crit Damage]]<br>Crit Damage !! [[File:Ammo.png|x32px|Clip Size]]<br />Clip Size !! Other |
|- align="center" | |- align="center" | ||
| − | | ''' | + | | '''Mag Rifle''' || 4 - 6 || 2 || 3 || - |
|- align="center" | |- align="center" | ||
| − | | ''' | + | | '''Frag Grenade''' || 2 - 7 || - || 1 || Range: 10<br>Radius: 4<br>Shred: 1<br>Env Dmg: 9 |
|} | |} | ||
{| class="wikitable" width=100% style="table-layout: fixed" | {| class="wikitable" width=100% style="table-layout: fixed" | ||
|+ Max Units in Pod = 1 | |+ Max Units in Pod = 1 | ||
|- align="center" | |- align="center" | ||
| − | | colspan="4" |'''Force Level''' || 1 || 2 || 3 || 4 || 5 || 6 || 7 || 8 || 9 || 10 || 11 || 12 || 13 || 14 || 15 || 16 || 17 || 18 || 19 || 20 | + | | colspan="4" |'''Force Level''' || 1 || 2 || 3 || 4 || 5 || 6 || 7 || 8 || 9 || 10 || 11 || 12 || 13 || 14 || 15 || 16 || 17 || 18 || 19 || 20 |
|- align="center" | |- align="center" | ||
| − | | colspan="4" |'''Leader Spawn Weight''' || | + | | colspan="4" |'''Leader Spawn Weight''' || 0 || 0 || 0 || 0 || 0 || 1 || 1 || 2 || 2 || 2 || 2 || 2 || 0 || 0 || 0 || 0 || 0 || 0 || 0 || 0 |
|- align="center" | |- align="center" | ||
| − | | colspan="4" |'''Follower Spawn Weight''' || | + | | colspan="4" |'''Follower Spawn Weight''' || 0 || 0 || 0 || 0 || 0 || 1 || 2 || 2 || 2 || 2 || 2 || 2 || 0 || 0 || 0 || 0 || 0 || 0 || 0 || 0 |
|} | |} | ||
| − | {| class="wikitable" | + | {| class="wikitable" |
| − | |- | + | |- |
|+ Abilities and Tactical Upgrades | |+ Abilities and Tactical Upgrades | ||
|- align="center" | |- align="center" | ||
| − | | [[File:UIPerk_fraggrenade.png |38px]]<br></div><span style="color: #83c0ce;">'''Throw Grenade'''</span><br></div>''Throw a grenade at the target area.'' | + | | [[File:UIPerk_fraggrenade.png |38px]]<br></div><span style="color: #83c0ce;">'''Throw Grenade'''</span><br></div>''Throw a grenade at the target area.'' |
| − | | {{Tactical Sense (LWOTC)| b_name = 1 | b_descr = 1 | b_info = | + | | {{Tactical Sense (LWOTC)| b_name = 1 | b_descr = 1 | b_info = 1}} |
| − | | {{Center Mass (LWOTC)| b_name = 1 | b_descr = 1 | b_info = | + | | {{Center Mass (LWOTC)| b_name = 1 | b_descr = 1 | b_info = 1}}<br>[[Dark_Events_(LWOTC)#Military_R.26D|16% chance of applying after completion]] |
|} | |} | ||
| − | == | + | |
| − | {| class="wikitable" | + | |
| + | ==Advent First Sergeant (Rank 2)== | ||
| + | {| class="wikitable" | ||
|- align="center" | |- align="center" | ||
| − | ! Difficulty !! [[File:LW2_Health.png|36px|Health]]<br>Health !! [[File:Status_armor.png|36px|Armor]]<br>Armor !! [[File:LW2_Aim.png|36px|Aim]]<br>Aim !! Crit Chance !! Flanking Crit Chance Bonus !! [[File:LW2 Defense.png|36px|Defense]]<br>Defense !! [[File:LW2 Dodge.png|36px|Dodge]]<br>Dodge !! [[File:LW2 Mobility.png|36px|Mobility]]<br>Mobility !! [[File:LW2 Will.png|36px|Will]]<br>Will !! [[File:LW2 Hacking.png|36px|Hack Defense]]<br>Hack Defense !! [[File:Status overwatch.png |36px|Detection Radius]]<br>Detection Radius | + | ! Difficulty !! [[File:LW2_Health.png|36px|Health]]<br>Health !! [[File:Status_armor.png|36px|Armor]]<br>Armor !! [[File:LW2_Aim.png|36px|Aim]]<br>Aim !! [[File:Icon_CriticalChance.png |Crit Chance]]<br>Crit Chance !! [[File:Icon_CriticalChance.png |Flanking Crit Chance Bonus]]<br>Flanking Crit Chance Bonus !! [[File:LW2 Defense.png|36px|Defense]]<br>Defense !! [[File:LW2 Dodge.png|36px|Dodge]]<br>Dodge !! [[File:LW2 Mobility.png|36px|Mobility]]<br>Mobility !! [[File:LW2 Will.png|36px|Will]]<br>Will !! [[File:LW2 Hacking.png|36px|Hack Defense]]<br>Hack Defense !! [[File:Status overwatch.png |36px|Detection Radius]]<br>Detection Radius (tiles) |
|- align="center" | |- align="center" | ||
| − | | '''Rookie''' || 10 || 1 || 75 || 0 || 33 || 10 || 10 || 12 || 90 || 125 || | + | | '''Rookie''' || 10 || 1 || 75 || 0 || 33 || 10 || 10 || 12 || 90 || 125 || 10 |
|- align="center" | |- align="center" | ||
| − | | '''Veteran''' || 12 || 1 || 80 || 0 || 33 || 10 || 10 || 12 || 95 || 125 || | + | | '''Veteran''' || 12 || 1 || 80 || 0 || 33 || 10 || 10 || 12 || 95 || 125 || 10 |
|- align="center" | |- align="center" | ||
| − | | '''Commander''' || 14 || 1 || 85 || 0 || 40 || 10 || 10 || 12 || 95 || 125 || | + | | '''Commander''' || 14 || 1 || 85 || 0 || 40 || 10 || 10 || 12 || 95 || 125 || 10 |
|- align="center" | |- align="center" | ||
| − | | '''Legend''' || 15 || 1 || 85 || 0 || 40 || 10 || 10 || 12 || 95 || 125 || | + | | '''Legend''' || 15 || 1 || 85 || 0 || 40 || 10 || 10 || 12 || 95 || 125 || 13 |
|} | |} | ||
| − | {| class="wikitable" | + | {| class="wikitable" |
|- align="center" | |- align="center" | ||
! Weapon !! [[File:LW2Damage.png|36px|Damage]]<br>Damage !! [[File:LW2CritDamage.png|36px|Crit Damage]]<br>Crit Damage !! [[File:Ammo.png|x32px|Clip Size]]<br />Clip Size !! Other | ! Weapon !! [[File:LW2Damage.png|36px|Damage]]<br>Damage !! [[File:LW2CritDamage.png|36px|Crit Damage]]<br>Crit Damage !! [[File:Ammo.png|x32px|Clip Size]]<br />Clip Size !! Other | ||
|- align="center" | |- align="center" | ||
| − | | ''' | + | | '''Mag Rifle''' || 6 - 9 || 3 || 3 || Shred: 1 |
|- align="center" | |- align="center" | ||
| − | | ''' | + | | '''Frag Grenade''' || 3 - 8 || - || 1 || Range: 10<br>Radius: 4<br>Shred: 1<br>Env Dmg: 9 |
|} | |} | ||
{| class="wikitable" width=100% style="table-layout: fixed" | {| class="wikitable" width=100% style="table-layout: fixed" | ||
|+ Max Units in Pod = 1 | |+ Max Units in Pod = 1 | ||
|- align="center" | |- align="center" | ||
| − | | colspan="4" |'''Force Level''' || 1 || 2 || 3 || 4 || 5 || 6 || 7 || 8 || 9 || 10 || 11 || 12 || 13 || 14 || 15 || 16 || 17 || 18 || 19 || 20 | + | | colspan="4" |'''Force Level''' || 1 || 2 || 3 || 4 || 5 || 6 || 7 || 8 || 9 || 10 || 11 || 12 || 13 || 14 || 15 || 16 || 17 || 18 || 19 || 20 |
|- align="center" | |- align="center" | ||
| − | | colspan="4" |'''Leader Spawn Weight''' || | + | | colspan="4" |'''Leader Spawn Weight''' || 0 || 0 || 0 || 0 || 0 || 0 || 0 || 0 || 0 || 0 || 0 || 0 || 2 || 2 || 2 || 2 || 2 || 2 || 2 || 2 |
|- align="center" | |- align="center" | ||
| − | | colspan="4" |'''Follower Spawn Weight''' || | + | | colspan="4" |'''Follower Spawn Weight''' || 0 || 0 || 0 || 0 || 0 || 0 || 0 || 0 || 0 || 0 || 0 || 0 || 2 || 2 || 2 || 2 || 2 || 2 || 2 || 2 |
|} | |} | ||
{| class="wikitable" | {| class="wikitable" | ||
| − | |- | + | |- |
|+ Abilities and Tactical Upgrades | |+ Abilities and Tactical Upgrades | ||
|- align="center" | |- align="center" | ||
| − | | [[File:UIPerk_fraggrenade.png |38px]]<br></div><span style="color: #83c0ce;">'''Throw Grenade'''</span><br></div>''Throw a grenade at the target area.'' | + | | [[File:UIPerk_fraggrenade.png |38px]]<br></div><span style="color: #83c0ce;">'''Throw Grenade'''</span><br></div>''Throw a grenade at the target area.'' |
| − | | {{Tactical Sense (LWOTC)| b_name = 1 | b_descr = 1 | b_info | + | | {{Tactical Sense (LWOTC)| b_name = 1 | b_descr = 1 | b_info = 1}} |
| − | + | | {{Center Mass (LWOTC)| b_name = 1 | b_descr = 1 | b_info = 1}}<br>[[Dark_Events_(LWOTC)#Military_R.26D|16% chance of applying after completion]] | |
| − | |{{Center Mass (LWOTC)| b_name = 1 | b_descr = 1 | b_info = | ||
|} | |} | ||
| − | [[Category: ADVENT (LWOTC)]] | + | |
| + | == Tips == | ||
| + | * Like most flankable units, they will ideally try to find reasonable cover whenever flanked. This can be taken advantage of if you want to force enemies to move. | ||
| + | * Like most units with AOE moves, you ideally want to spread your soldiers out in order to greatly dissuade them from ever using them. | ||
| + | |||
| + | |||
| + | |||
| + | [[Category:ADVENT (LWOTC)]] | ||
Revision as of 12:35, 10 November 2023
Back To Main Page | Back To Units Page

The Advent Sergeant is a more elite trooper variant that sometimes acts as a substitute for the more advanced officers.
The Advent Sergeant are a more elite trooper, being much tougher, well trained and have higher awareness of the field. They can sometimes act as the substitute for officers, leading groups of ADVENT in place of the traditional officers and boast similar capabilities.
Advent Sergeant (Rank 1)
| Difficulty | Health |
Armor |
Aim |
Crit Chance |
Flanking Crit Chance Bonus |
Defense |
Dodge |
Mobility |
Will |
Hack Defense |
Detection Radius (tiles) |
|---|---|---|---|---|---|---|---|---|---|---|---|
| Rookie | 7 | 1 | 70 | 0 | 33 | 5 | 0 | 12 | 70 | 125 | 9 |
| Veteran | 8 | 1 | 75 | 0 | 33 | 10 | 0 | 12 | 75 | 125 | 9 |
| Commander | 8 | 1 | 75 | 0 | 40 | 10 | 0 | 12 | 75 | 125 | 9 |
| Legend | 9 | 1 | 75 | 0 | 40 | 10 | 0 | 12 | 75 | 125 | 11 |
| Weapon | Damage |
Crit Damage |
Clip Size |
Other |
|---|---|---|---|---|
| Mag Rifle | 4 - 6 | 2 | 3 | - |
| Frag Grenade | 2 - 7 | - | 1 | Range: 10 Radius: 4 Shred: 1 Env Dmg: 9 |
| Force Level | 1 | 2 | 3 | 4 | 5 | 6 | 7 | 8 | 9 | 10 | 11 | 12 | 13 | 14 | 15 | 16 | 17 | 18 | 19 | 20 | |||
| Leader Spawn Weight | 0 | 0 | 0 | 0 | 0 | 1 | 1 | 2 | 2 | 2 | 2 | 2 | 0 | 0 | 0 | 0 | 0 | 0 | 0 | 0 | |||
| Follower Spawn Weight | 0 | 0 | 0 | 0 | 0 | 1 | 2 | 2 | 2 | 2 | 2 | 2 | 0 | 0 | 0 | 0 | 0 | 0 | 0 | 0 | |||
Throw Grenade Throw a grenade at the target area. |
Gain 3 defense for each enemy you can see, up to a maximum of 15 defense. |
You do one additional point of base damage when using guns. 16% chance of applying after completion |
Advent First Sergeant (Rank 2)
| Difficulty | Health |
Armor |
Aim |
Crit Chance |
Flanking Crit Chance Bonus |
Defense |
Dodge |
Mobility |
Will |
Hack Defense |
Detection Radius (tiles) |
|---|---|---|---|---|---|---|---|---|---|---|---|
| Rookie | 10 | 1 | 75 | 0 | 33 | 10 | 10 | 12 | 90 | 125 | 10 |
| Veteran | 12 | 1 | 80 | 0 | 33 | 10 | 10 | 12 | 95 | 125 | 10 |
| Commander | 14 | 1 | 85 | 0 | 40 | 10 | 10 | 12 | 95 | 125 | 10 |
| Legend | 15 | 1 | 85 | 0 | 40 | 10 | 10 | 12 | 95 | 125 | 13 |
| Weapon | Damage |
Crit Damage |
Clip Size |
Other |
|---|---|---|---|---|
| Mag Rifle | 6 - 9 | 3 | 3 | Shred: 1 |
| Frag Grenade | 3 - 8 | - | 1 | Range: 10 Radius: 4 Shred: 1 Env Dmg: 9 |
| Force Level | 1 | 2 | 3 | 4 | 5 | 6 | 7 | 8 | 9 | 10 | 11 | 12 | 13 | 14 | 15 | 16 | 17 | 18 | 19 | 20 | |||
| Leader Spawn Weight | 0 | 0 | 0 | 0 | 0 | 0 | 0 | 0 | 0 | 0 | 0 | 0 | 2 | 2 | 2 | 2 | 2 | 2 | 2 | 2 | |||
| Follower Spawn Weight | 0 | 0 | 0 | 0 | 0 | 0 | 0 | 0 | 0 | 0 | 0 | 0 | 2 | 2 | 2 | 2 | 2 | 2 | 2 | 2 | |||
Throw Grenade Throw a grenade at the target area. |
Gain 3 defense for each enemy you can see, up to a maximum of 15 defense. |
You do one additional point of base damage when using guns. 16% chance of applying after completion |
Tips
- Like most flankable units, they will ideally try to find reasonable cover whenever flanked. This can be taken advantage of if you want to force enemies to move.
- Like most units with AOE moves, you ideally want to spread your soldiers out in order to greatly dissuade them from ever using them.