Difference between revisions of "ADVENT Turret (LWOTC)"
Jump to navigation
Jump to search

(→Tips: fix typo) |
(→Superheavy Turret (Rank 3): correct stats) |
||
| Line 86: | Line 86: | ||
! Difficulty !! [[File:LW2_Health.png|36px|Health]]<br>Health !! [[File:Status_armor.png|36px|Armor]]<br>Armor !! [[File:LW2_Aim.png|36px|Aim]]<br>Aim !! [[File:Icon_CriticalChance.png |Crit Chance]]<br>Crit Chance !! [[File:Icon_CriticalChance.png |Flanking Crit Chance Bonus]]<br>Flanking Crit Chance Bonus !! [[File:LW2 Defense.png|36px|Defense]]<br>Defense !! [[File:LW2 Dodge.png|36px|Dodge]]<br>Dodge !! [[File:LW2 Mobility.png|36px|Mobility]]<br>Mobility !! [[File:LW2 Will.png|36px|Will]]<br>Will !! [[File:LW2 Hacking.png|36px|Hack Defense]]<br>Hack Defense !! [[File:Status overwatch.png |36px|Detection Radius]]<br>Detection Radius (tiles) | ! Difficulty !! [[File:LW2_Health.png|36px|Health]]<br>Health !! [[File:Status_armor.png|36px|Armor]]<br>Armor !! [[File:LW2_Aim.png|36px|Aim]]<br>Aim !! [[File:Icon_CriticalChance.png |Crit Chance]]<br>Crit Chance !! [[File:Icon_CriticalChance.png |Flanking Crit Chance Bonus]]<br>Flanking Crit Chance Bonus !! [[File:LW2 Defense.png|36px|Defense]]<br>Defense !! [[File:LW2 Dodge.png|36px|Dodge]]<br>Dodge !! [[File:LW2 Mobility.png|36px|Mobility]]<br>Mobility !! [[File:LW2 Will.png|36px|Will]]<br>Will !! [[File:LW2 Hacking.png|36px|Hack Defense]]<br>Hack Defense !! [[File:Status overwatch.png |36px|Detection Radius]]<br>Detection Radius (tiles) | ||
|- align="center" | |- align="center" | ||
| − | | '''Rookie''' || | + | | '''Rookie''' || 12 || 3 || 70 || 0 || 33 || 0 || 0 || 0 || 50 || 75 || 8 |
|- align="center" | |- align="center" | ||
| − | | '''Veteran''' || | + | | '''Veteran''' || 13 || 3 || 75 || 0 || 33 || 0 || 0 || 0 || 50 || 75 || 8 |
|- align="center" | |- align="center" | ||
| − | | '''Commander''' || | + | | '''Commander''' || 14 || 3 || 75 || 10 || 40 || 0 || 0 || 0 || 50 || 75 || 8 |
|- align="center" | |- align="center" | ||
| − | | '''Legend''' || | + | | '''Legend''' || 16 || 3 || 75 || 10 || 40 || 0 || 0 || 0 || 50 || 75 || 9 |
|} | |} | ||
{| class="wikitable" | {| class="wikitable" | ||
| Line 107: | Line 107: | ||
| colspan="4" |'''Leader Spawn Weight''' || 0 || 0 || 0 || 0 || 0 || 0 || 0 || 0 || 0 || 0 || 0 || 0 || 0 || 0 || 0 || 0 || 0 || 0 || 0 || 0 | | colspan="4" |'''Leader Spawn Weight''' || 0 || 0 || 0 || 0 || 0 || 0 || 0 || 0 || 0 || 0 || 0 || 0 || 0 || 0 || 0 || 0 || 0 || 0 || 0 || 0 | ||
|- align="center" | |- align="center" | ||
| − | | colspan="4" |'''Follower Spawn Weight''' || 0 || 0 || 0 || 0 || 0 || 0 || | + | | colspan="4" |'''Follower Spawn Weight''' || 0 || 0 || 0 || 0 || 0 || 0 || 0 || 0 || 0 || 0 || 0 || 0 || 0 || 1 || 2 || 3 || 3 || 4 || 4 || 4 |
|} | |} | ||
{| class="wikitable" | {| class="wikitable" | ||
| Line 117: | Line 117: | ||
| {{Damage Control (LWOTC)| b_name = 1 | b_descr = 1 | b_info = 1}}<br>[[Dark_Events_(LWOTC)#Military_R.26D|20% chance of applying after completion]] | | {{Damage Control (LWOTC)| b_name = 1 | b_descr = 1 | b_info = 1}}<br>[[Dark_Events_(LWOTC)#Military_R.26D|20% chance of applying after completion]] | ||
|} | |} | ||
| − | |||
== Tips == | == Tips == | ||
Latest revision as of 15:21, 8 December 2023
Back To Main Page | Back To Units Page

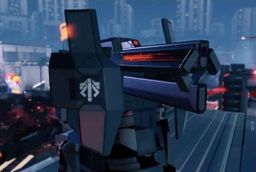
The ADVENT Turrets are automated defenses that acts as stationary guards that protect any important assets.
The Advent Turret are automated defenses that are commonly found in important areas to protect any important assets such as any supply trains. These defenses are capable of detecting our soldiers which can make it difficult to accomplish the mission as it forces us to engage with it or to spend extra time going around it. These turrets are also capable of shooting from afar, utilizing squadsight to fire against targets outside their own visual range and instead using their allies.
Advent Turret (Rank 1)
| Difficulty | Health |
Armor |
Aim |
Crit Chance |
Flanking Crit Chance Bonus |
Defense |
Dodge |
Mobility |
Will |
Hack Defense |
Detection Radius (tiles) |
|---|---|---|---|---|---|---|---|---|---|---|---|
| Rookie | 4 | 1 | 60 | 0 | 33 | 0 | 0 | 0 | 50 | 30 | 7 |
| Veteran | 4 | 2 | 65 | 0 | 33 | 0 | 0 | 0 | 50 | 35 | 7 |
| Commander | 5 | 2 | 65 | 0 | 40 | 0 | 0 | 0 | 50 | 35 | 7 |
| Legend | 6 | 2 | 65 | 0 | 40 | 0 | 0 | 0 | 50 | 35 | 8 |
| Weapon | Damage |
Crit Damage |
Clip Size |
Other |
|---|---|---|---|---|
| Turret Cannon | 2 - 5 | 1 | - | - |
| Force Level | 1 | 2 | 3 | 4 | 5 | 6 | 7 | 8 | 9 | 10 | 11 | 12 | 13 | 14 | 15 | 16 | 17 | 18 | 19 | 20 | |||
| Leader Spawn Weight | 0 | 0 | 0 | 0 | 0 | 0 | 0 | 0 | 0 | 0 | 0 | 0 | 0 | 0 | 0 | 0 | 0 | 0 | 0 | 0 | |||
| Follower Spawn Weight | 0 | 1 | 2 | 3 | 4 | 4 | 4 | 3 | 2 | 2 | 1 | 1 | 1 | 1 | 0 | 0 | 0 | 0 | 0 | 0 | |||
You can target enemies within squadmates' sight, provided there is line of sight to the target. |
 Iron Skin Reduce incoming melee damage by 3. 100% chance of applying after completion |
After taking damage, gain 2 armor through the end of the turn. 20% chance of applying after completion |
Heavy Turret (Rank 2)
| Difficulty | Health |
Armor |
Aim |
Crit Chance |
Flanking Crit Chance Bonus |
Defense |
Dodge |
Mobility |
Will |
Hack Defense |
Detection Radius (tiles) |
|---|---|---|---|---|---|---|---|---|---|---|---|
| Rookie | 6 | 2 | 65 | 0 | 33 | 0 | 0 | 0 | 50 | 70 | 8 |
| Veteran | 7 | 3 | 75 | 10 | 33 | 0 | 0 | 0 | 50 | 70 | 8 |
| Commander | 8 | 3 | 75 | 10 | 33 | 0 | 0 | 0 | 50 | 70 | 8 |
| Legend | 8 | 3 | 75 | 10 | 40 | 0 | 0 | 0 | 50 | 70 | 9 |
| Weapon | Damage |
Crit Damage |
Clip Size |
Other |
|---|---|---|---|---|
| Turret Cannon | 4 - 7 | 2 | - | - |
| Force Level | 1 | 2 | 3 | 4 | 5 | 6 | 7 | 8 | 9 | 10 | 11 | 12 | 13 | 14 | 15 | 16 | 17 | 18 | 19 | 20 | |||
| Leader Spawn Weight | 0 | 0 | 0 | 0 | 0 | 0 | 0 | 0 | 0 | 0 | 0 | 0 | 0 | 0 | 0 | 0 | 0 | 0 | 0 | 0 | |||
| Follower Spawn Weight | 0 | 0 | 0 | 0 | 0 | 0 | 1 | 2 | 2 | 3 | 3 | 3 | 3 | 3 | 3 | 2 | 2 | 2 | 2 | 2 | |||
You can target enemies within squadmates' sight, provided there is line of sight to the target. |
Iron Skin Reduce incoming melee damage by 3. 100% chance of applying after completion |
After taking damage, gain 2 armor through the end of the turn. 20% chance of applying after completion |
Superheavy Turret (Rank 3)
| Difficulty | Health |
Armor |
Aim |
Crit Chance |
Flanking Crit Chance Bonus |
Defense |
Dodge |
Mobility |
Will |
Hack Defense |
Detection Radius (tiles) |
|---|---|---|---|---|---|---|---|---|---|---|---|
| Rookie | 12 | 3 | 70 | 0 | 33 | 0 | 0 | 0 | 50 | 75 | 8 |
| Veteran | 13 | 3 | 75 | 0 | 33 | 0 | 0 | 0 | 50 | 75 | 8 |
| Commander | 14 | 3 | 75 | 10 | 40 | 0 | 0 | 0 | 50 | 75 | 8 |
| Legend | 16 | 3 | 75 | 10 | 40 | 0 | 0 | 0 | 50 | 75 | 9 |
| Weapon | Damage |
Crit Damage |
Clip Size |
Other |
|---|---|---|---|---|
| Turret Cannon | 5 - 9 | 3 | - | - |
| Force Level | 1 | 2 | 3 | 4 | 5 | 6 | 7 | 8 | 9 | 10 | 11 | 12 | 13 | 14 | 15 | 16 | 17 | 18 | 19 | 20 | |||
| Leader Spawn Weight | 0 | 0 | 0 | 0 | 0 | 0 | 0 | 0 | 0 | 0 | 0 | 0 | 0 | 0 | 0 | 0 | 0 | 0 | 0 | 0 | |||
| Follower Spawn Weight | 0 | 0 | 0 | 0 | 0 | 0 | 0 | 0 | 0 | 0 | 0 | 0 | 0 | 1 | 2 | 3 | 3 | 4 | 4 | 4 | |||
You can target enemies within squadmates' sight, provided there is line of sight to the target. |
Iron Skin Reduce incoming melee damage by 3. 100% chance of applying after completion |
After taking damage, gain 2 armor through the end of the turn. 20% chance of applying after completion |
Tips
- Like most mechanical enemies, they do not have much defense making them easier targets but are more durable by having generally more HP and armor than bio enemies. It is recommended to have some sort of shredding or piercing to more easily deal with these targets.
- As Turrets have squadsight, it is best to be careful about your positioning to not take flanked shots from them or to break reasonable line of sight to prevent attacks (though they will overwatch instead).