Difference between revisions of "Air Combat (LWR)"
| Line 267: | Line 267: | ||
|{{Research required (LWR)}}||{{Engineers required (LWR)}}||{{Credits cost (LWR)}}||{{Alloys cost (LWR)}}||{{Elerium cost (LWR)}}||{{Meld cost (LWR)}}||{{Items cost (LWR)}}||{{Time cost (LWR)}} | |{{Research required (LWR)}}||{{Engineers required (LWR)}}||{{Credits cost (LWR)}}||{{Alloys cost (LWR)}}||{{Elerium cost (LWR)}}||{{Meld cost (LWR)}}||{{Items cost (LWR)}}||{{Time cost (LWR)}} | ||
|-align="center" | |-align="center" | ||
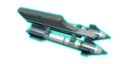
| − | |[[File:UFO Tracking Long War.png|128px|link=Air Combat (LWR)#Modules|Aim Booster]]<br />'''[[Air Combat (LWR)#Modules|Aim Booster]]'''|| | + | |[[File:UFO Tracking Long War.png|128px|link=Air Combat (LWR)#Modules|Aim Booster]]<br />'''[[Air Combat (LWR)#Modules|Aim Booster]]'''||The active aircraft automatically hits the next two attacks<br>Increases interception time by 30%<br>Only usable when active aircraft is in LEAD||[[Research (LWR)#Materials and Aerospace|Alien Materials]]<br />[[Foundry (LWR)#Aerospace Improvements|Aircraft Boosters]]||12||title="Cost in Credits (Cost when building quickly)"|3<br />(4)|| ||title="Cost in Elerium (Cost when building quickly)"|1<br />(1)||title="Cost in Meld (Cost when building quickly)"|1<br />(3)||12 [[Alien Artifacts (LWR)#Aliens|Floater Corpses]]||title="Duration in days (Duration when building quickly)"|5 days<br />(2.5 days)||6 |
|-align="center" | |-align="center" | ||
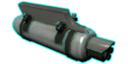
| − | |[[File:Defense Matrix Long War.png|128px|link=Air Combat (LWR)#Modules|Dodge Booster]]<br />'''[[Air Combat (LWR)#Modules|Dodge Booster]]'''||Dodges the next two | + | |[[File:Defense Matrix Long War.png|128px|link=Air Combat (LWR)#Modules|Dodge Booster]]<br />'''[[Air Combat (LWR)#Modules|Dodge Booster]]'''||Dodges the next two shots that would hit the active aircraft<br>Increases interception time by 30%<br>Only usable when active aircraft is in REAR||[[Research (LWR)#Alien Autopsies|Cyberdisc Autopsy]]<br />[[Foundry (LWR)#Aerospace Improvements|Aircraft Boosters]]||50||title="Cost in Credits (Cost when building quickly)"|5<br />(7)|| ||title="Cost in Elerium (Cost when building quickly)"|2<br />(3)||title="Cost in Meld (Cost when building quickly)"|1<br />(3)||2 [[Alien Artifacts (LWR)#Aliens|Cyberdisc Wrecks]]||title="Duration in days (Duration when building quickly)"|5 days<br />(2.5 days)||10 |
|-align="center" | |-align="center" | ||
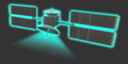
|[[File:Uplink Targeting Long War.png|128px|link=Air Combat (LWR)#Tracking Booster]]<br />'''[[Air Combat (LWR)#Modules|Tracking Booster]]'''||Increases interception time by 30%<br>Only usable when active aircraft is in MID||[[Research (LWR)#Alien Autopsies|Floater Autopsy]]<br />[[Foundry (LWR)#Aerospace Improvements|Aircraft Boosters]]||35||title="Cost in Credits (Cost when building quickly)"|4<br />(5)||title="Cost in Alien Alloys (Cost when building quickly)"|1<br />(1)||title="Cost in Elerium (Cost when building quickly)"|1<br />(1)||title="Cost in Meld (Cost when building quickly)"|1<br />(3)||4 [[Alien Artifacts (LWR)#Aliens|Drone Wrecks]]||title="Duration in days (Duration when building quickly)"|5 days<br />(2.5 days)||8 | |[[File:Uplink Targeting Long War.png|128px|link=Air Combat (LWR)#Tracking Booster]]<br />'''[[Air Combat (LWR)#Modules|Tracking Booster]]'''||Increases interception time by 30%<br>Only usable when active aircraft is in MID||[[Research (LWR)#Alien Autopsies|Floater Autopsy]]<br />[[Foundry (LWR)#Aerospace Improvements|Aircraft Boosters]]||35||title="Cost in Credits (Cost when building quickly)"|4<br />(5)||title="Cost in Alien Alloys (Cost when building quickly)"|1<br />(1)||title="Cost in Elerium (Cost when building quickly)"|1<br />(1)||title="Cost in Meld (Cost when building quickly)"|1<br />(3)||4 [[Alien Artifacts (LWR)#Aliens|Drone Wrecks]]||title="Duration in days (Duration when building quickly)"|5 days<br />(2.5 days)||8 | ||
Revision as of 03:33, 29 January 2023
In General
UFOs are tougher, faster, and much stronger in Long War Rebalance than in either Long War 1.0 or Vanilla EU/EW. Along with that, your crafts and armaments are significantly less potent, at least at first. However, in Long War Rebalance you can send up full squadrons of up to 5 aircraft at once, which helps you handle such strong UFOs.
Players should exert caution and pick and choose their air battles carefully. You will not be able to bring down every single enemy UFO. Sometimes attempting high risk interceptions against tough targets would be detrimental to your campaign due to the highly unpredictable nature of the engagements at the start of the game. Your early game goal should be to get experience for some of your pilots and advance your air-warfare technology in order to keep aliens at bay on the battleground for the Earth's skies. In case you overreach too early, you might quickly find yourself crippled with long repair times and unable to stop alien operations.
If the aliens send a UFO and it is damaged, destroyed or lost, the aliens will pay resources for it, limiting their options in the next month.
Damaging and Destroying UFOs
It is not necessary to shoot down enemy UFOs in order to prevent them from completing their mission. Doing damage to them is enough to spoil their plans or reduce their effectiveness. The damage that UFO sustains is stored between interceptions, therefore multiple interception attempts may be a good idea to limit the damage to your own Air Force. When a player does more than 50% damage to a UFO, you will start seeing explosion effects around it. A non-landing UFO at 50% health will fail the mission it was sent on. It is important to consider dealing some damage (even 1) to all non-landing UFOs, as this will prevent them from increasing panic in the country below (except for the bomb mission, which causes some panic anyway, unless foiled by damaging the craft for at least 50%).
UFOs that take a lot of damage beyond their HP total will be destroyed in the air, so in some cases you may want to pull your punches. To compensate, the Council will give cash rewards for UFOs obliterated in flight. Fighters and Destroyers will always be destroyed if their HP is reduced to 0 or less (as they never crash land). Destroying UFOs (except for Fighters and Destroyers) is unlikely until you get harder hitting weapons in the late game that have a greater chance of reducing UFOs to a pile of smelted alloys: specifically, it is the amount of damage beyond the UFO's HP total that determines the UFO's survival chance.
Chance of Destruction = (HP_Overkill - 1200) divided by 5
Average Chance of Destruction = 1 - 0.5 ^ ((Weapon_Damage-1200)/500)
Average chances of shots (non-crit) causing destruction of a UFO (vs the UFO being shot down) are listed in the table here: Aircraft Weapons
Pilot Rank and Kills
UFO kills are awarded to all pilots in a sortie that downs a UFO, and not just the pilot who lands the final hit.
Pilots gain 0.5 aim for each kill they make (modified by campaign length).
Pilots can also earn ranks through kills (modified by campaign length) and the ranks will allow them to command larger sorties of aircraft.
Lieutenant: Requires 4 kills and can command a sortie of 3 planes.
Captain: Requires 6 kills.
Major: Requires 8 kills and can command a sortie of 4 planes.
Colonel: Requires 12 kills.
Commander: Requires 16 kills and can command a sortie of 5 planes.
UFO Flight Patterns
UFOs can fly at three altitudes: "High", "Low" and "NOE" ("Nap of the Earth"). The altitude is a clue of what mission the UFO is going on - UFOs flying at NOE altitude may land (and only such UFOs), are performing bombing runs (then their icon would flash in the mission view), or will generate an Abduction or Terror mission immediately upon arriving at their destination. UFOs at high altitude are most likely to be hunting satellites. UFOs at low altitude are likely to be scouting satellites, so they must be dealt with. Unless playing in Ironman, you may want to see if a UFO would land in a place visible to XCOM before deciding to shoot it down (and reload if it does not land). While a landed UFO is always more dangerous, an intact UFO and it's material components is a valuable prize, given how fragile Power Sources and Flight Computers are from being shot down in Long War.
Once you successfully raid, shoot down, or destroy a UFO type, you can research that craft for a damage and resource bonus against it in the future.
Formation
When launching you can set a combat formation position for your interceptors as they launch on a mission:
- LEAD: +15 hit chance (1.5x hit chance for UFO)
- MID: no change
- REAR: -15 hit chance (0.67x hit chance for UFO)
You may not use the aim booster when the active aircraft is in the rear of a formation. You may not use the dodge booster when the active aircraft is in the lead of a formation.
Mathematically and not accounting for interception time, this means that lead is the most efficient formation position when your Interceptor aim is low, while rear is most efficient when your Interceptor aim is high. However, lead formation positions can lead to too much damage and rear formation positions can lead to too little.
Aircraft Hit Chance
The Hit Chance of a XCOM's aircraft is determined mostly by the aim of the weapon they are using. It can then be modified by their position in the formation, their experience, and the size of their opponent.
- As discussed in the section above, aircraft in the lead of the formation will gain 15 hit chance and aircraft in the rear of the formation will lose 15 hit chance.
- Experienced aircraft pilots will gain +0.5 aim for each UFO they have killed. There is no limit to this increase. This makes them especially effective using aircraft weapons with low aim.
- Larger UFOs are (reasonably) easier to hit. As such, XCOM aircraft will find their hit chance to be 150% and 200% of the original amount, respectively, for medium and large UFOs.
Interception Time
The interception time of a squadron and a UFO is based on their speeds.
The specific formula is:
Interception Time = 30s * (Slowest Aircraft Speed / UFO Speed)
Interception time can be modified by:
- UFO Scanners: +10% interception time
- Damaged Aircraft: -20% aircraft speed
- Elerium Afterburners: +5 squardron speed
- Tracking Booster: +50% squadron speed
An example of a squadron of Interceptors with UFO scanners vs a Scout.
Interception Time = 30s * (25 / 45) * 1.1
Interception Time = 18.3s
The Active Aircraft

The active aircraft is chosen randomly from all aircrafts in the lead of the formation. If there are no aircrafts in lead, an aircraft will be randomly select from the mid of the formation. Likewise, if there are no aircrafts in mid, an aircraft will be randomly selected from the rear of the formation.
The active aircraft will take 50% of all shots from the UFO, which makes it the most likely to take damage when there are more than 2 aircraft in a sortie. Support aircraft (non-active aircraft in the squadron) will evenly share the remaining 50% of shots from the UFO.
The active aircraft also dictates which aircraft boosters can be used (an active aircraft in lead restricts the use of dodge boosters and an active aircraft in rear restricts the use of aim boosters).
The active aircraft is also the only aircraft which you can tell to disengage. Supporting aircraft will automatically disengage if their HP has dropped below 25%. The active aircraft will continue to engage until you issue a disengage order.
Note that the disengage order can take a second or two to occur.
This means UFOs can still destroy aircraft AFTER they have been given an order to disengage.
Damaged Aircraft
Damaged aircraft can engage UFOs but will have -10 aim and only 80% of their base speed. The entire sortie will always fly at the speed of the slowest aircraft, so sending in a single damaged aircraft may end up reducing the overall damage of your sortie.
You can speed the repair of aircraft by hiring additional repair crews in the hangar at the cost of 150 credits per crew. This cuts remaining repair time in half, though it cannot go below 1 day.
Refueling
After engaging a UFO, all aircraft will need to refuel. The refuel time is 12 hours which mostly prevents an aircraft from engaging the same UFO more than once.
Combat Patrols
Undamaged interceptors can be sent on Combat Patrols. This will cost 50 credits. Each use increases the cost by 50 + 10x the current alien level (due to increased alien resiliency). However, the cost will decrease by 50 credits each month down to a minimum of 50 credits.
Combat Patrols lower continent panic and alien resources. It will also raise Alien Aggression by 12.5%. The aircraft sent on combat patrol will return immediately and will have received 10-90% of it's max HP in damage.
The amount of effect of the Combat Patrol on continent panic reduction and alien resource reduction is modified based on how many countries are in the effected continent (i.e. multiplied by 3 / # of countries) and then based on the following:

  Base Amount:
    Base Amount: 6-10
  Aircraft:
    Interceptor: +0
    Firestorm: +2
  Weapon:
    Avalanche Missiles: +0
    Stingray Missiles: +0
    Phoenix Coilgun: +1
    Laser Cannon: +1
    EMP Cannon: +2
    Plasma Cannon: +3
    Fusion Lance: +3
  Pilot Rank:
    Rookie: +0
    Lieutenant: +1
    Captain: +1
    Major: +2
    Colonel: +2
    Commander: +3
Country Air Forces
If you engage a UFO over a country that has some Country Defense (gained by completing council requests for that country) then there is a chance they may aid you in the air battle by sending up one of their own aircraft.
The chance is:
Chance for Country Air Force Aid = Country Defense / 2
The strength of the aircraft the country sends up is based upon their Country Defense:
| Country Defense | Aircraft Upgrade |
| >= 30 | Phoenix Cannon |
| >= 60 | EMP Cannon |
| >= 90 | Firestorm |
Damage Calculations

The damage each aircraft deals when it lands a hit is based upon its weapon and the damage resistance of it's target.
To aid the player, the average damage per second of your current aircraft (in its selected formation position) against the current UFO will be displayed on any aircraft you select to join a squadron. As well, the aim of your aircraft and the HP of the UFO will be displayed. This allows for quick calculations of the amount of damage you will be dealing during the engagement.
Air Game Damage Calculation Formula:
- DR = 1 - (25 * (Armor Tier - Penetration Tier) / 100) <-- Clamped between 0.0 and 0.9
- Base Damage = Weapon Damage * DR
- Critical Hit Chance [x1.5 damage] = 10% * (Penetration Tier - Armor Tier)
- All damage is randomized between 80-120%
Example of Phoenix Cannon (360 damage, 3s cooldown, Tier 2 penetration, 30 aim) vs Fighter (HP:400, Tier 3 armor):
Base Damage = 360 * (1 - Clamp((25 * (3 - 2))/100, 0, 0.90))
Base Damage = 360 * 0.75
Base Damage = 270
Critical hit Chance = 10% * (2-3) = -10% = 0%
Base Damage is then randomized between 80% and 120%
Rate of Fire = 3s
Damage per Second = 270/3 = 90 dps
UFOs and UFO Weapons
For information on UFOs click here: UFOs
For information on UFO Weapons click here: UFO Weapons
Aircraft
| Name | Health | Armor | Battle Speed | Map Speed | Other | Prerequisites | Cost | Maintenance | ||||||
|---|---|---|---|---|---|---|---|---|---|---|---|---|---|---|
| Other | ||||||||||||||
 Satellite |
Increases funding and provides unique bonuses | 10 | 450 (630) |
0 (7) |
27 days (13.5 days) |
|||||||||
 Skyranger |
Cannot engage in interceptions | 2000 | XCOM starts with one, unable to produce more | 20 | ||||||||||
 Interceptor |
2000 | Unarmored | 20 | 3500 | 500 | 20 days (cannot be rushed) |
100 | |||||||
 Firestorm |
6000 | Tier 4 | 30 | 7000 | Can wield a Fusion Lance | Alien Propulsion | 75 | 600 (900) |
120 (180) |
30 (45) |
XX (XX) |
4 UFO Flight Computers 4 UFO Power Sources |
80 days (40.0 days) |
XX |
Aircraft Weapons
| Name | Hit chance | Damage | Firing cooldown |
Penetration | UFO Destruction Chance 1-0.5^((dmg-1200)/500) |
Prerequisites | Cost | Sell value | ||||||
|---|---|---|---|---|---|---|---|---|---|---|---|---|---|---|
| Other | ||||||||||||||
 Avalanche Missiles |
25% / 40% / 55% | 160 (80 per second) (32 dmg/s realised) |
2.0s | No Penetration | 0% | XCOM starts with an unlimited supply | ||||||||
 Stingray Missiles |
20% / 35% / 50% | 800 (73 per second) (25 dmg/s realised) |
11.0s | Tier 2 | 0% | XCOM starts with an unlimited supply | ||||||||
 Phoenix Cannon |
15% / 30% / 45% | 400 (133 per second) (40 dmg/s realised) |
3.0s | Tier 2 | 0% | Alien Materials | 15 | 110 (165) |
10 (15) |
0 (5) |
13 days (6.5 days) |
48 | ||
| Phoenix Coilgun | Tier 3 | Phoenix Coilguns (Foundry) | 28 (42) |
56 (120) |
0 (5) |
6 UFO Power Sources 230 Weapon Fragments |
7 days (3.5 days) |
|||||||
 Laser Cannon |
30% / 45% / 60% | 400 (160 per second) (72 dmg/s realised) |
2.5s | No Penetration | 0% | Advanced Beam Lasers | 35 | 310 (465) |
25 (37) |
0 (5) |
18 days (9 days) |
64 | ||
| Pulse Cannon | 600 (240 per second) (108 dmg/s realised) |
Supercapacitors (Foundry) | 200 (300) |
300 (450) |
40 (60) |
30 (35) |
8 UFO Power Sources 140 Weapon Fragments |
21 days (10.5 days) |
||||||
 EMP Cannon |
20% / 35% / 50% | 350 (100 per second) (35dmg/s realised) |
3.5s | Tier 5 | 0% | Electromagnetic Pulse Weapons | 55 | 220 (330) |
140 (196) |
0 (5) |
20 days (14 days) |
230 | ||
 Plasma Cannon |
5% / 20% / 35% | 1600 (356 per second) (71 dmg/s realised) |
4.5s | Tier 4 | 43% | Vehicular Plasma Weapons | 95 | 400 (600) |
80 (112) |
55 (82) |
0 (5) |
28 days (16.6 days) |
200 | |
 Fusion Lance |
0% / 15% / 30% | 5000 (625 per second) (94 dmg/s realised) |
8.0s | Tier 6 | 100% | Fusion Weapons Only equippable on Firestorm |
120 | 600 (900) |
90 (135) |
90 (135) |
0 (5) |
1 Fusion Core | 49 days (24.5 days) |
320 |
Note: EMP Cannons increase the chance to retrieve artifacts from shot down UFOs by 40% if they are responsible for the fatal hit (see UFO Equipment)
Boosters
| Name | Special properties |
Prerequisites | Cost | Sell value | ||||||
|---|---|---|---|---|---|---|---|---|---|---|
| Other | ||||||||||
Aim Booster |
The active aircraft automatically hits the next two attacks Increases interception time by 30% Only usable when active aircraft is in LEAD |
Alien Materials Aircraft Boosters |
12 | 3 (4) |
1 (1) |
1 (3) |
12 Floater Corpses | 5 days (2.5 days) |
6 | |
 Dodge Booster |
Dodges the next two shots that would hit the active aircraft Increases interception time by 30% Only usable when active aircraft is in REAR |
Cyberdisc Autopsy Aircraft Boosters |
50 | 5 (7) |
2 (3) |
1 (3) |
2 Cyberdisc Wrecks | 5 days (2.5 days) |
10 | |
 Tracking Booster |
Increases interception time by 30% Only usable when active aircraft is in MID |
Floater Autopsy Aircraft Boosters |
35 | 4 (5) |
1 (1) |
1 (1) |
1 (3) |
4 Drone Wrecks | 5 days (2.5 days) |
8 |