Difference between revisions of "Air Combat (LWR)"
| Line 24: | Line 24: | ||
=== Formation === | === Formation === | ||
| − | When launching you can set a combat formation | + | When launching you can set a combat formation position for your interceptors as they launch on a mission: |
* Lead position gives +10 to hit for you and +50% to hit for the UFO. You may not use the dodge module when the active aircraft is in the lead of a formation. | * Lead position gives +10 to hit for you and +50% to hit for the UFO. You may not use the dodge module when the active aircraft is in the lead of a formation. | ||
* Mid position plays out like normal, no bonus or negative for the Interceptor or UFO. | * Mid position plays out like normal, no bonus or negative for the Interceptor or UFO. | ||
* Rear position gives -10 to hit for you and -33% for the UFO. You may not use the aim module when the active aircraft is in the rear of a formation. | * Rear position gives -10 to hit for you and -33% for the UFO. You may not use the aim module when the active aircraft is in the rear of a formation. | ||
| − | Mathematically and not accounting for interception time, this means that lead is the most efficient stance when your Interceptor aim is low, while rear is most efficient when your Interceptor aim is high. However, lead formation | + | Mathematically and not accounting for interception time, this means that lead is the most efficient stance when your Interceptor aim is low, while rear is most efficient when your Interceptor aim is high. However, lead formation positions can lead to too much damage, and rear formation positions can lead to too little. |
=== The Active Aircraft === | === The Active Aircraft === | ||
Revision as of 15:35, 26 September 2020
Rewrite Needed.png) The contents of this article are outdated, missing key info, confusing or constructed in a discussion format. Possibly due to EXALT sabotage. Please help fight the alien menace by updating or correcting the information on this page. |
Overview
UFOs are tougher, faster, and much deadlier in Long War Rebalance. Along with that, your crafts and armaments are significantly less potent, at least at first.
Players should exert caution and pick and choose their air battles carefully. You will not be able to bring down every single enemy UFO. Sometimes attempting high risk interceptions against tough targets would be detrimental to your campaign due to the highly unpredictable nature of the engagements at the start of the game. Your early game goal should be to get experience for some of your pilots and advance your air-warfare technology in order to keep aliens at bay on the battleground for the Earth's skies. In case you overreach too early, you might quickly find yourself crippled with long repair times and unable to stop alien operations.
If the aliens send a UFO and it is damaged, destroyed or lost, the aliens will pay resources for it, limiting their options in the next month.
Damaging UFOs
It is not necessary to shoot down enemy UFOs in order to prevent them from completing their mission. Doing damage to them is enough to spoil their plans or reduce their effectiveness. The damage that UFO sustains is stored between interceptions, therefore multiple interception attempts may be a good idea to limit the damage to your own Air Force. When a player does more than 50% damage to a UFO, you will start seeing explosion effects around it. A UFO at 50% health will fail the mission it was sent on. Any damage to a UFO will prevent it from increasing panic in the country below.
UFOs that take too much damage will be destroyed in the air, so in some cases you may want to pull your punches. To compensate, the Council will give cash rewards for UFOs obliterated in flight. Fighters and Destroyers will always be destroyed if their hp is reduced to 0 or less (as they never crash land). Harder hitting weapons have a greater chance of reducing UFOs to a pile of smelted alloys: specifically, it is the strength of the killshot that determines the UFO's survival.
Interceptor Weapons
Air-to-air weapons have three main damage statistics - Damage, Rate of Fire, and Penetration. UFOs have different armor levels, which reduces the damage done by a weapon if its armor penetration isn't high enough. For example, you start with a choice between Avalanche Missiles (medium damage, low armor penetration, moderate rate of fire) and Stingray missiles (high damage, high armor penetration, low rate of fire). Avalanches will be better against unarmored UFOs, while Stingrays will be better against more armored UFOs.
Formation
When launching you can set a combat formation position for your interceptors as they launch on a mission:
- Lead position gives +10 to hit for you and +50% to hit for the UFO. You may not use the dodge module when the active aircraft is in the lead of a formation.
- Mid position plays out like normal, no bonus or negative for the Interceptor or UFO.
- Rear position gives -10 to hit for you and -33% for the UFO. You may not use the aim module when the active aircraft is in the rear of a formation.
Mathematically and not accounting for interception time, this means that lead is the most efficient stance when your Interceptor aim is low, while rear is most efficient when your Interceptor aim is high. However, lead formation positions can lead to too much damage, and rear formation positions can lead to too little.
The Active Aircraft
The active aircraft is chosen randomly from all aircrafts in the lead of the formation. If there are no aircrafts in lead, an aircraft will be randomly select from the mid of the formation. Likewise, if there are no aircrafts in mid, an aircraft will be randomly selected from the rear of the formation.
The active aircraft will take 50% of all shots from the UFO, which makes it the most likely to take damage when there are more than 2 aircraft in a sortie.
The active aircraft also dictates which aircraft modules can be used (an active aircraft in lead restricts the use of dodge modules and an active aircraft in rear restricts the use of aim modules).
UFO Flight Patterns
UFOs can fly at three altitudes: "High", "Low" and "NOE" ("Nap of the Earth,"). The altitude is a clue of what mission the UFO is going on - UFOs flying at NOE altitude are most likely to land, are performing bombing runs, or will generate an Abduction or Terror mission immediately upon arriving at their destination. UFOs at high altitude are most likely to be hunting satellites. UFOs at low altitude are likely to be scouting satellites, so they must be dealt with. Unless playing in Ironman, you may want to see if a UFO will land before shooting it down (and reload if it does not): while a landed UFO is always more dangerous, an intact UFO and it's material components is a valuable prize, given how fragile Power Sources and Flight Computers are from being shot down in Long War.
Once you successfully raid, shoot down, or destroy a UFO type, you can research that craft for a damage and resource bonus against it in the future.
Strategic Plan
- You start with the Avalanche and Stingray missiles. These will work for small craft for a while until Aliens field stronger UFOs.
- After some time, sticking with conventional weapons will leave you totally outgunned. Next you'll want to upgrade to Laser and Phoenix cannons: Laser Cannons are built for accuracy and damage against unarmored UFOs, so a pilot can still reliably hit UFOs on Mid or Rear positions. Phoenix Cannons are built for armor penetration and higher rate of fire. You would likely need multiple interceptions to reliably bring down larger UFOs.
- Eventually, you may be able to purchase the Gauss/Coilgun and Supercapacitor Foundry projects for the Phoenix and Laser Cannon: these vastly upgrade every aspect of these mid-level aerial weapons
Interception Strategy
- Choose an appropriate stance based on your equipped weapon, researched upgrades, and UFO type.
- Always be prepared to cancel an interception if the engagement is not going well for you. Losing an aircraft with an expensive weapon can be costly. Note that it will take 1-2s for aircraft to disengage after you give the order, which means they could still be lost after you tell them to pull out.
- Consider aborting when a satellite hunter displays explosion effects. You have prevented the destruction of the satellite, so you might not want to risk additional damage.
- Use modules in tough situations when you need an extra boost to get the job done.
- The aliens will most often focus their efforts on wherever they have the greatest foothold: expect Terror Ships and Assault Carriers on any country that's in the red, as the aliens commit Terror Missions in order to send a country over the edge to withdraw from the Council.
By swatting UFOs out of the sky, you may be able to keep Panic tempered down: a UFO brought crashing to the ground is a pack of aliens not completing missions in the cities, and a smoking impact crater is a mission your soldiers don't need to get fatigued/injured on: heavy weapons obliterating the smaller UFOs may be desirable, at least to avoid a 'Fatigue Spiral.' If you've managed to take by the sky for a month, you may have a easier time in the next, as the aliens recoup their losses...
Damage Calculations
Tables
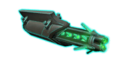
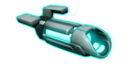
UFO Types
| UFO Type | Durability | Armor | Firepower | Description |
|---|---|---|---|---|
 |
Low (800) | None | Low | The speedy Scout-class UFO is fortunately within Earth's native capabilities to shoot down ... on occasion. It appears to be used for general reconnaissance, resource-gathering and research. |
 |
Low (400) | Moderate (75% DR) | Low | The alien Fighter, while similar in outward appearance to the Scout, is much better protected. Armor-piercing weapons like our Stingray Missiles will be helpful in bringing these craft down. This class of craft is used primarily for air raids and anti-satellite operations. |
 |
Moderate (4000) | None | Low | The Raider class of UFO seems to be a multirole craft that thus suffers in combat power. The aliens appear to use it for reconnaissance, research and resource-gathering operations. |
 |
Low (1500) | Moderate (75% DR) | Low | The Destroyer presents a much greater threat to our aircraft than its sister class of ships. Armor-piercing weapons are required to defeat this craft. It appears to primarily be used for air raids and anti-satellite operations, although we may see it conduct reconnaissance missions as well. Our analysts note the presence of unused hardpoints on some images of this craft, so we should look out for upgraded versions with even more killing power. |
 |
High (12000) | Very Heavy (225% DR) | Moderate | Abductors appear to be much better protected than other ships of this size. Perhaps the aliens particularly value the abduction and research missions they are used for. |
 |
High (8000) | Heavy (100% DR) | Moderate | The Harvester class of UFO seems to have one role - to recover important biological materials and minerals from Earth in support of other alien operations. We should try to interdict alien harvest operations whenever possible to slow the alien advance. These craft may be vulnerable to a concentrated attack. |
 |
High (14000) | Heavy (150% DR) | Moderate | This ponderously slow craft will be a tough nut to crack. It appears to be primarily used in alien terrestrial resource-gathering but could also be used in support of other major alien operations. |
 |
High (10000) | Heavy (125% DR) | High | The rarely encountered Terror Ship appears suited for rapid deployment of alien shock troops. They appear to presage alien terror missions, but they may be used for alien research on XCOM as well. |
 |
Very High (20000) | Very Heavy (200% DR) | High | The Assault Carrier, while built on a battleship hull, lacks some of its sister's firepower and may be easier to shoot down. Nevertheless, we expect to see the aliens use this craft only against high-value targets, so it should be taken seriously whenever it is detected. |
 |
Very High (20000) | Heavy (175% DR) | Extremely High | An unbelievably dangerous piece of hardware, these UFOs never appear to land but are used in bombing, anti-satellite and air superiority roles. |
 |
Moderate (4000) | Heavy (125% DR) | High | This class of ship appears to be used as a airborne command center for the Ethereal race of alien. Only our strongest weapons will be able to penetrate its armor. |
Aircraft
| Name | Health | Damage Resistance | Speed | Prerequisites | Cost | Maintenance | ||||||
|---|---|---|---|---|---|---|---|---|---|---|---|---|
| Other | ||||||||||||
 Skyranger |
Can't be damaged or destroyed | XCOM starts with one, unable to produce more | 20 | |||||||||
 Satellite |
Increases funding and provides unique bonuses | 10 | 300 (450) |
0 (7) |
27 days (13.5 days) |
|||||||
 Interceptor |
2000 | 0% | 10 | 500 | 20 days | 100 | ||||||
 Firestorm |
6000 | 100% | 15 | Alien Propulsion | 75 | 600 (900) |
20 (30) |
30 (45) |
XX (XX) |
X UFO Flight Computers X UFO Power Sources |
80 days (40.0 days) |
XX |
Interceptor Weapons
| Name | Hit chance | Damage | Penetration | Firing cooldown |
Prerequisites | Cost | Sell value | ||||||
|---|---|---|---|---|---|---|---|---|---|---|---|---|---|
| Other | |||||||||||||
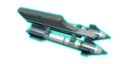 Avalanche Missiles |
30% / 40% / 50% | 160 (80 per second) (32 dmg/s realised) |
2.0 second | XCOM starts with an unlimited supply | |||||||||
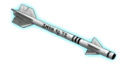 Stingray Missiles |
20% / 30% / 40% | 900 (90 per second) (27 dmg/s realised) |
75% | 10.0 second | XCOM starts with an unlimited supply | ||||||||
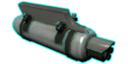 Phoenix Cannon |
20% / 30% / 40% | 360 (120 per second) (36 dmg/s realised) |
50% | 3.0 second | Alien Materials | 15 | 300 (450) |
10 (15) |
0 (5) |
13 days (6.5 days) |
48 | ||
| Phoenix Coilgun | 360 (120 per second) (36 dmg/s realised) |
100% | Phoenix Coilguns (Foundry) | ||||||||||
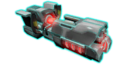 Laser Cannon |
35% / 45% / 55% | 300 (120 per second) (54 dmg/s realised) |
2.5 second | Advanced Beam Lasers | 35 | 450 (675) |
25 (37) |
0 (6) |
18 days (9.0 days) |
64 | |||
| Pulse Cannon | 450 (180 per second) (81 dmg/s realised) |
2.5 second | Supercapacitors (Foundry) | ||||||||||
 Plasma Cannon |
10% / 20% / 30% | 1500 (750 per second) (150 dmg/s realised) |
100% | 2.0 second | Vehicular Plasma Weapons | 95 | 1200 (1800) |
55 (82) |
55 (82) |
xx (xx) |
XX | 28 days (16.6 days) |
200 |
 EMP Cannon |
30% / 40% / 50% | 420 (120 per second) (48dmg/s realised) |
150% | 3.5 second | Electromagnetic Pulse Weapons | 100 | 800 (1200) |
15 (22) |
75 (112) |
xx (xx) |
XX | 20 days (14.0 days) |
230 |
 Fusion Lance |
5% / 15% / 25% | 5000 (1667 per second) (250 dmg/s realised) |
150% | 3.0 second | Fusion Weapons | 120 | 1800 (2700) |
90 (135) |
90 (135) |
xx (xx) |
1 Fusion Core | 49 days (24.5 days) |
320 |
Modules
| Name | Special properties |
Prerequisites | Cost | Sell value | ||||||
|---|---|---|---|---|---|---|---|---|---|---|
| Other | ||||||||||
UFO Tracking (Boost) |
Increases the duration of this air combat | Alien Materials Aircraft Boosters |
12 | 15 (22) |
1 (1) |
1 (3) |
2 Drone Wrecks | 5 days (2.5 days) |
6 | |
 Defense Matrix (Dodge) |
Dodges the next two incoming attacks | Cyberdisc Autopsy Aircraft Boosters |
50 | 25 (37) |
2 (3) |
1 (3) |
2 Cyberdisc Wrecks | 5 days (2.5 days) |
10 | |
 Uplink Targeting (Aim) |
Automatically hits the next two attacks | Floater Autopsy Aircraft Boosters |
35 | 20 (30) |
1 (1) |
1 (1) |
1 (3) |
3 Floater Corpses | 5 days (2.5 days) |
8 |