Difference between revisions of "Air Combat (Long War)"
m (removed fusion cores from list of things less likely to be destroyed by EMP since fusion cores have 100% survival on shoot-down) |
|||
| (73 intermediate revisions by 10 users not shown) | |||
| Line 1: | Line 1: | ||
| − | {{ | + | {{Toc (Long War)|60}} |
| − | |||
==Overview== | ==Overview== | ||
| − | UFOs are tougher, faster, and much deadlier in Long War. Along with that, your crafts and armaments are significantly less potent, at least at first. You will need to cycle your craft regularly like your soldiers | + | UFOs are tougher, faster, and much deadlier in Long War. Along with that, your crafts and armaments are significantly less potent, at least at first. You will need to cycle your craft regularly like your soldiers. |
| − | At the start of the game your fresh pilots are equipped with Avalanche Missiles, which now have an abysmal 40% accuracy. While it is still possible to down the first Scout with one Interceptor, this is an incredibly unlikely event. It's more probable that it would take two, or even three interceptions to bring down even the most basic alien craft | + | At the start of the game your fresh pilots are equipped with Avalanche Missiles, which now have an abysmal 40% accuracy. While it is still possible to down the first Scout with one Interceptor, this is an incredibly unlikely event. It's more probable that it would take two, or even three interceptions to bring down even the most basic alien craft. |
| − | Players should exert caution and pick and choose their air battles carefully. You will not be able to bring down every single enemy UFO. Sometimes attempting high risk interceptions against tough targets | + | Players should exert caution and pick and choose their air battles carefully. You will not be able to bring down every single enemy UFO. Sometimes attempting high risk interceptions against tough targets will be detrimental to your campaign due to the highly unpredictable nature of the engagements at the start of the game. Your early game goal should be to get kills for some of your pilots and advance your air-warfare technology in order to keep aliens at bay on the battleground for the Earth's skies. In case you overreach too early, you might quickly find yourself crippled with long repair times and unable to stop alien operations. |
| − | There are Research and Engineering projects that will assist in aerial sorties | + | There are Research and Engineering projects that will assist in aerial sorties, including multiple Foundry projects to improve your Interceptors. There are also the aircraft boost modules, which return from vanilla. |
| − | As | + | As the campaign goes on, UFOs will slowly gain tiny but permanent increases to their health, accuracy and damage, which act as a de facto time limit on the campaign: after several in-game years have past, you may find interceptions to become near impossible. Try to finish your campaign within two in game years, and don't expect to ever truly dominate the skies. |
| − | + | If the aliens send a UFO and it is damaged, destroyed or lost, the aliens will pay [[Alien Resources (Long War)|resources]] for it, limiting their options in the next month. | |
| − | |||
| − | + | ===Pilot Kills=== | |
| + | Your pilots will learn UFO flight patterns and weaknesses, therefore they will become much better at shooting down alien craft: pilots gain +3% aim per kill (up to + 30%) and +1% damage per kill (with no top limit). Also, both your craft and UFOs may sometimes get 'critical hits' (200% damage), with UFOs being downed in a few hits, or your undamaged Interceptor immediately going into near-full red damage indicator. | ||
| − | + | ===Disrupting, Damaging and Destroying UFOs=== | |
| + | Each UFO you encounter is running a [[Alien Missions (Long War)|particular mission]] that benefits the aliens strategically in some specific way, whether it be generating panic, shooting down your Satellites, or harvesting resources. Shooting them down is a reliable method of preventing whatever they're trying to do from occurring. Plus, UFOs that are damaged or shot down [[Alien Resources (Long War)#Cost of Repairing / Replacing_UFOs|cost the aliens resources]] to repair or replace. | ||
| − | Long War | + | Some UFOs will simply land, allowing you to assault them directly; these include UFOs on [[Alien_Missions_(Long_War)#Research|Research]] and [[Alien_Missions_(Long_War)#Harvest|Harvest]] missions. In terms of the resource costs accrued to replace the destroyed UFO, a successful assault is functionally equivalent to shooting the UFO down. |
| + | |||
| + | Some UFOs will fly about a country's airspace before zooming off (see the [[Alien Missions (Long War)#Scout|Scout]], [[Alien Missions (Long War)#Hunt|Hunt]], and [[Alien Missions (Long War)#Bomb|Bomb]] mission entries). Generally speaking, you'll have a window of opportunity to engage such UFOs 2-3 times before they fly off - and you should, not only to deny the enemy and cost them resources, but also to harvest materials from the crash site. But if most of your Interceptors are being repaired, or you're facing down a powerful UFO that you're not sure you can destroy, simply dealing enough damage to the UFO can disrupt the mission even if it isn't shot out of the sky. | ||
| + | |||
| + | For Hunt missions, when a player does more than 50% of its health in damage to a UFO, the mission will be successfully scuttled. You can visually identify when you've reached this threshold during an interception: yellow explosions will flash around the UFO, as if it is continually being hit by your attacks. Note however that you still have a chance to prevent the UFO's mission while doing less than 50% damage, which is simply linear (i.e., in general UFO failure chance is equal to (100-2x)% where x is their health percentage). Bombing missions are different, in that the total amount of panic generated scales directly with the amount of damage dealt to the UFO, and only shooting it down is sufficient to completely negate the panic. The UFO will inflict 8 x (100-x)% panic to a target country (and an additional +2 if it has 100% health). Scout missions have a chance to fail based on a number of factors including dealing damage to the UFO (see the [[Alien Missions (Long War)#Scout|Scout mission]] page for details), but they do nothing except spawn a followup Hunt mission, so you have multiple chances to stop it. | ||
| + | |||
| + | Finally, in some cases you will have only a narrow window of opportunity to intercept UFOs: they will simply fly directly to a target location, spawning a mission and then completely disappearing from the geoscape. This includes [[Alien Missions (Long War)#Abduction|Abductions]], [[Alien Missions (Long War)#Terrorize Populace|Terror Missions]]. No amount of damage you deal to the UFO short of shooting it down will have any effect on the resulting mission it spawns (though it will incur them repair costs), and for the most part you won't have an air force capable of doing this anyways. Most likely, you'll just have to play the resulting mission. | ||
| + | |||
| + | The Long War mod also brings back a mechanic from previous generations of XCOM: UFOs can now be utterly destroyed on a crash, generating no crash site mission. To compensate, the Council will give cash rewards for UFOs obliterated in flight (see [[UFOs (Long War)#UFO Bounties|UFO Bounties]]), and you'll salvage a small amount of resources from the wreckage as well. The harder hitting weapons have a greater chance of reducing UFOs to a pile of smelted alloys: specifically, it is the strength of the final hit relative to the UFOs remaining HP that determines the UFO's survival. | ||
| + | |||
| + | ===UFO Landings=== | ||
| + | When a UFO lands it is either conducting a Harvest mission (to gain [[Alien Resources (Long War)|resources]]) or a Research mission (to gain [[Alien Research (Long War)|research]]). Such missions have [[Threat (Long War)#Trap_UFOs|a chance]] of spawning a much larger force of aliens; this is known colloquially as a ''Trap UFO''. See [[UFOs (Long War)|the UFOs page]] for approximate troop counts for regular landings vs. traps. | ||
| + | |||
| + | [[Alien Missions (Long War)#Research|Research missions]] happen only in countries with Satellites -- this is an alien "recon-in-force" that's a direct attempt to engage XCOM and test it's battle capabilities. | ||
| + | |||
| + | [[Alien Missions (Long War)#Harvest|Harvest missions]] will sometimes avoid countries with Satellites [[Threat_(Long_War)|depending on how threatening the Aliens perceive XCOM to be]], though this will reduce the resource reward of the mission. | ||
| + | |||
| + | Damage to UFOs, or losses of its infantry on the ground, have no bearing on research points or resources gained from the mission. If the UFO survives, the aliens gets full benefit of the mission. However, a UFO that is shot down or assaulted fails its mission automatically. Furthermore, shooting down, successfully assaulting, and/or damaging a UFO does deduct from the aliens [[Alien Resources (Long War)|resources]] in the form of [[Alien Resources (Long War)#Cost of Repairing .2F Replacing UFOs|repair/replacement costs]]. | ||
===Interceptor Weapons and Stances=== | ===Interceptor Weapons and Stances=== | ||
| − | Air-to-air weapons now have three main damage statistics - Damage, Rate of Fire, and Armor Penetration. UFOs have different armor levels, which reduces the damage done by a weapon if its armor penetration isn't high enough. For example, you start with a choice between Avalanche missiles (medium damage, low armor penetration) and Stingray missiles (low damage, medium armor penetration). Avalanches will be better against unarmored and very lightly armored UFOs, while Stingrays will be better against more armored UFOs. | + | Air-to-air weapons now have three main damage statistics - Damage, Rate of Fire, and Armor Penetration; "Range" is no longer a factor as it was in vanilla. Additionally, UFOs have different armor levels, which reduces the damage done by a weapon if its armor penetration isn't high enough. For example, you start with a choice between Avalanche missiles (medium damage, low armor penetration) and Stingray missiles (low damage, medium armor penetration). Avalanches will be better against unarmored and very lightly armored UFOs like Scouts, while Stingrays will be better against more armored UFOs like Fighters. |
When launching you can set a combat stance for your interceptors as they launch on a mission: | When launching you can set a combat stance for your interceptors as they launch on a mission: | ||
| − | * Aggressive gives +15% to hit for both you and the UFO. You may not use the | + | * Aggressive gives +15% to hit for both you and the UFO. You may not use the Dodge consumable when aggressive. |
* Balanced plays out like normal. | * Balanced plays out like normal. | ||
| − | * Defensive gives -15% to hit for both you and the UFO. You may not use the | + | * Defensive gives -15% to hit for both you and the UFO. You may not use the Aim consumable when defensive. |
| − | Mathematically and not accounting for interception time, this means that Aggressive is the most efficient stance when your Interceptor aim is lower than UFO aim, while Defensive is strongest when your Interceptor aim is higher than UFO aim. These effects are stronger the bigger the difference. | + | |
| − | However, Interception time is an issue as UFOs will just leave after some time. Obviously, Aggressive is the most time-effective stance. | + | Mathematically (and not accounting for interception time), this means that Aggressive is the most efficient stance when your Interceptor aim is lower than UFO aim, while Defensive is strongest when your Interceptor aim is higher than UFO aim. These effects are stronger the bigger the difference. However, Interception time is an issue as UFOs will just leave after some time. Obviously, Aggressive is the most time-effective stance, allowing you to maximize your damage output given limited engagements. |
===UFO Flight Patterns=== | ===UFO Flight Patterns=== | ||
| − | UFOs can fly at three altitudes: "High", "Low" and "NOE" ("Nap of the Earth,"). The altitude is a clue of what mission the UFO is going on | + | UFOs can fly at three altitudes: "High", "Low" and "NOE" ("Nap of the Earth,"). The altitude is a clue of what mission the UFO is going on: |
| − | + | * High: UFOs at high altitude are usually hunting satellites (and will flash purple on the radar). | |
| + | * Low: UFOs at low altitude are scouting for your satellites, and will spawn a high-altitude satellite hunter if not dealt with. | ||
| + | * NOE: UFOs flying at NOE altitude are either performing bombing runs (if flashing purple) or landing at a target location; landed UFOs will generate either a Landed UFO, Abduction or Terror mission immediately upon arriving at their destination. | ||
| − | + | UFOs flashing purple on the radar screen are taking aggressive actions: they are either attacking your satellite (high altitude) or bombing civilians (NOE). If the UFO is flying NOE, use the purple flash to differentiate between a regular landing and a bombing run. If a UFO is NOE but not flashing purple, you can probably let it land and assault it on the ground (though it may also generate another mission type like Abduction or Terror mission). | |
| − | |||
| − | |||
| − | |||
| − | |||
| − | |||
| − | |||
| − | |||
| − | |||
| − | |||
| − | |||
| − | |||
| − | |||
| − | |||
| − | |||
| − | |||
| − | |||
| − | |||
| − | |||
| − | |||
| − | |||
| − | |||
==Damage Calculations== | ==Damage Calculations== | ||
| − | *Armor Mitigation = | + | *Armor Mitigation = Target Armor - Armor Penetration [%] |
| − | **0 is the minimum Armor Mitigation and | + | **0% is the minimum Armor Mitigation and 95% is the maximum |
*Base Damage = Weapon Damage * (1 - Armor Mitigation) | *Base Damage = Weapon Damage * (1 - Armor Mitigation) | ||
| − | *Crit Chance = (Armor Penetration - Target Armor) / 2 | + | *Crit Chance = (Armor Penetration - Target Armor) / 2 [%] |
**5% is the minimum Crit Chance and 25% is the maximum | **5% is the minimum Crit Chance and 25% is the maximum | ||
| − | *A successful Crit multiplies damage by 2 | + | **A successful Crit multiplies damage by 2 |
| − | * | + | *Total damage is then randomized to between 100% and 150% of its current value |
*For XCOM Aircraft: | *For XCOM Aircraft: | ||
**If the appropriate UFO analysis has been researched, total damage is multiplied by 1.1 | **If the appropriate UFO analysis has been researched, total damage is multiplied by 1.1 | ||
| − | ** | + | **Total damage is also multiplied by 1 + (Pilot Kills / 100) |
Examples: | Examples: | ||
| − | * Avalanche Missiles (340 damage, 0 armor penetration) vs Fighter (armor | + | * Avalanche Missiles (340 damage, 0% armor penetration) vs Fighter (armor 60%): no armor is penetrated, so 60% of damage is blocked, and the Avalanche has an effective damage of 136-204. |
| − | * Laser Cannon (290 damage, | + | * Laser Cannon (290 damage, 25% armor penetration) vs Fighter (armor 60%): effective armor mitigation value of 60%-25%=35%. Consequently, 35% of the damage is blocked, and the Laser has an effective damage of 188-282. |
| − | * Stingray Missiles (200 damage, | + | * Stingray Missiles (200 damage, 50% armor penetration) vs Fighter (armor 60%): armor mitigation value of 60%-50%=10%. Only 10% of damage is blocked, the Stingray has an effective damage of 180-270. |
| + | * Avalanche Missiles (340 damage, 0% armor penetration) vs Overseer (armor 200%): 200% damage blocked (nonsense) gets corrected to 95% damage blocked, effective damage is 17-26. | ||
| + | * EMP Cannon (310 damage, 150% armor penetration) vs Scout (armor 0%): armor mitigation is 0%-150%=-150%. However, damage is never increased due to penetration, so this gets corrected to 0% resulting in effective damage of 310-465. | ||
Note that in the above example while the Laser Cannon and Stingray Missiles are about equal on a per-hit basis, the Laser Cannon is more effective in combat due to its higher rate of fire and higher accuracy. | Note that in the above example while the Laser Cannon and Stingray Missiles are about equal on a per-hit basis, the Laser Cannon is more effective in combat due to its higher rate of fire and higher accuracy. | ||
| Line 83: | Line 83: | ||
{| class="wikitable" width="100%" | {| class="wikitable" width="100%" | ||
|- | |- | ||
| − | ! | + | ! UFO Size || UFO Type || Health || Armor || Penetration || Firepower || Description |
| − | |||
| − | |||
| − | |||
|-align="center" | |-align="center" | ||
| − | |<div style="background:#333333">[[Image: UFO-Analysis_Scout.png|center|128x64px]]</div> '''Scout'''|| | + | |rowspan=2|Small||<div style="background:#333333">[[Image: UFO-Analysis_Scout.png|center|128x64px]]</div> '''[[UFOs (Long War)#Scout|Scout]]'''|| 750 || 0% || 15% || 1x Single Plasma || The speedy Scout-class UFO is fortunately within Earth's native capabilities to shoot down ... on occasion. It appears to be used for general reconnaissance, resource-gathering and research. |
|-align="center" | |-align="center" | ||
| − | |<div style="background:#333333">[[Image: UFO-Analysis_Fighter.png|center|128x64px]]</div> '''Fighter'''|| | + | |<div style="background:#333333">[[Image: UFO-Analysis_Fighter.png|center|128x64px]]</div> '''[[UFOs (Long War)#Fighter|Fighter]]'''|| 850 || 60% || 35% || 1x Single Plasma || The alien Fighter, while similar in outward appearance to the Scout, is much better protected. Armor-piercing weapons like our Stingray Missiles will be helpful in bringing these craft down. This class of craft is used primarily for air raids and anti-satellite operations. |
|-align="center" | |-align="center" | ||
| − | |<div style="background:#333333">[[Image: UFO-Analysis_Raider.png|center|128x64px]]</div> '''Raider'''|| | + | |rowspan=2|Medium||<div style="background:#333333">[[Image: UFO-Analysis_Raider.png|center|128x64px]]</div> '''[[UFOs (Long War)#Raider|Raider]]'''|| 1500 || 25% || 35% || 1x Single Plasma || The Raider class of UFO seems to be a multirole craft that thus suffers in combat power. The aliens appear to use it for reconnaissance, research and resource-gathering operations. |
|-align="center" | |-align="center" | ||
| − | |<div style="background:#333333">[[Image: UFO-Analysis_Destroyer.png|center|128x64px]]</div> '''Destroyer'''|| | + | |<div style="background:#333333">[[Image: UFO-Analysis_Destroyer.png|center|128x64px]]</div> '''[[UFOs (Long War)#Destroyer|Destroyer]]'''|| 1600 || 90% || 75% || 1x Single Plasma || The deadly Destroyer present a much greater threat to our aircraft than its sister class of ships. Armor-piercing weapons are required to defeat this craft. It appears to primarily be used for air raids and anti-satellite operations, although we may see it conduct reconnaissance missions as well. Our analysts note the presence of unused hardpoints on some images of this craft, so we should look out for upgraded versions with even more killing power. |
|-align="center" | |-align="center" | ||
| − | |<div style="background:#333333">[[Image: UFO-Analysis_Abductor.png|center|128x64px]]</div> '''Abductor'''|| | + | |rowspan=4|Large||<div style="background:#333333">[[Image: UFO-Analysis_Abductor.png|center|128x64px]]</div> '''[[UFOs (Long War)#Abductor|Abductor]]'''|| 4000 || 160% || 10% || 1x Double Plasma || Abductors appear to be much better protected than other ships of this size. Perhaps the aliens particularly value the abduction and research missions they are used for. |
|-align="center" | |-align="center" | ||
| − | |<div style="background:#333333">[[Image: UFO-Analysis_Harvester.png|center|128x64px]]</div> '''Harvester'''|| | + | |<div style="background:#333333">[[Image: UFO-Analysis_Harvester.png|center|128x64px]]</div> '''[[UFOs (Long War)#Harvester|Harvester]]'''|| 6000 || 100% || 15% || 1x Double Plasma || The Harvester class of UFO seems to have one role - to recover important biological materials and minerals from Earth in support of other alien operations. We should try to interdict alien harvest operations whenever possible to slow the alien advance. These craft may be vulnerable to a concentrated attack. |
|-align="center" | |-align="center" | ||
| − | |<div style="background:#333333">[[Image: UFO-Analysis_Transport.png|center|128x64px]]</div> '''Transport'''|| | + | |<div style="background:#333333">[[Image: UFO-Analysis_Transport.png|center|128x64px]]</div> '''[[UFOs (Long War)#Transport|Transport]]'''|| 5000 || 160% || 0% || 1x Double Plasma || This ponderously slow craft will be a tough nut to crack. It appears to be primarily used in alien terrestrial resource-gathering but could also be used in support of other major alien operations. |
|-align="center" | |-align="center" | ||
| − | |<div style="background:#333333">[[Image: UFO-Analysis_TerrorShip.png|center|128x64px]]</div> '''Terror Ship'''|| | + | |<div style="background:#333333">[[Image: UFO-Analysis_TerrorShip.png|center|128x64px]]</div> '''[[UFOs (Long War)#Terror Ship|Terror Ship]]'''|| 6000 || 125% || 0% || 1x Double Plasma || The rarely encountered Terror Ship appears suited for rapid deployment of alien shock troops. They appear to presage alien terror missions, but they may be used for alien research on XCOM as well. |
|-align="center" | |-align="center" | ||
| − | |<div style="background:#333333">[[Image: UFO-Analysis_AssaultCarrier.png|center|128x64px]]</div> '''Assault Carrier'''|| | + | |rowspan=2|Very Large||<div style="background:#333333">[[Image: UFO-Analysis_AssaultCarrier.png|center|128x64px]]</div> '''[[UFOs (Long War)#Assault Carrier|Assault Carrier]]'''|| 8000 || 140% || 90% || 1x Double Plasma, 1x Single Plasma || The Assault Carrier, while built on a battleship hull, lacks some of its sister's firepower and may be easier to shoot down. Nevertheless, we expect to see the aliens use this craft only against high-value targets, so it should be taken seriously whenever it is detected. |
|-align="center" | |-align="center" | ||
| − | |<div style="background:#333333">[[Image: UFO-Analysis_Battleship.png|center|128x64px]]</div> '''Battleship'''|| | + | |<div style="background:#333333">[[Image: UFO-Analysis_Battleship.png|center|128x64px]]</div> '''[[UFOs (Long War)#Battleship|Battleship]]'''|| 9000 || 180% || 125% || 1x Fusion Lance || An unbelievably dangerous piece of hardware, these UFOs never appear to land but are used in bombing, anti-satellite and air superiority roles. |
|-align="center" | |-align="center" | ||
| − | |<div style="background:#333333">[[Image: UFO-Analysis_Overseer.png|center|128x64px]]</div> '''Overseer'''|| | + | |rowspan=1|Medium||<div style="background:#333333">[[Image: UFO-Analysis_Overseer.png|center|128x64px]]</div> '''[[UFOs (Long War)#Overseer|Overseer]]'''|| 2500 || 200% || 125% || 1x Double Plasma, 1x Single Plasma || This class of ship appears to be used as a airborne command center for the Ethereal race of alien. Only our strongest weapons will be able to penetrate its armor. |
|} | |} | ||
| Line 114: | Line 111: | ||
{|class="wikitable" width="100%" | {|class="wikitable" width="100%" | ||
|- | |- | ||
| − | !rowspan="2" {{Item name (Long War)}}!!rowspan="2"|Health!!rowspan="2"|Armor!!rowspan="2"|Penetration!!rowspan="2"|Speed!!colspan="2"|Prerequisites!!colspan="6"|Cost!!Maintenance | + | !rowspan="2" {{Item name (Long War)}}!!rowspan="2"|Health!!rowspan="2"|Armor!!rowspan="2"|Armor Penetration!!rowspan="2"|Speed!!colspan="2"|Prerequisites!!colspan="6"|Cost!!Maintenance |
|-align="center" | |-align="center" | ||
|{{Research required (Long War)}}||{{Engineers required (Long War)}}||{{Credits cost (Long War)}}||{{Alloys cost (Long War)}}||{{Elerium cost (Long War)}}||{{Meld cost (Long War)}}||{{Items cost (Long War)}}||{{Time cost (Long War)}}||{{Maintenance cost (Long War)}} | |{{Research required (Long War)}}||{{Engineers required (Long War)}}||{{Credits cost (Long War)}}||{{Alloys cost (Long War)}}||{{Elerium cost (Long War)}}||{{Meld cost (Long War)}}||{{Items cost (Long War)}}||{{Time cost (Long War)}}||{{Maintenance cost (Long War)}} | ||
|-align="center" | |-align="center" | ||
| − | |[[File:Inv Skyranger.png|128px|link= | + | |[[File:Inv Skyranger.png|128px|link=Air Combat (Long War)#Aircraft|Skyranger]]<br />'''[[Air Combat (Long War)#Aircraft|Skyranger]]'''||colspan="4"|Can't be damaged or destroyed||colspan="8"|XCOM starts with one, unable to produce more||title="Cost in Credits"|20 |
|-align="center" | |-align="center" | ||
| − | |[[File:Inv Satellite.png|128px|link= | + | |[[File:Inv Satellite.png|128px|link=Air Combat (Long War)#Aircraft|Satellite]]<br />'''[[Air Combat (Long War)#Aircraft|Satellite]]'''||colspan="4"|Increases funding and provides unique bonuses|| ||10||title="Cost in Credits (Cost when building quickly)"|200<br />(300)|| || ||title="Cost in Meld (Cost when building quickly)"|0<br />(7)|| ||title="Duration in days (Duration when building quickly)"|25 days<br />(12.5 days)|| |
|-align="center" | |-align="center" | ||
| − | |[[File:Inv Interceptor.png|128px|link= | + | |[[File:Inv Interceptor.png|128px|link=Air Combat (Long War)#Aircraft|Interceptor]]<br />'''[[Air Combat (Long War)#Aircraft|Interceptor]]'''||2500||25%||0%||10|| || ||title="Cost in Credits"|200|| || || || ||title="Duration in days"|3 days||title="Cost in Credits"|40 |
|-align="center" | |-align="center" | ||
| − | |[[File:Inv Firestorm.png|128px|link= | + | |[[File:Inv Firestorm.png|128px|link=Air Combat (Long War)#Aircraft|Firestorm]]<br />'''[[Air Combat (Long War)#Aircraft|Firestorm]]'''||4000||125%||25%||15||[[Research (Long War)#Materials and Aerospace|Alien Propulsion]]||75||title="Cost in Credits (Cost when building quickly)"|750<br />(1125)||title="Cost in Alien Alloys (Cost when building quickly)"|180<br />(270)||title="Cost in Elerium (Cost when building quickly)"|120<br />(180)||title="Cost in Meld (Cost when building quickly)"|10<br />(30)||8 [[Alien Artifacts (Long War)#Alien devices|UFO Flight Computers]]<br />4 [[Alien Artifacts (Long War)#Alien devices|UFO Power Sources]]||title="Duration in days (Duration when building quickly)"|28 days<br />(14.0 days)||title="Cost in Credits"|50 |
|} | |} | ||
| Line 130: | Line 127: | ||
{|class="wikitable" width="100%" | {|class="wikitable" width="100%" | ||
|- | |- | ||
| − | !rowspan="2" {{Item name (Long War)}}!!rowspan="2"|Hit chance!!rowspan="2"|Damage!!rowspan="2"|Penetration!!rowspan="2"|Firing<br />cooldown!!colspan="2"|Prerequisites!!colspan="6"|Cost | + | !rowspan="2" {{Item name (Long War)}}!!rowspan="2"|Hit chance!!rowspan="2"|Damage!!rowspan="2"|Armor Penetration!!rowspan="2"|Firing<br />cooldown!!colspan="2"|Prerequisites!!colspan="6"|Cost!!rowspan="2" {{Sell value (Long War)}} |
|-align="center" | |-align="center" | ||
|{{Research required (Long War)}}||{{Engineers required (Long War)}}||{{Credits cost (Long War)}}||{{Alloys cost (Long War)}}||{{Elerium cost (Long War)}}||{{Meld cost (Long War)}}||{{Items cost (Long War)}}||{{Time cost (Long War)}} | |{{Research required (Long War)}}||{{Engineers required (Long War)}}||{{Credits cost (Long War)}}||{{Alloys cost (Long War)}}||{{Elerium cost (Long War)}}||{{Meld cost (Long War)}}||{{Items cost (Long War)}}||{{Time cost (Long War)}} | ||
|-align="center" | |-align="center" | ||
| − | |[[File:Avalanche Missiles Long War.png|128px|link= | + | |[[File:Avalanche Missiles Long War.png|128px|link=Air Combat (Long War)#Interceptor Weapons|Avalanche Missiles]]<br />'''[[Air Combat (Long War)#Interceptor Weapons|Avalanche Missiles]]'''||title="Def / Bal / Agg "|25% / 40% / 55%||340<br />(170 per second)||0%||2.0 second||colspan="8"|XCOM starts with an unlimited supply|| |
| + | |-align="center" | ||
| + | |[[File:Stingray Missiles Long War.png|128px|link=Air Combat (Long War)#Interceptor Weapons|Stingray Missiles]]<br />'''[[Air Combat (Long War)#Interceptor Weapons|Stingray Missiles]]'''||title="Def / Bal / Agg "|25% / 40% / 55%||200<br />(133 per second)||50%||1.5 second||colspan="8"|XCOM starts with an unlimited supply|| | ||
| + | |-align="center" | ||
| + | |[[File:Phoenix Coilgun Long War.png|128px|link=Air Combat (Long War)#Interceptor Weapons|Phoenix Cannon]]<br />'''[[Air Combat (Long War)#Interceptor Weapons|Phoenix Cannon]]'''||title="Def / Bal / Agg "|25% / 40% / 55%||140<br />(183 per second)||25%||0.75 second||[[Research (Long War)#Materials and Aerospace|Alien Materials]]||15||title="Cost in Credits (Cost when building quickly)"|120<br />(180)||title="Cost in Alien Alloys (Cost when building quickly)"|12<br />(18)|| ||title="Cost in Meld (Cost when building quickly)"|0<br />(5)|| ||title="Duration in days (Duration when building quickly)"|10 days<br />(5.0 days)||48 | ||
|-align="center" | |-align="center" | ||
| − | |[[File: | + | |[[File:Phoenix Coilgun Long War.png|128px|link=Air Combat (Long War)#Interceptor Weapons|Phoenix Cannon]]<br />'''[[Air Combat (Long War)#Interceptor Weapons|Phoenix Coilgun]]'''||title="Def / Bal / Agg "|25% / 40% / 55%||230<br />(307 per second)||90%||0.75 second||[[Foundry (Long War)#Aerospace Improvements|Phoenix Coilguns (Foundry)]]|| || || || || || || || |
|-align="center" | |-align="center" | ||
| − | |[[File: | + | |[[File:Laser Cannon Long War.png|128px|link=Air Combat (Long War)#Interceptor Weapons|Laser Cannon]]<br />'''[[Air Combat (Long War)#Interceptor Weapons|Laser Cannon]]'''||title="Def / Bal / Agg "|40% / 55% / 70%||290<br />(290 per second)||25%||1.0 second||[[Research (Long War)#Laser and Gauss Weapons|Advanced Beam Lasers]]||25||title="Cost in Credits (Cost when building quickly)"|160<br />(240)||title="Cost in Alien Alloys (Cost when building quickly)"|30<br />(45)|| ||title="Cost in Meld (Cost when building quickly)"|0<br />(6)|| ||title="Duration in days (Duration when building quickly)"|10 days<br />(5.0 days)||64 |
|-align="center" | |-align="center" | ||
| − | |[[File:Laser Cannon Long War.png|128px|link= | + | |[[File:Laser Cannon Long War.png|128px|link=Air Combat (Long War)#Interceptor Weapons|Laser Cannon]]<br />'''[[Air Combat (Long War)#Interceptor Weapons|Pulse Cannon]]'''||title="Def / Bal / Agg "|40% / 55% / 70% ||300<br />(400 per second)||55%||0.75 second||[[Foundry (Long War)#Aerospace Improvements|Supercapacitors (Foundry)]]|| || || || || || || || |
|-align="center" | |-align="center" | ||
| − | |[[File:Plasma Cannon Long War.png|128px|link= | + | |[[File:Plasma Cannon Long War.png|128px|link=Air Combat (Long War)#Interceptor Weapons|Plasma Cannon]]<br />'''[[Air Combat (Long War)#Interceptor Weapons|Plasma Cannon]]'''||title="Def / Bal / Agg "|25% / 40% / 55%||650<br />(650 per second)||110%||1.0 second||[[Research (Long War)#Plasma Weapons|Vehicular Plasma Weapons]]||95||title="Cost in Credits (Cost when building quickly)"|500<br />(750)||title="Cost in Alien Alloys (Cost when building quickly)"|50<br />(75)||title="Cost in Elerium (Cost when building quickly)"|60<br />(90)||title="Cost in Meld (Cost when building quickly)"|5<br />(19)||1 [[Alien Artifacts (Long War)#Alien weapons|Alien Rifle]]||title="Duration in days (Duration when building quickly)"|14 days<br />(7.0 days)||200 |
|-align="center" | |-align="center" | ||
| − | |[[File:EMP Cannon Long War.png|128px|link= | + | |[[File:EMP Cannon Long War.png|128px|link=Air Combat (Long War)#Interceptor Weapons|EMP Cannon]]<br />'''[[Air Combat (Long War)#Interceptor Weapons|EMP Cannon]]'''||title="Def / Bal / Agg "|15% / 30% / 45%||310<br />(563 per second)||150%||0.55 second||[[Research (Long War)#Laser and Gauss Weapons|Electromagnetic Pulse Weapons]]||100||title="Cost in Credits (Cost when building quickly)"|575<br />(862)||title="Cost in Alien Alloys (Cost when building quickly)"|60<br />(90)||title="Cost in Elerium (Cost when building quickly)"|160<br />(240)||title="Cost in Meld (Cost when building quickly)"|0<br />(16)||1 [[Alien Artifacts (Long War)#Aliens|Sectopod Wreck]]||title="Duration in days (Duration when building quickly)"|20 days<br />(10.0 days)||230 |
|-align="center" | |-align="center" | ||
| − | |[[File:Fusion Lance Long War.png|128px|link= | + | |[[File:Fusion Lance Long War.png|128px|link=Air Combat (Long War)#Interceptor Weapons|Fusion Lance]]<br />'''[[Air Combat (Long War)#Interceptor Weapons|Fusion Lance]]'''||title="Def / Bal / Agg "|15% / 30% / 45%||1200<br />(960 per second)||130%||1.25 second||[[Research (Long War)#Plasma Weapons|Fusion Weapons]]||120||title="Cost in Credits (Cost when building quickly)"|800<br />(1200)||title="Cost in Alien Alloys (Cost when building quickly)"|70<br />(105)||title="Cost in Elerium (Cost when building quickly)"|120<br />(180)||title="Cost in Meld (Cost when building quickly)"|40<br />(62)||1 [[Alien Artifacts (Long War)#Alien devices|Fusion Core]]||title="Duration in days (Duration when building quickly)"|25 days<br />(12.5 days)||320 |
|} | |} | ||
| Line 152: | Line 153: | ||
{|class="wikitable" width="100%" | {|class="wikitable" width="100%" | ||
|- | |- | ||
| − | !rowspan="2" {{Item name (Long War)}}!!rowspan="2" {{Special properties (Long War)}}!!colspan="2"|Prerequisites!!colspan="6"|Cost | + | !rowspan="2" {{Item name (Long War)}}!!rowspan="2" {{Special properties (Long War)}}!!colspan="2"|Prerequisites!!colspan="6"|Cost!!rowspan="2" {{Sell value (Long War)}} |
|-align="center" | |-align="center" | ||
|{{Research required (Long War)}}||{{Engineers required (Long War)}}||{{Credits cost (Long War)}}||{{Alloys cost (Long War)}}||{{Elerium cost (Long War)}}||{{Meld cost (Long War)}}||{{Items cost (Long War)}}||{{Time cost (Long War)}} | |{{Research required (Long War)}}||{{Engineers required (Long War)}}||{{Credits cost (Long War)}}||{{Alloys cost (Long War)}}||{{Elerium cost (Long War)}}||{{Meld cost (Long War)}}||{{Items cost (Long War)}}||{{Time cost (Long War)}} | ||
|-align="center" | |-align="center" | ||
| − | |[[File:UFO Tracking Long War.png|128px|link= | + | |[[File:UFO Tracking Long War.png|128px|link=Air Combat (Long War)#Modules|UFO Tracking (Boost)]]<br />'''[[Air Combat (Long War)#Modules|UFO Tracking (Boost)]]'''||Increases the duration of this air combat by 5 seconds||[[Research (Long War)#Materials and Aerospace|Alien Materials]]<br />[[Foundry (Long War)#Aerospace Improvements|Aircraft Boosters]]||12||title="Cost in Credits (Cost when building quickly)"|15<br />(22)|| ||title="Cost in Elerium (Cost when building quickly)"|1<br />(1)||title="Cost in Meld (Cost when building quickly)"|1<br />(3)||2 [[Alien Artifacts (Long War)#Aliens|Drone Wrecks]]||title="Duration in days (Duration when building quickly)"|5 days<br />(2.5 days)||6 |
|-align="center" | |-align="center" | ||
| − | |[[File:Defense Matrix Long War.png|128px|link= | + | |[[File:Defense Matrix Long War.png|128px|link=Air Combat (Long War)#Modules|Defense Matrix (Dodge)]]<br />'''[[Air Combat (Long War)#Modules|Defense Matrix (Dodge)]]'''||Dodges the next two incoming attacks||[[Research (Long War)#Alien Autopsies|Cyberdisc Autopsy]]<br />[[Foundry (Long War)#Aerospace Improvements|Aircraft Boosters]]||50||title="Cost in Credits (Cost when building quickly)"|25<br />(37)|| ||title="Cost in Elerium (Cost when building quickly)"|2<br />(3)||title="Cost in Meld (Cost when building quickly)"|1<br />(3)||2 [[Alien Artifacts (Long War)#Aliens|Cyberdisc Wrecks]]||title="Duration in days (Duration when building quickly)"|5 days<br />(2.5 days)||10 |
|-align="center" | |-align="center" | ||
| − | |[[File:Uplink Targeting Long War.png|128px|link= | + | |[[File:Uplink Targeting Long War.png|128px|link=Air Combat (Long War)#Modules|Uplink Targeting (Aim)]]<br />'''[[Air Combat (Long War)#Modules|Uplink Targeting (Aim)]]'''||Automatically hits the next two attacks||[[Research (Long War)#Alien Autopsies|Floater Autopsy]]<br />[[Foundry (Long War)#Aerospace Improvements|Aircraft Boosters]]||35||title="Cost in Credits (Cost when building quickly)"|20<br />(30)||title="Cost in Alien Alloys (Cost when building quickly)"|1<br />(1)||title="Cost in Elerium (Cost when building quickly)"|1<br />(1)||title="Cost in Meld (Cost when building quickly)"|1<br />(3)||3 [[Alien Artifacts (Long War)#Aliens|Floater Corpses]]||title="Duration in days (Duration when building quickly)"|5 days<br />(2.5 days)||8 |
|} | |} | ||
| − | === | + | ==Strategy== |
| − | ( | + | |
| − | + | ===Interception Tactics=== | |
| − | |- | + | * You can have more than six interceptors when you defend one continent. Store your spare interceptors on other continents and swap them in for damaged Interceptors. |
| − | + | ** Transit time puts repair times on pause, making the damaged interceptor take a few extra days to repair, but transferring in a new Interceptor from another continent will almost always be far quicker than the days it'll take to wait on repairs. | |
| − | + | * Always be prepared to cancel an interception if the engagement is not going well for you. Losing an aircraft with an expensive weapons can be devastating to your resources. | |
| − | | | + | * Mashing the Escape key instantly after aborting, and then quickly re-selecting mission control and the UFO will allow you to send a new interceptor out without having to wait for the first one to fly back to base. This can give you marginally more time to down the UFO before it escapes. |
| + | ** If the interceptor you aborted with wasn't damaged, you can even send the same interceptor back mid-air and instantly re-engage, without having to fly back & forth and refuel. Use the spacebar key as you bring up the hologlobe to quickly engage the topmost UFO contact, then quickly select your interceptor before it flies too far back to base. | ||
| + | * If your interceptor fleet is barely holding on, consider aborting when a UFO on a Scout (flying Low) or Hunt mission (flashing purple on the map and flying at High altitude) displays continuous explosion effects, as if it is being hit repeatedly by attacks. This means the UFO has accumulated over 50% damage, which guarantees the failure of their Scout or Hunt mission. You won't get any rewards, but you won't accrue any additional repair times. | ||
| + | ** UFOs tend to flee into orbit when at 50% of HP or less, robbing you of the opportunity to shoot them down for supplies. Try to keep the pressure up. | ||
| + | * Have an idea of how many interceptions are possible before UFO completes its mission or attempts to escape. For example Scouts usually can only be engaged twice with Ravens. | ||
| + | ** Your choice of starting continent and country is also key, as your starting country determines your starting base location; for instance, USA is centrally located in the moderately-sized North America continent, frequently allowing up to 3 interceptions with Scouts in any of the three countries. | ||
| + | ** Meanwhile, Russia is massive and thus difficult to cover as a starting country without losing a few UFOs. Similarly, Australia as a starting country has difficulty intercepting UFOs in other Asia countries due to the long distance between them. | ||
| + | * Use modules in tough situations when you need an extra boost to get the job done. Dodge Module can be used on Defensive and Balanced tactics, Aim Module can be used on Balanced and Aggressive tactics, and Boost module can be used on any stance. The modules are much more worthwhile-- nearly essential-- in Long War. As they do take time to build, it pays to maintain a stock of them. | ||
| + | ** The Aim module is fairly cheap, and is useful throughout a campaign. Keep a large stock of Floater corpses to make these. While an aggressive stance means that all shots have more accuracy, using an Aim module early in a Balanced stance dogfight means drawing first blood while being a little harder to be hit yourself. | ||
| + | ** The Boost module can be used in any stance, and only extends time (as all air-to-air weapons now are counted as 'long range', approach reduction time no longer is affected). More useful in early game, when you need more time to do enough damage with the weaker weapons and less experienced pilots. | ||
| + | ** The Dodge module is exceedingly useful, and still hard to make, due to the necessity of Cyberdisc wrecks needed to construct them. | ||
| + | |||
| + | ===Strategic Plan=== | ||
| + | |||
| + | ====Early Game==== | ||
| + | |||
| + | In the early months, you'll want to ensure UFOs are downed so you can harvest them for supplies and earn troop XP, and sending 2 Interceptors (occasionally even 3 in the worst case) to each [[UFOs (Long War)#Scout|Scout]] or [[UFOs (Long War)#Fighter|Fighter]] that you find on ''Aggressive'' stance is your best bet. To do so, you'll want to buy many interceptors, more than the 6 slots you have available in your starting continent, using other continents to store interceptors as backup and perform lengthy (>15 day) repairs while your starting continent remains stocked with 4-6 interceptors ready to handle any back-to-back UFO contacts. Each early UFO contact you down will practically pay an entire Interceptor in corpses and materials, though you obviously need to save some of it for research and production. | ||
| + | |||
| + | That being said, your goal should be to stack kills on a small handful of interceptors (up to 10 kills per Interceptor) by having it finish off UFOs softened up by others. Interceptor Pilots gain +3% hit chance per downed UFO, up to a maximum of +30% at 10 kills (they also get +1% damage per kill with no cap). Once your Interceptor is getting a solid +15-30% aim bonus, you can switch them over to ''Balanced'' or even ''Defensive'' to reduce damage and repair times to the interceptor while still ensuring UFOs are downed, or even outfit it with upgraded weapons to take on tougher UFOs. | ||
| + | |||
| + | You start with [[Air Combat (Long War)#Interceptor Weapons|Avalanche]] and [[Air Combat (Long War)#Interceptor Weapons|Stingray]] missiles as potential armaments. These will work for all small and a few medium UFO contacts, until Aliens stockpile enough resources and/or research to field better UFOs. [[Air Combat (Long War)#Interceptor Weapons|Avalanche]] is effective against the unarmored [[UFOs (Long War)#Scout|Scouts]], while [[Air Combat (Long War)#Interceptor Weapons|Stingray]] are optimal for the moderately-armored [[UFOs (Long War)#Fighter|Fighters]]. | ||
| + | |||
| + | '''[[UFOs (Long War)#Scout|Scouts]]''' will be sent out regularly to attempt to locate your Satellites, anywhere from 3 in the early months all the way up to 6 later on. UFOs on '''[[Alien Missions (Long War)#Scout|Scout]]''' missions (i.e. the mission type, not the UFO type) can be easily identified as they'll be flying ''Low''. Ideally, you'll have 2 Interceptors armed with Avalanche missiles at all times to down any Scouts that show up. If not, they have a chance to fail in their mission both randomly and as a result of damage. If the scout mission is successful, they'll spawn a [[UFOs (Long War)#Fighter|Fighter]] shortly afterwards on a [[Alien Missions (Long War)#Hunt|Hunt]] mission, which you'll have to intercept with probably at least 2 [[Air Combat (Long War)#Interceptor Weapons|Stingray]] or lose the Satellite. | ||
| + | |||
| + | Even if you've shot down all the [[UFOs (Long War)#Scout|Scouts]] that showed up, occasionally the aliens will still send '''[[UFOs (Long War)#Fighter|Fighters]]''' to target your satellites anyways. UFOs on '''[[Alien Missions (Long War)#Hunt|Hunt]]''' missions can be easily identified as they'll be flying ''High'' and flashing purple on the radar screen. Much like [[UFOs (Long War)#Scout|Scouts]], they have a low chance to fail outright that increases the more damage you inflict to the UFO, with a guaranteed fail after 50% damage. If you've done a decent job shooting down UFOs in the first month (and thus have got the [[Threat (Long War)|attention of the aliens]]), you'll typically see at least 1 [[Alien Missions (Long War)#Hunt|Hunt]] mission starting in the second month, which will require at least 2 [[Air Combat (Long War)#Interceptor Weapons|Stingray]]-armed Interceptors to down, possibly 3. Expect to see additional direct [[Alien Missions (Long War)#Hunt|Hunt]] missions show up occasionally by the third month if you're doing a good job downing UFOs. For more information on how many of each mission spawns, see [[Alien_Missions_(Long_War)#Mission_Occurences|this table]]. | ||
| + | |||
| + | As an aside, when you down a UFO and successfully assault it, you'll unlock a [[Research_(Long_War)#UFO_Analysis|UFO Analysis]] research project associated with that UFO type. Completing it will grant your interceptors a nifty +10% damage bonus against that UFO type and also award you +20% extra materials (elerium and alloys) when you assault it with your ground forces. While taking a pitstop to research a [[Research_(Long_War)#UFO_Analysis|UFO Analysis]] might delay other crucial research, it's quite useful to grab the analysis project when you have the chance, particularly for UFOs you either encounter frequently ([[UFOs (Long War)#Scout|Scouts]], [[UFOs (Long War)#Fighter|Fighters]], and [[UFOs (Long War)#Raider|Raiders]] in the early months) or currently have the military capacity to shoot down (based on this guide). You'll get a nice boost to your economy and air game if you do so. | ||
| + | |||
| + | Anyways, '''[[UFOs (Long War)#Raider|Raiders]]''' are a Medium-sized UFO that will tend to start showing up around April or May, either in place of [[UFOs (Long War)#Scout|Scouts]] or [[UFOs (Long War)#Fighter|Fighters]]. Both [[Air Combat (Long War)#Interceptor Weapons|Avalanche]] and [[Air Combat (Long War)#Interceptor Weapons|Stingray]] are equally mediocre at dealing with [[UFOs (Long War)#Raider|Raiders]], although 3-4 interceptions will usually do it (be prepared to cripple your Interceptor Bay). You can avoid [[UFOs (Long War)#Raider|Raiders]] on [[Alien Missions (Long War)#Scout|Scout]] missions if need be, as they have a chance to spawn a [[UFOs (Long War)#Fighter|Fighter]] on the followup [[Alien Missions (Long War)#Hunt|Hunt]] mission which is easier to kill. But if the [[UFOs (Long War)#Raider|Raiders]] returns on the [[Alien Missions (Long War)#Hunt|Hunt]] mission, it will cost you a stack of $200 credits to replace that Satellite if you don't at least cut it to 50% HP. If you can develop the military capacity to down them, either through buying more Interceptors or by improving their weapons, it offers more aliens to defeat and more materials to harvest. | ||
| + | |||
| + | If you want to reliably down [[UFOs (Long War)#Raider|Raiders]], you can build a '''[[Air Combat (Long War)#Interceptor Weapons|Phoenix Cannon]]''' or two once you research ''[[Research (Long War)#Materials_and_Aerospace|Alien Materials]]''. Not only are they equally good as if not better than the other two weapon types you have access to ([[Air Combat (Long War)#Interceptor Weapons|Avalanche]] and [[Air Combat (Long War)#Interceptor Weapons|Stingray]]) against both [[UFOs (Long War)#Scout|Scouts]] and [[UFOs (Long War)#Fighter|Fighters]], they're also decently better than both against [[UFOs (Long War)#Raider|Raiders]]. Two will usually be sufficient to take out [[UFOs (Long War)#Raider|Raiders]] on Aggressive; you could instead go Balanced, but you'll probably have to send an [[Air Combat (Long War)#Interceptor Weapons|Avalanche]] or [[Air Combat (Long War)#Interceptor Weapons|Stingray]] to clean up. Four Interceptors armed with [[Air Combat (Long War)#Interceptor Weapons|Avalanche]] missiles and two armed with [[Air Combat (Long War)#Interceptor Weapons|Phoenix Cannon]] is a versatile Interceptor setup for the first month or two that should be able to take on two [[UFOs (Long War)#Scout|Scouts]] (the most common UFO type you'll see) as well as either a [[UFOs (Long War)#Raider|Raider]], [[UFOs (Long War)#Fighter|Fighter]], or third [[UFOs (Long War)#Scout|Scout]] in a short window. It's entirely reasonable to build no [[Air Combat (Long War)#Interceptor Weapons|Phoenix Cannon]] at all, though, and instead just rush [[Air Combat (Long War)#Interceptor Weapons|Laser Cannons]], which are the strongest against all three types. | ||
| + | |||
| + | Additionally, the aforementioned [[Research (Long War)#Materials_and_Aerospace|Alien Materials]] research will also unlock the '''[[Foundry_(Long_War)#Aerospace_Improvements|Aircraft Boosters]]''' foundry project. These allow you to build and deploy three different single-use consumables to boost an individual engagement. '''[[Air_Combat_(Long_War)#Modules|Boost Modules]]''' (aka "UFO Tracking") are available immediately at the lowest cost, requiring two ''Drone wrecks'' and a small amount of cash and materials; they freeze the engagement timer for 5 seconds, giving you extra time to finish a contact. Keep a floating stock of a couple of these, and use them liberally in the moments just before you run out of time if you need an extra couple seconds to finish off a UFO. Once you've autopsied a [[Alien_Life_Forms_(Long_War)#Floater|Floater]], you'll get access to '''[[Air_Combat_(Long_War)#Modules|Aim Modules]]''' (aka "Uplink Targeting"), which are a little more expensive and also require three ''Floater corpses'' (which are used for quite a number of other things, mind you); this module causes your next two shots to automatically hit, but the booster cannot be used while on Defensive stance. Lastly, autopsy a ''Cyberdisc Wreck'' and you'll unlock access to the most expensive module available, the '''[[Air_Combat_(Long_War)#Modules|Dodge Module]]''' (aka "Defense Matrix"), which requires the most resources including the relatively rare ''Cyberdisc Wrecks''; it causes you to automatically dodge the next two attacks, but the booster cannot be used while on Aggressive stance. You probably won't have enough resources to use either Aim or Dodge modules as liberally as you will Boost modules, so I would save them for taking on particularly dangerous UFOs (see below). | ||
| + | |||
| + | The '''[[Air Combat (Long War)#Interceptor Weapons|Laser Cannon]]''' becomes available after researching ''[[Research (Long War)#Laser and Gauss Weapons|Advanced Beam Lasers]]''; they are highly accurate (with +15% more accuracy than other interceptor weapons), fast firing, and powerful weapons (they have almost twice the DPS of [[Air Combat (Long War)#Interceptor Weapons|Avalanche]] and [[Air Combat (Long War)#Interceptor Weapons|Stingray]]), and their accuracy boost synergizes well with ''Defensive'' stance: a single experienced pilot (5+ kills) can reliably down [[UFOs (Long War)#Scout|Scouts]] solo, and has a good shot at taking down [[UFOs (Long War)#Fighter|Fighters]] and [[UFOs (Long War)#Raider|Raiders]] too, all while taking nearly zero damage in return. You'll want [[Air Combat (Long War)#Interceptor Weapons|Laser Cannon]] on as many of your Interceptors as you can afford (eventually all of them); ensure your best pilots get [[Air Combat (Long War)#Interceptor Weapons|Laser Cannon]] first and feed them even more kills, up to at least 10 each to maximize their accuracy. | ||
| + | |||
| + | ====Mid Game==== | ||
| + | |||
| + | If you research [[Research_(Long_War)#Materials_and_Aerospace|Alien Computers]] (note it requires 4 Flight Computers) and then autopsy a ''Seeker'', you'll unlock the '''[[Foundry_(Long_War)#Aerospace_Improvements|UFO Countermeasures]]''' Foundry project, which will reduce enemy UFO accuracy by -15%; combine this with Defensive stance for another -15% hit chance, and small enemy UFOs will be looking at a piddly 3% base accuracy (though keep in mind they get +2% accuracy every 30 points of [[Alien_Research (Long War)|Alien Research]], which at bare minimum increases by 1 per day). If you can outfit your entire Interceptor Fleet with [[Air Combat (Long War)#Interceptor Weapons|Laser Cannon]] (a costly endeavor, to be sure, though the North American continent bonus is very strong here), then the combined bonus to your aim (from lasers) and penalty to their aim (from Defensive stance and UFO Countermeasures) will make [[UFOs (Long War)#Scout|Scouts]], [[UFOs (Long War)#Fighter|Fighters]], and [[UFOs (Long War)#Raider|Raiders]] a joke to deal with. These will be the vast majority of contacts you face in the early and mid game, and you can easily defend an entire continent with just 3 [[Air Combat (Long War)#Interceptor Weapons|Laser Cannons]] on ''Defensive''. Your high kill (8+) interceptor pilots should probably be put on reserve to tackle [[UFOs (Long War)#Raider|Raiders]] and potentially even [[UFOs (Long War)#Destroyer|Destroyers]], while low kill pilots can be trained up on [[UFOs (Long War)#Scout|Scouts]] and [[UFOs (Long War)#Fighter|Fighters]]. At this point, you'll have almost everything you need to dominate the skies for quite some time, and the goal from here on is to maintain this momentum. | ||
| − | + | When you research ''[[Research (Long War)#Laser and Gauss Weapons|Advanced Gauss Weapons]]'', the '''[[Foundry (Long War)#Aerospace Improvements|Phoenix Coilguns]]''' Foundry project becomes available, which significantly boosts the damage (+64%) and armor penetration (+65%) of your [[Air Combat (Long War)#Interceptor Weapons|Phoenix Cannons]] (assuming you built any). While the accuracy boost that [[Air Combat (Long War)#Interceptor Weapons|Laser Cannons]] provide makes them incredibly useful for the small UFO types, [[Air Combat (Long War)#Interceptor Weapons|Phoenix Coilguns]] can be used for the larger, heavily armed UFO contacts. You won't spot them often and you could probably eat the loss associated with just not having the military capacity to handle them, but the option is there. | |
| − | | Advanced | ||
| − | | | ||
| − | | | ||
| − | | | ||
| − | |||
| − | |||
| − | |||
| − | |||
| − | |||
| − | |||
| − | |||
| − | |- | + | In this case, with just the [[Air Combat (Long War)#Interceptor Weapons|Phoenix Coilguns]] upgrade and nothing else, your mid-tier pilots should be able to take on [[UFOs (Long War)#Destroyer|Destroyers]] and [[UFOs (Long War)#Harvester|Harvesters]]. There isn't much reason to down a '''[[UFOs (Long War)#Harvester|Harvester]]''', as they always fly '''NoE''' and land, allowing you to assault them directly. '''[[UFOs (Long War)#Destroyer|Destroyers]]''', on the other hand, are high priority targets. These Medium-sized ships may appear in place of [[UFOs (Long War)#Raider|Raiders]] and [[UFOs (Long War)#Fighter|Fighters]] as early as June if the aliens have [[Alien Resources (Long War)|high enough resources]], to either [[Alien Missions (Long War)#Hunt|Hunt]] your UFOs or [[Alien Missions (Long War)#Bomb|Bomb]] cities, spreading panic. They're heavily armored, but one or two decent (3+ kill) pilots with [[Air Combat (Long War)#Interceptor Weapons|Phoenix Coilguns]] should be able to down them, as can two or three elite (~10 kill) pilots with [[Air Combat (Long War)#Interceptor Weapons|Laser Cannons]]. Aim and Dodge [[Air_Combat_(Long_War)#Modules|Modules]] are a really good investment here to keep your Satellites from being shot down and earn you a juicy medium UFO crash site to raid for supplies, but keep in mind you need to be on ''Balanced'' stance if you want to use both. |
| − | | | ||
| − | | | ||
| − | | | ||
| − | | Alien | ||
| − | | | ||
| − | | | ||
| − | | | ||
| − | |||
| − | | 10 | ||
| − | | | ||
| − | | | ||
| − | | | + | '''[[Alien Missions (Long War)#Bomb|Bomb]]''' missions spike panic in the country by +8, plus an additional +2 if the UFO is completely ignored. Unlike [[Alien Missions (Long War)#Scout|Scout]] and [[Alien Missions (Long War)#Hunt|Hunt]], which target XCOM operations directly and show up regularly from the beginning of the game, [[Alien Missions (Long War)#Bomb|Bombing]] missions show up later and tend to target countries with high panic as well as those near their [[Alien Base (Long War)|established holdings]]. As you expand out of your starting continent to new locations with much higher accrued panic, you'll most likely start to spot [[UFOs (Long War)#Fighter|Fighters]] and [[UFOs (Long War)#Destroyer|Destroyers]] (and eventually, [[UFOs (Long War)#Battleship|Battleships]]) showing up to [[Alien Missions (Long War)#Bomb|Bomb]] high panic countries. You can identify a bombing run if you spot any of those three ships flying '''NoE''' as these ships ''never'' land and will flash purple on the radar (similarly to UFOs on [[Alien Missions (Long War)#Hunt|Hunt]] missions). |
| − | |||
| − | |||
| − | | | ||
| − | | | ||
| − | | | ||
| − | | | ||
| − | | | ||
| − | | | ||
| − | | | ||
| − | | | ||
| − | | | ||
| − | | | + | The ''[[Research_(Long_War)#Materials_and_Aerospace|Advanced Aerospace Concepts]]'' research project, available in the midgame, will unlock various foundry projects, such as '''[[Foundry_(Long_War)#Aerospace_Improvements|Penetrator Weapons]]''' (+25% Armor Penetration), '''[[Foundry_(Long_War)#Aerospace_Improvements|Wingtip Sparrowhawks]]''' (add automatic half damage Stingrays to all Interceptors), and '''[[Foundry_(Long_War)#Aerospace_Improvements|Advanced Avionics]]''' (+10% accuracy). With all three upgrades, 1-2 decent (3+ kill) pilots armed with [[Air Combat (Long War)#Interceptor Weapons|Laser Cannons]] can imitate the offensive capabilities of the [[Foundry_(Long_War)#Aerospace_Improvements|Phoenix Coilguns]] upgrade and take down [[UFOs (Long War)#Destroyer|Destroyers]]. Likewise, consider acquiring the '''[[Foundry_(Long_War)#Aerospace_Improvements|Armored Fighters]]''' (+1000 Interceptor HP, from 2500 to 3500) to directly increase the survivability of your aircraft vs. UFOs (and also indirectly reduce their repair time, as repairs are proportional to percentage of damage taken). |
| − | | | ||
| − | | | ||
| − | | | ||
| − | | | ||
| − | | | ||
| − | | | ||
| − | |||
| − | |||
| − | |||
| − | |||
| − | |||
| − | |- | + | With all of these upgrades, shooting down [[UFOs (Long War)#Abductor|Abductors]], [[UFOs (Long War)#Transport|Transports]], and [[UFOs (Long War)#Terror Ship|Terror Ships]] becomes possible with 2-3 [[Air Combat (Long War)#Interceptor Weapons|Phoenix Coilguns]] Interceptors, though again keep in mind doing so is more of a luxury than a necessity. '''[[UFOs (Long War)#Abductor|Abductors]]''' always fly NoE and usually generate [[Missions (Long War)#Alien Abductions|Abduction missions]] for cash rewards (although they may also land normally and allow you to assault them in rarer cases); you might consider shooting them down for the alloy and elerium salvage, rather than letting them land for cash. '''[[UFOs (Long War)#Transport|Transports]]''' typically fly '''NoE''' and land, allowing you to assault them, though on occasion their appearance flying '''Low''' (especially while joined by a Battleship) signals an infiltration mission that will instantly force a country to leave the XCOM project. Preventing this is impossible unless XCOM has a Hyperwave Beacon to spot the hidden Overseer the two UFOs are guarding, but fortunately, Infiltration missions are rare unless XCOM is quite far behind the aliens, and you can always Assault the bases they establish. Lastly, '''[[UFOs (Long War)#Terror Ship|Terror Ships]]''' will serve as an advanced warning for an incoming [[Missions (Long War)#Terror Site|Terror mission]] as they screen the airspace in advance of an [[UFOs (Long War)#Assault Carrier|Assault Carrier]]. Shooting them down won't stop the [[Missions (Long War)#Terror Site|Terror mission]], but you'll be able to get a lot of good rewards from it if you can manage to do so and cost the aliens dearly for every terror mission they run. Keep in mind that all of these UFOs (and potentially [[UFOs (Long War)#Destroyer|Destroyers]] in the mid-to-lategame) will be armed with the incredibly powerful '''[[UFOs (Long War)#UFO Weapons|Double Plasma]]''', which has +7% higher base accuracy, 8% faster fire rate, +20% armor penetration, and nearly double (800 vs 450) the damage per shot of the weapons you'll find on smaller UFOs. A single extremely lucky crit from these things can potentially one shot kill an interceptor without [[Foundry_(Long_War)#Aerospace_Improvements|Armored Fighters]], so always make sure you grab that before trying to take on large UFOs. |
| − | | | ||
| − | | | ||
| − | | | ||
| − | | | ||
| − | | | ||
| − | | | ||
| − | | | ||
| − | | | ||
| − | | | ||
| − | |||
| − | |||
| − | | | + | Eventually, you'll unlock research of ''[[Research (Long War)#Laser and Gauss Weapons|Advanced Pulse Lasers]]'' and the '''[[Foundry (Long War)#Aerospace Improvements|Supercapacitors]]''' Foundry Project. This provides a similar boost to all of your [[Air Combat (Long War)#Interceptor Weapons|Laser Cannons]] that [[Foundry (Long War)#Aerospace Improvements|Phoenix Coilguns]] did for all of your [[Air Combat (Long War)#Interceptor Weapons|Phoenix Cannons]]; this time, you're looking at a minor increase in their damage (+3%) but a significant increase to armor penetration (+30%) and fire rate (+33%). Your new [[Air Combat (Long War)#Interceptor Weapons|Pulse Cannons]] will now outperform [[Air Combat (Long War)#Interceptor Weapons|Phoenix Coilguns]] (assuming you have any, as well as the associated upgrade) against most of the above UFOs, but your [[Air Combat (Long War)#Interceptor Weapons|Phoenix Coilguns]] will still be optimal any time you feel like trying to take down a [[UFOs (Long War)#Terror Ship|Terror Ship]] or [[UFOs (Long War)#Abductor|Abductor]]. Of course, as previously mentioned, you don't *have* to shoot down these UFO types if you don't want to. |
| − | | | ||
| − | | | ||
| − | | | ||
| − | | | ||
| − | | | ||
| − | | | ||
| − | | | ||
| − | |||
| − | |||
| − | |||
| − | |||
| − | | | + | You'll be able to construct '''[[Air Combat (Long War)#Aircraft|Firestorms]]''' once you research ''[[Research (Long War)#Materials_and_Aerospace|Alien Propulsion]]''. While these interceptors are extremely expensive and require a massive haul of 8 ''UFO Flight Computers'' and 4 ''UFO Power Sources'', they provides a considerable upgrade over the default [[Air Combat (Long War)#Aircraft|Raven]] interceptor: they come with +1500 HP, +25% Armor Penetration, +100% Armor, and 50% faster flight speeds (letting you reach the UFO faster and also granting you 50% longer engage times); additionally, your most experienced pilot will automatically move into the new craft (bringing their accuracy and damage boosts with them, but leaving the weapon they were armed with behind), and a rookie pilot will be brought in to take over the [[Air Combat (Long War)#Aircraft|Raven]] they leave behind. The additional armor penetration pushes [[Air Combat (Long War)#Interceptor Weapons|Pulse Cannons]] ahead of [[Air Combat (Long War)#Interceptor Weapons|Phoenix Coilguns]] against all aforementioned targets, and in conjunction with the improved survivability will make [[Air Combat (Long War)#Interceptor Weapons|Pulse Cannons]] quite effective against all aforementioned UFOs. |
| − | | | ||
| − | | | ||
| − | |||
| − | | | ||
| − | | | ||
| − | | | ||
| − | |||
| − | |||
| − | |||
| − | |||
| − | |||
| − | | | + | Additionally, Alien Propulsion also unlocks the '''[[Foundry (Long War)#Aerospace Improvements|Elerium Afterburners]]''' Foundry project, which increases your interceptors speed by +5; the easiest way to think about this is a +50% engagement time boost to your [[Air Combat (Long War)#Aircraft|Ravens]] and a +33% engagement time boost to your [[Air Combat (Long War)#Aircraft|Firestorms]]. It doesn't much help if you're outgunned, as it doesn't improve your survivability or damage; if you have to abort early, it does nothing for you, and it's not going to shorten your repair times either. What it does do is twofold: first, you can dish out more total damage over the same number of engagements, which helps against fast or tanky UFOs that escape into orbit before you can finish shooting them down. Second, you also concentrate repair times on a single Interceptor, which can be both a blessing and a curse. You can't use Interceptors to shoot down UFOs while they're damaged, so having 4-5 lightly-damaged interceptors means you're vulnerable to attack for a short window. Conversely, 4-5 lightly-damaged interceptors can all undergo repairs simultaneously, so you'll get them all back sooner than 1-2 heavily damaged ones. |
| − | |||
| − | |||
| − | |||
| − | |||
| − | |||
| − | |||
| − | |||
| − | |||
| − | |||
| − | |||
| − | |||
| − | + | ====Late Game==== | |
| − | |||
| − | |||
| − | |||
| − | |||
| − | |||
| − | |||
| − | |||
| − | |||
| − | |||
| − | |||
| − | |||
| − | | | + | One to two [[Air Combat (Long War)#Aircraft|Firestorms]] piloted by top pilots (10+ kills) with all the aforementioned Foundry projects to boost them (including either [[Air Combat (Long War)#Interceptor Weapons|Pulse Cannons]] or [[Air Combat (Long War)#Interceptor Weapons|Phoenix Coilguns]]), plus a healthy selection of boosters for insurance will be able to take on '''[[UFOs (Long War)#Assault Carrier|Assault Carriers]]'''. These are the third-strongest UFO in the game but have a small chance of dropping ''Fusion Cores'' when shot out of the air, making downing them well worth it. They're also responsible for dropping off the troops for the most difficult missions in the game, namely [[Alien Missions (Long War)#Terrorize|Terrorize]] and [[Alien Missions (Long War)#Retaliate|Retaliate]] missions, and shooting them down means you completely avoid said mission. You'll have a short window to spot and engage them before they arrive at their destination, and nothing short of shooting the UFO out of the sky will have any impact whatsoever. |
| − | | | ||
| − | | | ||
| − | |||
| − | |||
| − | |||
| − | |||
| − | |||
| − | |||
| − | |||
| − | |||
| − | |||
| − | | | + | To finish the game, you'll need to find and shoot down an '''[[UFOs (Long War)#Overseer|Overseer]]'''. [[UFOs (Long War)#Overseer|Overseers]] are hidden on the geoscape until you research ''[[Research_(Long_War)#Xenology|Alien Communications]]'' and construct the ''Hyperwave Beacon'', after which you'll see them floating around the geoscape conducting '''[[Alien Missions (Long War)#Command Overwatch|Command Overwatch]]''' missions. These missions don't have any mechanical impact on the strategic layer like other missions do; they're just there to allow XCOM the opportunity to shoot an [[UFOs (Long War)#Overseer|Overseer]] down. Once you do spot one, you'll find they're extremely fast, heavily armored, and equipped with solid armaments. Their speed makes it difficult to catch them in the geoscape and gives you an extremely short window of engagement once you do engage them; [[Air Combat (Long War)#Aircraft|Firestorms]], [[Foundry (Long War)#Aerospace Improvements|Elerium Afterburners]], and [[Air_Combat_(Long_War)#Modules|Modules]] are all quite useful here, and you'll probably only get a single engagement. Similarly, their extremely high armor renders even [[Air Combat (Long War)#Interceptor Weapons|Pulse Cannons]] impotent against them; if you're trying to shoot them down without end-game interceptor weapons, you'll need a [[Air Combat (Long War)#Interceptor Weapons|Phoenix Coilgun]] mounted to a 10+ kill Firestorm plus every single aforementioned UFO upgrade and a full set of 3 modules to stand chance, and even then you need to get lucky with your engagement (or get a second engagement). Plus, you can never predict which continent the [[UFOs (Long War)#Overseer|Overseer]] will appear in, so unless you want to pray to the RNG gods for month after month you'll want to develop the capacity to down an [[UFOs (Long War)#Overseer|Overseer]] in multiple continents, not just one. |
| − | | | ||
| − | | | ||
| − | | | ||
| − | | | ||
| − | | | ||
| − | | | ||
| − | | | ||
| − | | | ||
| − | | | ||
| − | |||
| − | | | ||
| − | | | + | For a more reliable method of downing an [[UFOs (Long War)#Overseer|Overseer]], you'll need either [[Air Combat (Long War)#Interceptor Weapons|Plasma Cannons]], [[Air Combat (Long War)#Interceptor Weapons|EMP Cannons]], or [[Air Combat (Long War)#Interceptor Weapons|Fusion Lances]] on your [[Air Combat (Long War)#Aircraft|Firestorms]]. Once you're most of the way through Plasma tech, ''[[Research (Long War)#Plasma Weapons|Vehicular Plasma]]'' will unlock '''[[Air Combat (Long War)#Interceptor Weapons|Plasma Cannons]]'''. Each Cannon requires an intact ''Alien Rifle'' to build, which are equipped by mid-to-lategame [[Alien Life Forms (Long War)#Muton|Mutons]] and [[Alien Life Forms (Long War)#Heavy Floater|Heavy Floaters]]; you can only acquire intact enemy weapons by capturing the enemy unit alive with the ''Arc Thrower'' (you'll need to do a lot of this in general to make Plasma tech, so get started with your captures early and often). Your best pilot in a [[Air Combat (Long War)#Aircraft|Firestorm]] with all upgrades and a [[Air Combat (Long War)#Interceptor Weapons|Plasma Cannon]] could be expected to easily solo an [[UFOs (Long War)#Overseer|Overseer]]; you might want to bring two if you want to take on a [[UFOs (Long War)#Battleship|Battleship]] though. |
| − | | | ||
| − | | | ||
| − | | | ||
| − | | | ||
| − | | | ||
| − | | | ||
| − | | | ||
| − | | | ||
| − | | | ||
| − | | | ||
| − | |||
| − | + | Speaking of which, '''[[UFOs (Long War)#Battleship|Battleships]]''' are the ultimate UFO type, and are fielded in many types of UFO missions we discussed previously ([[Alien Missions (Long War)#Scout|Scout]], [[Alien Missions (Long War)#Hunt|Hunt]], and [[Alien Missions (Long War)#Bomb|Bomb]]) whenever enemies have a glut of resources or in the lategame when they've got high resource income per month. These things come armed with a [[UFOs_(Long_War)#UFO_Weapons|Fusion Lance]] that deals 1300-1950 damage per shot at base (almost half the HP of a [[Air Combat (Long War)#Aircraft|Firestorm]] with [[Armored Fighters]]), and 2600-3900 on a crit (just barely less than a one-shot kill on that same UFO type). Defeating these is incredibly difficult and risky, especially since you're risking an extremely expensive [[Air Combat (Long War)#Aircraft|Firestorm]] piloted by a top pilot, but if you ''have'' to take one on, I suggest abusing Aim and Dodge modules and bailing immediately if you get hit once (and of course, only try with full upgrades and one of the three lategame weapons). | |
| − | |||
| − | |||
| − | | | ||
| − | | Alien | ||
| − | | | ||
| − | | | ||
| − | | | ||
| − | | | ||
| − | |||
| − | |||
| − | |||
| − | | | + | ''[[Research_(Long_War)#Laser_and_Gauss_Weapons|EMP Weapons]]'' is an earlier alternative to teching heavily into Plasma, and is available after you've researched both [[Research_(Long_War)#Laser_and_Gauss_Weapons|Advanced Gauss Weapons]] and [[Research_(Long_War)#Laser_and_Gauss_Weapons|Advanced Pulse Lasers]]. Unlike [[Research (Long War)#Plasma Weapons|Plasma]], you don't need a large assortment of captured alien weaponry to research and outfit it, but [[Research (Long War)#Plasma Weapons|Plasma]] also upgrades your ground forces, and is pretty important to tech into before you finish the game, whereas EMP is very much an optional pickup. In any case, the research will unlock the '''[[Air Combat (Long War)#Interceptor Weapons|EMP Cannon]]''', which has low damage per shot, extremely high armor penetration, and a fast fire rate; the net result is slightly worse performance compared to the other two end-game weapons against virtually all UFOs (except [[UFOs (Long War)#Overseer|Overseers]], actually), but they're also the least likely to overkill and destroy the UFO outright, and they also have an innately reduced chance for UFO components like ''UFO Flight Computers'' and ''UFO Power Sources'' to be destroyed on crash; if you want to farm UFO components and resources its... well kind of a luxury item, really, since it comes so late and is so expensive, but it's there, and can be important if you can't tech into Plasma weapons yet because you haven't been keeping up with your alien captures. |
| − | | | ||
| − | | | ||
| − | |||
| − | |||
| − | |||
| − | |||
| − | |||
| − | |||
| − | |||
| − | |||
| − | |||
| − | | | + | With both EMP and Plasma, you'll enable research into ''[[Research_(Long_War)#Plasma_Weapons|Fusion Weapons]]'', which will unlock the '''[[Air Combat (Long War)#Interceptor Weapons|Fusion Lance]]'''. They are the most powerful Interceptor weapons in the game and can only be mounted on [[Air Combat (Long War)#Aircraft|Firestorms]], but consume a rare ''Fusion Core'' to do so; it can be quite difficult to acquire these, but shooting down [[UFOs (Long War)#Assault Carrier|Assault Carriers]] with an [[Air Combat (Long War)#Interceptor Weapons|EMP Cannon]] is your best bet (or just save a spare core from the Slingshot DLC mission). Much like EMP, it's a luxury weapon, but a [[Air Combat (Long War)#Aircraft|Firestorms]] mounted with a [[Air Combat (Long War)#Interceptor Weapons|Fusion Lance]] can utterly dominate the skies; once acquired, you can solo any UFO type you feel like for quite a while. That said, keep in mind the free bonuses enemy UFOs get over time (+75 HP, +8 damage and +2% aim every 30 days, or faster if enemies accumulate large amounts of [[Alien_Research_(Long_War)|Alien Research]]) will eventually stack their accuracy all the way to the cap of 95%, so you'll need to make an effort to finish the game before that happens. You don't want a [[UFOs (Long War)#Battleship|Battleship]] hitting you with 95% accuracy. |
| − | ==See | + | ==See also== |
| + | * [[Foundry (Long War)#Aerospace Improvements|Aerospace Improvements]] | ||
* [[Hangar (Long War)|Hangar]] | * [[Hangar (Long War)|Hangar]] | ||
* [[UFOs (Long War)|UFOs]] | * [[UFOs (Long War)|UFOs]] | ||
[[Category: Long War]] | [[Category: Long War]] | ||
Latest revision as of 20:16, 31 May 2023
Overview
UFOs are tougher, faster, and much deadlier in Long War. Along with that, your crafts and armaments are significantly less potent, at least at first. You will need to cycle your craft regularly like your soldiers.
At the start of the game your fresh pilots are equipped with Avalanche Missiles, which now have an abysmal 40% accuracy. While it is still possible to down the first Scout with one Interceptor, this is an incredibly unlikely event. It's more probable that it would take two, or even three interceptions to bring down even the most basic alien craft.
Players should exert caution and pick and choose their air battles carefully. You will not be able to bring down every single enemy UFO. Sometimes attempting high risk interceptions against tough targets will be detrimental to your campaign due to the highly unpredictable nature of the engagements at the start of the game. Your early game goal should be to get kills for some of your pilots and advance your air-warfare technology in order to keep aliens at bay on the battleground for the Earth's skies. In case you overreach too early, you might quickly find yourself crippled with long repair times and unable to stop alien operations.
There are Research and Engineering projects that will assist in aerial sorties, including multiple Foundry projects to improve your Interceptors. There are also the aircraft boost modules, which return from vanilla.
As the campaign goes on, UFOs will slowly gain tiny but permanent increases to their health, accuracy and damage, which act as a de facto time limit on the campaign: after several in-game years have past, you may find interceptions to become near impossible. Try to finish your campaign within two in game years, and don't expect to ever truly dominate the skies.
If the aliens send a UFO and it is damaged, destroyed or lost, the aliens will pay resources for it, limiting their options in the next month.
Pilot Kills
Your pilots will learn UFO flight patterns and weaknesses, therefore they will become much better at shooting down alien craft: pilots gain +3% aim per kill (up to + 30%) and +1% damage per kill (with no top limit). Also, both your craft and UFOs may sometimes get 'critical hits' (200% damage), with UFOs being downed in a few hits, or your undamaged Interceptor immediately going into near-full red damage indicator.
Disrupting, Damaging and Destroying UFOs
Each UFO you encounter is running a particular mission that benefits the aliens strategically in some specific way, whether it be generating panic, shooting down your Satellites, or harvesting resources. Shooting them down is a reliable method of preventing whatever they're trying to do from occurring. Plus, UFOs that are damaged or shot down cost the aliens resources to repair or replace.
Some UFOs will simply land, allowing you to assault them directly; these include UFOs on Research and Harvest missions. In terms of the resource costs accrued to replace the destroyed UFO, a successful assault is functionally equivalent to shooting the UFO down.
Some UFOs will fly about a country's airspace before zooming off (see the Scout, Hunt, and Bomb mission entries). Generally speaking, you'll have a window of opportunity to engage such UFOs 2-3 times before they fly off - and you should, not only to deny the enemy and cost them resources, but also to harvest materials from the crash site. But if most of your Interceptors are being repaired, or you're facing down a powerful UFO that you're not sure you can destroy, simply dealing enough damage to the UFO can disrupt the mission even if it isn't shot out of the sky.
For Hunt missions, when a player does more than 50% of its health in damage to a UFO, the mission will be successfully scuttled. You can visually identify when you've reached this threshold during an interception: yellow explosions will flash around the UFO, as if it is continually being hit by your attacks. Note however that you still have a chance to prevent the UFO's mission while doing less than 50% damage, which is simply linear (i.e., in general UFO failure chance is equal to (100-2x)% where x is their health percentage). Bombing missions are different, in that the total amount of panic generated scales directly with the amount of damage dealt to the UFO, and only shooting it down is sufficient to completely negate the panic. The UFO will inflict 8 x (100-x)% panic to a target country (and an additional +2 if it has 100% health). Scout missions have a chance to fail based on a number of factors including dealing damage to the UFO (see the Scout mission page for details), but they do nothing except spawn a followup Hunt mission, so you have multiple chances to stop it.
Finally, in some cases you will have only a narrow window of opportunity to intercept UFOs: they will simply fly directly to a target location, spawning a mission and then completely disappearing from the geoscape. This includes Abductions, Terror Missions. No amount of damage you deal to the UFO short of shooting it down will have any effect on the resulting mission it spawns (though it will incur them repair costs), and for the most part you won't have an air force capable of doing this anyways. Most likely, you'll just have to play the resulting mission.
The Long War mod also brings back a mechanic from previous generations of XCOM: UFOs can now be utterly destroyed on a crash, generating no crash site mission. To compensate, the Council will give cash rewards for UFOs obliterated in flight (see UFO Bounties), and you'll salvage a small amount of resources from the wreckage as well. The harder hitting weapons have a greater chance of reducing UFOs to a pile of smelted alloys: specifically, it is the strength of the final hit relative to the UFOs remaining HP that determines the UFO's survival.
UFO Landings
When a UFO lands it is either conducting a Harvest mission (to gain resources) or a Research mission (to gain research). Such missions have a chance of spawning a much larger force of aliens; this is known colloquially as a Trap UFO. See the UFOs page for approximate troop counts for regular landings vs. traps.
Research missions happen only in countries with Satellites -- this is an alien "recon-in-force" that's a direct attempt to engage XCOM and test it's battle capabilities.
Harvest missions will sometimes avoid countries with Satellites depending on how threatening the Aliens perceive XCOM to be, though this will reduce the resource reward of the mission.
Damage to UFOs, or losses of its infantry on the ground, have no bearing on research points or resources gained from the mission. If the UFO survives, the aliens gets full benefit of the mission. However, a UFO that is shot down or assaulted fails its mission automatically. Furthermore, shooting down, successfully assaulting, and/or damaging a UFO does deduct from the aliens resources in the form of repair/replacement costs.
Interceptor Weapons and Stances
Air-to-air weapons now have three main damage statistics - Damage, Rate of Fire, and Armor Penetration; "Range" is no longer a factor as it was in vanilla. Additionally, UFOs have different armor levels, which reduces the damage done by a weapon if its armor penetration isn't high enough. For example, you start with a choice between Avalanche missiles (medium damage, low armor penetration) and Stingray missiles (low damage, medium armor penetration). Avalanches will be better against unarmored and very lightly armored UFOs like Scouts, while Stingrays will be better against more armored UFOs like Fighters.
When launching you can set a combat stance for your interceptors as they launch on a mission:
- Aggressive gives +15% to hit for both you and the UFO. You may not use the Dodge consumable when aggressive.
- Balanced plays out like normal.
- Defensive gives -15% to hit for both you and the UFO. You may not use the Aim consumable when defensive.
Mathematically (and not accounting for interception time), this means that Aggressive is the most efficient stance when your Interceptor aim is lower than UFO aim, while Defensive is strongest when your Interceptor aim is higher than UFO aim. These effects are stronger the bigger the difference. However, Interception time is an issue as UFOs will just leave after some time. Obviously, Aggressive is the most time-effective stance, allowing you to maximize your damage output given limited engagements.
UFO Flight Patterns
UFOs can fly at three altitudes: "High", "Low" and "NOE" ("Nap of the Earth,"). The altitude is a clue of what mission the UFO is going on:
- High: UFOs at high altitude are usually hunting satellites (and will flash purple on the radar).
- Low: UFOs at low altitude are scouting for your satellites, and will spawn a high-altitude satellite hunter if not dealt with.
- NOE: UFOs flying at NOE altitude are either performing bombing runs (if flashing purple) or landing at a target location; landed UFOs will generate either a Landed UFO, Abduction or Terror mission immediately upon arriving at their destination.
UFOs flashing purple on the radar screen are taking aggressive actions: they are either attacking your satellite (high altitude) or bombing civilians (NOE). If the UFO is flying NOE, use the purple flash to differentiate between a regular landing and a bombing run. If a UFO is NOE but not flashing purple, you can probably let it land and assault it on the ground (though it may also generate another mission type like Abduction or Terror mission).
Damage Calculations
- Armor Mitigation = Target Armor - Armor Penetration [%]
- 0% is the minimum Armor Mitigation and 95% is the maximum
- Base Damage = Weapon Damage * (1 - Armor Mitigation)
- Crit Chance = (Armor Penetration - Target Armor) / 2 [%]
- 5% is the minimum Crit Chance and 25% is the maximum
- A successful Crit multiplies damage by 2
- Total damage is then randomized to between 100% and 150% of its current value
- For XCOM Aircraft:
- If the appropriate UFO analysis has been researched, total damage is multiplied by 1.1
- Total damage is also multiplied by 1 + (Pilot Kills / 100)
Examples:
- Avalanche Missiles (340 damage, 0% armor penetration) vs Fighter (armor 60%): no armor is penetrated, so 60% of damage is blocked, and the Avalanche has an effective damage of 136-204.
- Laser Cannon (290 damage, 25% armor penetration) vs Fighter (armor 60%): effective armor mitigation value of 60%-25%=35%. Consequently, 35% of the damage is blocked, and the Laser has an effective damage of 188-282.
- Stingray Missiles (200 damage, 50% armor penetration) vs Fighter (armor 60%): armor mitigation value of 60%-50%=10%. Only 10% of damage is blocked, the Stingray has an effective damage of 180-270.
- Avalanche Missiles (340 damage, 0% armor penetration) vs Overseer (armor 200%): 200% damage blocked (nonsense) gets corrected to 95% damage blocked, effective damage is 17-26.
- EMP Cannon (310 damage, 150% armor penetration) vs Scout (armor 0%): armor mitigation is 0%-150%=-150%. However, damage is never increased due to penetration, so this gets corrected to 0% resulting in effective damage of 310-465.
Note that in the above example while the Laser Cannon and Stingray Missiles are about equal on a per-hit basis, the Laser Cannon is more effective in combat due to its higher rate of fire and higher accuracy.
Tables
UFO Types
| UFO Size | UFO Type | Health | Armor | Penetration | Firepower | Description |
|---|---|---|---|---|---|---|
| Small |  |
750 | 0% | 15% | 1x Single Plasma | The speedy Scout-class UFO is fortunately within Earth's native capabilities to shoot down ... on occasion. It appears to be used for general reconnaissance, resource-gathering and research. |
 |
850 | 60% | 35% | 1x Single Plasma | The alien Fighter, while similar in outward appearance to the Scout, is much better protected. Armor-piercing weapons like our Stingray Missiles will be helpful in bringing these craft down. This class of craft is used primarily for air raids and anti-satellite operations. | |
| Medium |  |
1500 | 25% | 35% | 1x Single Plasma | The Raider class of UFO seems to be a multirole craft that thus suffers in combat power. The aliens appear to use it for reconnaissance, research and resource-gathering operations. |
 |
1600 | 90% | 75% | 1x Single Plasma | The deadly Destroyer present a much greater threat to our aircraft than its sister class of ships. Armor-piercing weapons are required to defeat this craft. It appears to primarily be used for air raids and anti-satellite operations, although we may see it conduct reconnaissance missions as well. Our analysts note the presence of unused hardpoints on some images of this craft, so we should look out for upgraded versions with even more killing power. | |
| Large |  |
4000 | 160% | 10% | 1x Double Plasma | Abductors appear to be much better protected than other ships of this size. Perhaps the aliens particularly value the abduction and research missions they are used for. |
 |
6000 | 100% | 15% | 1x Double Plasma | The Harvester class of UFO seems to have one role - to recover important biological materials and minerals from Earth in support of other alien operations. We should try to interdict alien harvest operations whenever possible to slow the alien advance. These craft may be vulnerable to a concentrated attack. | |
 |
5000 | 160% | 0% | 1x Double Plasma | This ponderously slow craft will be a tough nut to crack. It appears to be primarily used in alien terrestrial resource-gathering but could also be used in support of other major alien operations. | |
 |
6000 | 125% | 0% | 1x Double Plasma | The rarely encountered Terror Ship appears suited for rapid deployment of alien shock troops. They appear to presage alien terror missions, but they may be used for alien research on XCOM as well. | |
| Very Large |  |
8000 | 140% | 90% | 1x Double Plasma, 1x Single Plasma | The Assault Carrier, while built on a battleship hull, lacks some of its sister's firepower and may be easier to shoot down. Nevertheless, we expect to see the aliens use this craft only against high-value targets, so it should be taken seriously whenever it is detected. |
 |
9000 | 180% | 125% | 1x Fusion Lance | An unbelievably dangerous piece of hardware, these UFOs never appear to land but are used in bombing, anti-satellite and air superiority roles. | |
| Medium |  |
2500 | 200% | 125% | 1x Double Plasma, 1x Single Plasma | This class of ship appears to be used as a airborne command center for the Ethereal race of alien. Only our strongest weapons will be able to penetrate its armor. |
Aircraft
| Name | Health | Armor | Armor Penetration | Speed | Prerequisites | Cost | Maintenance | ||||||
|---|---|---|---|---|---|---|---|---|---|---|---|---|---|
| Other | |||||||||||||
 Skyranger |
Can't be damaged or destroyed | XCOM starts with one, unable to produce more | 20 | ||||||||||
 Satellite |
Increases funding and provides unique bonuses | 10 | 200 (300) |
0 (7) |
25 days (12.5 days) |
||||||||
 Interceptor |
2500 | 25% | 0% | 10 | 200 | 3 days | 40 | ||||||
 Firestorm |
4000 | 125% | 25% | 15 | Alien Propulsion | 75 | 750 (1125) |
180 (270) |
120 (180) |
10 (30) |
8 UFO Flight Computers 4 UFO Power Sources |
28 days (14.0 days) |
50 |
Interceptor Weapons
| Name | Hit chance | Damage | Armor Penetration | Firing cooldown |
Prerequisites | Cost | Sell value | ||||||
|---|---|---|---|---|---|---|---|---|---|---|---|---|---|
| Other | |||||||||||||
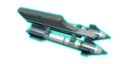 Avalanche Missiles |
25% / 40% / 55% | 340 (170 per second) |
0% | 2.0 second | XCOM starts with an unlimited supply | ||||||||
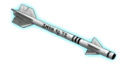 Stingray Missiles |
25% / 40% / 55% | 200 (133 per second) |
50% | 1.5 second | XCOM starts with an unlimited supply | ||||||||
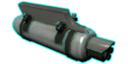 Phoenix Cannon |
25% / 40% / 55% | 140 (183 per second) |
25% | 0.75 second | Alien Materials | 15 | 120 (180) |
12 (18) |
0 (5) |
10 days (5.0 days) |
48 | ||
Phoenix Coilgun |
25% / 40% / 55% | 230 (307 per second) |
90% | 0.75 second | Phoenix Coilguns (Foundry) | ||||||||
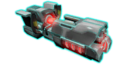 Laser Cannon |
40% / 55% / 70% | 290 (290 per second) |
25% | 1.0 second | Advanced Beam Lasers | 25 | 160 (240) |
30 (45) |
0 (6) |
10 days (5.0 days) |
64 | ||
Pulse Cannon |
40% / 55% / 70% | 300 (400 per second) |
55% | 0.75 second | Supercapacitors (Foundry) | ||||||||
 Plasma Cannon |
25% / 40% / 55% | 650 (650 per second) |
110% | 1.0 second | Vehicular Plasma Weapons | 95 | 500 (750) |
50 (75) |
60 (90) |
5 (19) |
1 Alien Rifle | 14 days (7.0 days) |
200 |
 EMP Cannon |
15% / 30% / 45% | 310 (563 per second) |
150% | 0.55 second | Electromagnetic Pulse Weapons | 100 | 575 (862) |
60 (90) |
160 (240) |
0 (16) |
1 Sectopod Wreck | 20 days (10.0 days) |
230 |
 Fusion Lance |
15% / 30% / 45% | 1200 (960 per second) |
130% | 1.25 second | Fusion Weapons | 120 | 800 (1200) |
70 (105) |
120 (180) |
40 (62) |
1 Fusion Core | 25 days (12.5 days) |
320 |
Modules
| Name | Special properties |
Prerequisites | Cost | Sell value | ||||||
|---|---|---|---|---|---|---|---|---|---|---|
| Other | ||||||||||
UFO Tracking (Boost) |
Increases the duration of this air combat by 5 seconds | Alien Materials Aircraft Boosters |
12 | 15 (22) |
1 (1) |
1 (3) |
2 Drone Wrecks | 5 days (2.5 days) |
6 | |
 Defense Matrix (Dodge) |
Dodges the next two incoming attacks | Cyberdisc Autopsy Aircraft Boosters |
50 | 25 (37) |
2 (3) |
1 (3) |
2 Cyberdisc Wrecks | 5 days (2.5 days) |
10 | |
 Uplink Targeting (Aim) |
Automatically hits the next two attacks | Floater Autopsy Aircraft Boosters |
35 | 20 (30) |
1 (1) |
1 (1) |
1 (3) |
3 Floater Corpses | 5 days (2.5 days) |
8 |
Strategy
Interception Tactics
- You can have more than six interceptors when you defend one continent. Store your spare interceptors on other continents and swap them in for damaged Interceptors.
- Transit time puts repair times on pause, making the damaged interceptor take a few extra days to repair, but transferring in a new Interceptor from another continent will almost always be far quicker than the days it'll take to wait on repairs.
- Always be prepared to cancel an interception if the engagement is not going well for you. Losing an aircraft with an expensive weapons can be devastating to your resources.
- Mashing the Escape key instantly after aborting, and then quickly re-selecting mission control and the UFO will allow you to send a new interceptor out without having to wait for the first one to fly back to base. This can give you marginally more time to down the UFO before it escapes.
- If the interceptor you aborted with wasn't damaged, you can even send the same interceptor back mid-air and instantly re-engage, without having to fly back & forth and refuel. Use the spacebar key as you bring up the hologlobe to quickly engage the topmost UFO contact, then quickly select your interceptor before it flies too far back to base.
- If your interceptor fleet is barely holding on, consider aborting when a UFO on a Scout (flying Low) or Hunt mission (flashing purple on the map and flying at High altitude) displays continuous explosion effects, as if it is being hit repeatedly by attacks. This means the UFO has accumulated over 50% damage, which guarantees the failure of their Scout or Hunt mission. You won't get any rewards, but you won't accrue any additional repair times.
- UFOs tend to flee into orbit when at 50% of HP or less, robbing you of the opportunity to shoot them down for supplies. Try to keep the pressure up.
- Have an idea of how many interceptions are possible before UFO completes its mission or attempts to escape. For example Scouts usually can only be engaged twice with Ravens.
- Your choice of starting continent and country is also key, as your starting country determines your starting base location; for instance, USA is centrally located in the moderately-sized North America continent, frequently allowing up to 3 interceptions with Scouts in any of the three countries.
- Meanwhile, Russia is massive and thus difficult to cover as a starting country without losing a few UFOs. Similarly, Australia as a starting country has difficulty intercepting UFOs in other Asia countries due to the long distance between them.
- Use modules in tough situations when you need an extra boost to get the job done. Dodge Module can be used on Defensive and Balanced tactics, Aim Module can be used on Balanced and Aggressive tactics, and Boost module can be used on any stance. The modules are much more worthwhile-- nearly essential-- in Long War. As they do take time to build, it pays to maintain a stock of them.
- The Aim module is fairly cheap, and is useful throughout a campaign. Keep a large stock of Floater corpses to make these. While an aggressive stance means that all shots have more accuracy, using an Aim module early in a Balanced stance dogfight means drawing first blood while being a little harder to be hit yourself.
- The Boost module can be used in any stance, and only extends time (as all air-to-air weapons now are counted as 'long range', approach reduction time no longer is affected). More useful in early game, when you need more time to do enough damage with the weaker weapons and less experienced pilots.
- The Dodge module is exceedingly useful, and still hard to make, due to the necessity of Cyberdisc wrecks needed to construct them.
Strategic Plan
Early Game
In the early months, you'll want to ensure UFOs are downed so you can harvest them for supplies and earn troop XP, and sending 2 Interceptors (occasionally even 3 in the worst case) to each Scout or Fighter that you find on Aggressive stance is your best bet. To do so, you'll want to buy many interceptors, more than the 6 slots you have available in your starting continent, using other continents to store interceptors as backup and perform lengthy (>15 day) repairs while your starting continent remains stocked with 4-6 interceptors ready to handle any back-to-back UFO contacts. Each early UFO contact you down will practically pay an entire Interceptor in corpses and materials, though you obviously need to save some of it for research and production.
That being said, your goal should be to stack kills on a small handful of interceptors (up to 10 kills per Interceptor) by having it finish off UFOs softened up by others. Interceptor Pilots gain +3% hit chance per downed UFO, up to a maximum of +30% at 10 kills (they also get +1% damage per kill with no cap). Once your Interceptor is getting a solid +15-30% aim bonus, you can switch them over to Balanced or even Defensive to reduce damage and repair times to the interceptor while still ensuring UFOs are downed, or even outfit it with upgraded weapons to take on tougher UFOs.
You start with Avalanche and Stingray missiles as potential armaments. These will work for all small and a few medium UFO contacts, until Aliens stockpile enough resources and/or research to field better UFOs. Avalanche is effective against the unarmored Scouts, while Stingray are optimal for the moderately-armored Fighters.
Scouts will be sent out regularly to attempt to locate your Satellites, anywhere from 3 in the early months all the way up to 6 later on. UFOs on Scout missions (i.e. the mission type, not the UFO type) can be easily identified as they'll be flying Low. Ideally, you'll have 2 Interceptors armed with Avalanche missiles at all times to down any Scouts that show up. If not, they have a chance to fail in their mission both randomly and as a result of damage. If the scout mission is successful, they'll spawn a Fighter shortly afterwards on a Hunt mission, which you'll have to intercept with probably at least 2 Stingray or lose the Satellite.
Even if you've shot down all the Scouts that showed up, occasionally the aliens will still send Fighters to target your satellites anyways. UFOs on Hunt missions can be easily identified as they'll be flying High and flashing purple on the radar screen. Much like Scouts, they have a low chance to fail outright that increases the more damage you inflict to the UFO, with a guaranteed fail after 50% damage. If you've done a decent job shooting down UFOs in the first month (and thus have got the attention of the aliens), you'll typically see at least 1 Hunt mission starting in the second month, which will require at least 2 Stingray-armed Interceptors to down, possibly 3. Expect to see additional direct Hunt missions show up occasionally by the third month if you're doing a good job downing UFOs. For more information on how many of each mission spawns, see this table.
As an aside, when you down a UFO and successfully assault it, you'll unlock a UFO Analysis research project associated with that UFO type. Completing it will grant your interceptors a nifty +10% damage bonus against that UFO type and also award you +20% extra materials (elerium and alloys) when you assault it with your ground forces. While taking a pitstop to research a UFO Analysis might delay other crucial research, it's quite useful to grab the analysis project when you have the chance, particularly for UFOs you either encounter frequently (Scouts, Fighters, and Raiders in the early months) or currently have the military capacity to shoot down (based on this guide). You'll get a nice boost to your economy and air game if you do so.
Anyways, Raiders are a Medium-sized UFO that will tend to start showing up around April or May, either in place of Scouts or Fighters. Both Avalanche and Stingray are equally mediocre at dealing with Raiders, although 3-4 interceptions will usually do it (be prepared to cripple your Interceptor Bay). You can avoid Raiders on Scout missions if need be, as they have a chance to spawn a Fighter on the followup Hunt mission which is easier to kill. But if the Raiders returns on the Hunt mission, it will cost you a stack of $200 credits to replace that Satellite if you don't at least cut it to 50% HP. If you can develop the military capacity to down them, either through buying more Interceptors or by improving their weapons, it offers more aliens to defeat and more materials to harvest.
If you want to reliably down Raiders, you can build a Phoenix Cannon or two once you research Alien Materials. Not only are they equally good as if not better than the other two weapon types you have access to (Avalanche and Stingray) against both Scouts and Fighters, they're also decently better than both against Raiders. Two will usually be sufficient to take out Raiders on Aggressive; you could instead go Balanced, but you'll probably have to send an Avalanche or Stingray to clean up. Four Interceptors armed with Avalanche missiles and two armed with Phoenix Cannon is a versatile Interceptor setup for the first month or two that should be able to take on two Scouts (the most common UFO type you'll see) as well as either a Raider, Fighter, or third Scout in a short window. It's entirely reasonable to build no Phoenix Cannon at all, though, and instead just rush Laser Cannons, which are the strongest against all three types.
Additionally, the aforementioned Alien Materials research will also unlock the Aircraft Boosters foundry project. These allow you to build and deploy three different single-use consumables to boost an individual engagement. Boost Modules (aka "UFO Tracking") are available immediately at the lowest cost, requiring two Drone wrecks and a small amount of cash and materials; they freeze the engagement timer for 5 seconds, giving you extra time to finish a contact. Keep a floating stock of a couple of these, and use them liberally in the moments just before you run out of time if you need an extra couple seconds to finish off a UFO. Once you've autopsied a Floater, you'll get access to Aim Modules (aka "Uplink Targeting"), which are a little more expensive and also require three Floater corpses (which are used for quite a number of other things, mind you); this module causes your next two shots to automatically hit, but the booster cannot be used while on Defensive stance. Lastly, autopsy a Cyberdisc Wreck and you'll unlock access to the most expensive module available, the Dodge Module (aka "Defense Matrix"), which requires the most resources including the relatively rare Cyberdisc Wrecks; it causes you to automatically dodge the next two attacks, but the booster cannot be used while on Aggressive stance. You probably won't have enough resources to use either Aim or Dodge modules as liberally as you will Boost modules, so I would save them for taking on particularly dangerous UFOs (see below).
The Laser Cannon becomes available after researching Advanced Beam Lasers; they are highly accurate (with +15% more accuracy than other interceptor weapons), fast firing, and powerful weapons (they have almost twice the DPS of Avalanche and Stingray), and their accuracy boost synergizes well with Defensive stance: a single experienced pilot (5+ kills) can reliably down Scouts solo, and has a good shot at taking down Fighters and Raiders too, all while taking nearly zero damage in return. You'll want Laser Cannon on as many of your Interceptors as you can afford (eventually all of them); ensure your best pilots get Laser Cannon first and feed them even more kills, up to at least 10 each to maximize their accuracy.
Mid Game
If you research Alien Computers (note it requires 4 Flight Computers) and then autopsy a Seeker, you'll unlock the UFO Countermeasures Foundry project, which will reduce enemy UFO accuracy by -15%; combine this with Defensive stance for another -15% hit chance, and small enemy UFOs will be looking at a piddly 3% base accuracy (though keep in mind they get +2% accuracy every 30 points of Alien Research, which at bare minimum increases by 1 per day). If you can outfit your entire Interceptor Fleet with Laser Cannon (a costly endeavor, to be sure, though the North American continent bonus is very strong here), then the combined bonus to your aim (from lasers) and penalty to their aim (from Defensive stance and UFO Countermeasures) will make Scouts, Fighters, and Raiders a joke to deal with. These will be the vast majority of contacts you face in the early and mid game, and you can easily defend an entire continent with just 3 Laser Cannons on Defensive. Your high kill (8+) interceptor pilots should probably be put on reserve to tackle Raiders and potentially even Destroyers, while low kill pilots can be trained up on Scouts and Fighters. At this point, you'll have almost everything you need to dominate the skies for quite some time, and the goal from here on is to maintain this momentum.
When you research Advanced Gauss Weapons, the Phoenix Coilguns Foundry project becomes available, which significantly boosts the damage (+64%) and armor penetration (+65%) of your Phoenix Cannons (assuming you built any). While the accuracy boost that Laser Cannons provide makes them incredibly useful for the small UFO types, Phoenix Coilguns can be used for the larger, heavily armed UFO contacts. You won't spot them often and you could probably eat the loss associated with just not having the military capacity to handle them, but the option is there.
In this case, with just the Phoenix Coilguns upgrade and nothing else, your mid-tier pilots should be able to take on Destroyers and Harvesters. There isn't much reason to down a Harvester, as they always fly NoE and land, allowing you to assault them directly. Destroyers, on the other hand, are high priority targets. These Medium-sized ships may appear in place of Raiders and Fighters as early as June if the aliens have high enough resources, to either Hunt your UFOs or Bomb cities, spreading panic. They're heavily armored, but one or two decent (3+ kill) pilots with Phoenix Coilguns should be able to down them, as can two or three elite (~10 kill) pilots with Laser Cannons. Aim and Dodge Modules are a really good investment here to keep your Satellites from being shot down and earn you a juicy medium UFO crash site to raid for supplies, but keep in mind you need to be on Balanced stance if you want to use both.
Bomb missions spike panic in the country by +8, plus an additional +2 if the UFO is completely ignored. Unlike Scout and Hunt, which target XCOM operations directly and show up regularly from the beginning of the game, Bombing missions show up later and tend to target countries with high panic as well as those near their established holdings. As you expand out of your starting continent to new locations with much higher accrued panic, you'll most likely start to spot Fighters and Destroyers (and eventually, Battleships) showing up to Bomb high panic countries. You can identify a bombing run if you spot any of those three ships flying NoE as these ships never land and will flash purple on the radar (similarly to UFOs on Hunt missions).
The Advanced Aerospace Concepts research project, available in the midgame, will unlock various foundry projects, such as Penetrator Weapons (+25% Armor Penetration), Wingtip Sparrowhawks (add automatic half damage Stingrays to all Interceptors), and Advanced Avionics (+10% accuracy). With all three upgrades, 1-2 decent (3+ kill) pilots armed with Laser Cannons can imitate the offensive capabilities of the Phoenix Coilguns upgrade and take down Destroyers. Likewise, consider acquiring the Armored Fighters (+1000 Interceptor HP, from 2500 to 3500) to directly increase the survivability of your aircraft vs. UFOs (and also indirectly reduce their repair time, as repairs are proportional to percentage of damage taken).
With all of these upgrades, shooting down Abductors, Transports, and Terror Ships becomes possible with 2-3 Phoenix Coilguns Interceptors, though again keep in mind doing so is more of a luxury than a necessity. Abductors always fly NoE and usually generate Abduction missions for cash rewards (although they may also land normally and allow you to assault them in rarer cases); you might consider shooting them down for the alloy and elerium salvage, rather than letting them land for cash. Transports typically fly NoE and land, allowing you to assault them, though on occasion their appearance flying Low (especially while joined by a Battleship) signals an infiltration mission that will instantly force a country to leave the XCOM project. Preventing this is impossible unless XCOM has a Hyperwave Beacon to spot the hidden Overseer the two UFOs are guarding, but fortunately, Infiltration missions are rare unless XCOM is quite far behind the aliens, and you can always Assault the bases they establish. Lastly, Terror Ships will serve as an advanced warning for an incoming Terror mission as they screen the airspace in advance of an Assault Carrier. Shooting them down won't stop the Terror mission, but you'll be able to get a lot of good rewards from it if you can manage to do so and cost the aliens dearly for every terror mission they run. Keep in mind that all of these UFOs (and potentially Destroyers in the mid-to-lategame) will be armed with the incredibly powerful Double Plasma, which has +7% higher base accuracy, 8% faster fire rate, +20% armor penetration, and nearly double (800 vs 450) the damage per shot of the weapons you'll find on smaller UFOs. A single extremely lucky crit from these things can potentially one shot kill an interceptor without Armored Fighters, so always make sure you grab that before trying to take on large UFOs.
Eventually, you'll unlock research of Advanced Pulse Lasers and the Supercapacitors Foundry Project. This provides a similar boost to all of your Laser Cannons that Phoenix Coilguns did for all of your Phoenix Cannons; this time, you're looking at a minor increase in their damage (+3%) but a significant increase to armor penetration (+30%) and fire rate (+33%). Your new Pulse Cannons will now outperform Phoenix Coilguns (assuming you have any, as well as the associated upgrade) against most of the above UFOs, but your Phoenix Coilguns will still be optimal any time you feel like trying to take down a Terror Ship or Abductor. Of course, as previously mentioned, you don't *have* to shoot down these UFO types if you don't want to.
You'll be able to construct Firestorms once you research Alien Propulsion. While these interceptors are extremely expensive and require a massive haul of 8 UFO Flight Computers and 4 UFO Power Sources, they provides a considerable upgrade over the default Raven interceptor: they come with +1500 HP, +25% Armor Penetration, +100% Armor, and 50% faster flight speeds (letting you reach the UFO faster and also granting you 50% longer engage times); additionally, your most experienced pilot will automatically move into the new craft (bringing their accuracy and damage boosts with them, but leaving the weapon they were armed with behind), and a rookie pilot will be brought in to take over the Raven they leave behind. The additional armor penetration pushes Pulse Cannons ahead of Phoenix Coilguns against all aforementioned targets, and in conjunction with the improved survivability will make Pulse Cannons quite effective against all aforementioned UFOs.
Additionally, Alien Propulsion also unlocks the Elerium Afterburners Foundry project, which increases your interceptors speed by +5; the easiest way to think about this is a +50% engagement time boost to your Ravens and a +33% engagement time boost to your Firestorms. It doesn't much help if you're outgunned, as it doesn't improve your survivability or damage; if you have to abort early, it does nothing for you, and it's not going to shorten your repair times either. What it does do is twofold: first, you can dish out more total damage over the same number of engagements, which helps against fast or tanky UFOs that escape into orbit before you can finish shooting them down. Second, you also concentrate repair times on a single Interceptor, which can be both a blessing and a curse. You can't use Interceptors to shoot down UFOs while they're damaged, so having 4-5 lightly-damaged interceptors means you're vulnerable to attack for a short window. Conversely, 4-5 lightly-damaged interceptors can all undergo repairs simultaneously, so you'll get them all back sooner than 1-2 heavily damaged ones.
Late Game
One to two Firestorms piloted by top pilots (10+ kills) with all the aforementioned Foundry projects to boost them (including either Pulse Cannons or Phoenix Coilguns), plus a healthy selection of boosters for insurance will be able to take on Assault Carriers. These are the third-strongest UFO in the game but have a small chance of dropping Fusion Cores when shot out of the air, making downing them well worth it. They're also responsible for dropping off the troops for the most difficult missions in the game, namely Terrorize and Retaliate missions, and shooting them down means you completely avoid said mission. You'll have a short window to spot and engage them before they arrive at their destination, and nothing short of shooting the UFO out of the sky will have any impact whatsoever.
To finish the game, you'll need to find and shoot down an Overseer. Overseers are hidden on the geoscape until you research Alien Communications and construct the Hyperwave Beacon, after which you'll see them floating around the geoscape conducting Command Overwatch missions. These missions don't have any mechanical impact on the strategic layer like other missions do; they're just there to allow XCOM the opportunity to shoot an Overseer down. Once you do spot one, you'll find they're extremely fast, heavily armored, and equipped with solid armaments. Their speed makes it difficult to catch them in the geoscape and gives you an extremely short window of engagement once you do engage them; Firestorms, Elerium Afterburners, and Modules are all quite useful here, and you'll probably only get a single engagement. Similarly, their extremely high armor renders even Pulse Cannons impotent against them; if you're trying to shoot them down without end-game interceptor weapons, you'll need a Phoenix Coilgun mounted to a 10+ kill Firestorm plus every single aforementioned UFO upgrade and a full set of 3 modules to stand chance, and even then you need to get lucky with your engagement (or get a second engagement). Plus, you can never predict which continent the Overseer will appear in, so unless you want to pray to the RNG gods for month after month you'll want to develop the capacity to down an Overseer in multiple continents, not just one.
For a more reliable method of downing an Overseer, you'll need either Plasma Cannons, EMP Cannons, or Fusion Lances on your Firestorms. Once you're most of the way through Plasma tech, Vehicular Plasma will unlock Plasma Cannons. Each Cannon requires an intact Alien Rifle to build, which are equipped by mid-to-lategame Mutons and Heavy Floaters; you can only acquire intact enemy weapons by capturing the enemy unit alive with the Arc Thrower (you'll need to do a lot of this in general to make Plasma tech, so get started with your captures early and often). Your best pilot in a Firestorm with all upgrades and a Plasma Cannon could be expected to easily solo an Overseer; you might want to bring two if you want to take on a Battleship though.
Speaking of which, Battleships are the ultimate UFO type, and are fielded in many types of UFO missions we discussed previously (Scout, Hunt, and Bomb) whenever enemies have a glut of resources or in the lategame when they've got high resource income per month. These things come armed with a Fusion Lance that deals 1300-1950 damage per shot at base (almost half the HP of a Firestorm with Armored Fighters), and 2600-3900 on a crit (just barely less than a one-shot kill on that same UFO type). Defeating these is incredibly difficult and risky, especially since you're risking an extremely expensive Firestorm piloted by a top pilot, but if you have to take one on, I suggest abusing Aim and Dodge modules and bailing immediately if you get hit once (and of course, only try with full upgrades and one of the three lategame weapons).
EMP Weapons is an earlier alternative to teching heavily into Plasma, and is available after you've researched both Advanced Gauss Weapons and Advanced Pulse Lasers. Unlike Plasma, you don't need a large assortment of captured alien weaponry to research and outfit it, but Plasma also upgrades your ground forces, and is pretty important to tech into before you finish the game, whereas EMP is very much an optional pickup. In any case, the research will unlock the EMP Cannon, which has low damage per shot, extremely high armor penetration, and a fast fire rate; the net result is slightly worse performance compared to the other two end-game weapons against virtually all UFOs (except Overseers, actually), but they're also the least likely to overkill and destroy the UFO outright, and they also have an innately reduced chance for UFO components like UFO Flight Computers and UFO Power Sources to be destroyed on crash; if you want to farm UFO components and resources its... well kind of a luxury item, really, since it comes so late and is so expensive, but it's there, and can be important if you can't tech into Plasma weapons yet because you haven't been keeping up with your alien captures.
With both EMP and Plasma, you'll enable research into Fusion Weapons, which will unlock the Fusion Lance. They are the most powerful Interceptor weapons in the game and can only be mounted on Firestorms, but consume a rare Fusion Core to do so; it can be quite difficult to acquire these, but shooting down Assault Carriers with an EMP Cannon is your best bet (or just save a spare core from the Slingshot DLC mission). Much like EMP, it's a luxury weapon, but a Firestorms mounted with a Fusion Lance can utterly dominate the skies; once acquired, you can solo any UFO type you feel like for quite a while. That said, keep in mind the free bonuses enemy UFOs get over time (+75 HP, +8 damage and +2% aim every 30 days, or faster if enemies accumulate large amounts of Alien Research) will eventually stack their accuracy all the way to the cap of 95%, so you'll need to make an effort to finish the game before that happens. You don't want a Battleship hitting you with 95% accuracy.