Difference between revisions of "Air Combat (Long War)"
| Line 188: | Line 188: | ||
|{{Research required (Long War)}}||{{Engineers required (Long War)}}||{{Credits cost (Long War)}}||{{Alloys cost (Long War)}}||{{Elerium cost (Long War)}}||{{Meld cost (Long War)}}||{{Items cost (Long War)}}||{{Time cost (Long War)}} | |{{Research required (Long War)}}||{{Engineers required (Long War)}}||{{Credits cost (Long War)}}||{{Alloys cost (Long War)}}||{{Elerium cost (Long War)}}||{{Meld cost (Long War)}}||{{Items cost (Long War)}}||{{Time cost (Long War)}} | ||
|-align="center" | |-align="center" | ||
| − | |[[File:UFO Tracking Long War.png|128px|link=Air Combat (Long War)#Modules|UFO Tracking (Boost)]]<br />'''[[Air Combat (Long War)#Modules|UFO Tracking (Boost)]]'''||Increases the duration of this air combat||[[Research (Long War)#Materials and Aerospace|Alien Materials]]<br />[[Foundry (Long War)#Aerospace Improvements|Aircraft Boosters]]||12||title="Cost in Credits (Cost when building quickly)"|15<br />(22)|| ||title="Cost in Elerium (Cost when building quickly)"|1<br />(1)||title="Cost in Meld (Cost when building quickly)"|1<br />(3)||2 [[Alien Artifacts (Long War)# | + | |[[File:UFO Tracking Long War.png|128px|link=Air Combat (Long War)#Modules|UFO Tracking (Boost)]]<br />'''[[Air Combat (Long War)#Modules|UFO Tracking (Boost)]]'''||Increases the duration of this air combat||[[Research (Long War)#Materials and Aerospace|Alien Materials]]<br />[[Foundry (Long War)#Aerospace Improvements|Aircraft Boosters]]||12||title="Cost in Credits (Cost when building quickly)"|15<br />(22)|| ||title="Cost in Elerium (Cost when building quickly)"|1<br />(1)||title="Cost in Meld (Cost when building quickly)"|1<br />(3)||2 [[Alien Artifacts (Long War)#Aliens|Drone Wrecks]]||title="Duration in days (Duration when building quickly)"|5 days<br />(2.5 days)||6 |
|-align="center" | |-align="center" | ||
| − | |[[File:Defense Matrix Long War.png|128px|link=Air Combat (Long War)#Modules|Defense Matrix (Dodge)]]<br />'''[[Air Combat (Long War)#Modules|Defense Matrix (Dodge)]]'''||Dodges the next two incoming attacks||[[Research (Long War)#Alien Autopsies|Cyberdisc Autopsy]]<br />[[Foundry (Long War)#Aerospace Improvements|Aircraft Boosters]]||50||title="Cost in Credits (Cost when building quickly)"|25<br />(37)|| ||title="Cost in Elerium (Cost when building quickly)"|2<br />(3)||title="Cost in Meld (Cost when building quickly)"|1<br />(3)||2 [[Alien Artifacts (Long War)# | + | |[[File:Defense Matrix Long War.png|128px|link=Air Combat (Long War)#Modules|Defense Matrix (Dodge)]]<br />'''[[Air Combat (Long War)#Modules|Defense Matrix (Dodge)]]'''||Dodges the next two incoming attacks||[[Research (Long War)#Alien Autopsies|Cyberdisc Autopsy]]<br />[[Foundry (Long War)#Aerospace Improvements|Aircraft Boosters]]||50||title="Cost in Credits (Cost when building quickly)"|25<br />(37)|| ||title="Cost in Elerium (Cost when building quickly)"|2<br />(3)||title="Cost in Meld (Cost when building quickly)"|1<br />(3)||2 [[Alien Artifacts (Long War)#Aliens|Cyberdisc Wrecks]]||title="Duration in days (Duration when building quickly)"|5 days<br />(2.5 days)||10 |
|-align="center" | |-align="center" | ||
| − | |[[File:Uplink Targeting Long War.png|128px|link=Air Combat (Long War)#Modules|Uplink Targeting (Aim)]]<br />'''[[Air Combat (Long War)#Modules|Uplink Targeting (Aim)]]'''||Automatically hits the next two attacks||[[Research (Long War)#Alien Autopsies|Floater Autopsy]]<br />[[Foundry (Long War)#Aerospace Improvements|Aircraft Boosters]]||35||title="Cost in Credits (Cost when building quickly)"|20<br />(30)||title="Cost in Alien Alloys (Cost when building quickly)"|1<br />(1)||title="Cost in Elerium (Cost when building quickly)"|1<br />(1)||title="Cost in Meld (Cost when building quickly)"|1<br />(3)||3 [[Alien Artifacts (Long War)# | + | |[[File:Uplink Targeting Long War.png|128px|link=Air Combat (Long War)#Modules|Uplink Targeting (Aim)]]<br />'''[[Air Combat (Long War)#Modules|Uplink Targeting (Aim)]]'''||Automatically hits the next two attacks||[[Research (Long War)#Alien Autopsies|Floater Autopsy]]<br />[[Foundry (Long War)#Aerospace Improvements|Aircraft Boosters]]||35||title="Cost in Credits (Cost when building quickly)"|20<br />(30)||title="Cost in Alien Alloys (Cost when building quickly)"|1<br />(1)||title="Cost in Elerium (Cost when building quickly)"|1<br />(1)||title="Cost in Meld (Cost when building quickly)"|1<br />(3)||3 [[Alien Artifacts (Long War)#Aliens|Floater Corpses]]||title="Duration in days (Duration when building quickly)"|5 days<br />(2.5 days)||8 |
|} | |} | ||
Revision as of 10:37, 12 June 2019
Overview
UFOs are tougher, faster, and much deadlier in Long War. Along with that, your crafts and armaments are significantly less potent, at least at first. You will need to cycle your craft regularly like your soldiers. UFO kills will grant experience to your pilots and provide a bonus to accuracy. Your pilots will learn UFO flight patterns and weaknesses, therefore they will become much better at shooting down alien craft: sortie experience provides +3% to hit per kill (up to + 30%) and +1% damage per kill (with no top limit). Also, you will find that both your craft and UFOs may sometimes get 'critical hits', with UFOs being downed in a few hits, or your undamaged Interceptor immediately going into near-full red damage indicator.
At the start of the game your fresh pilots are equipped with Avalanche Missiles, which now have an abysmal 40% accuracy. While it is still possible to down the first Scout with one Interceptor, this is an incredibly unlikely event. It's more probable that it would take two, or even three interceptions to bring down even the most basic alien craft. It is also a good idea to switch some of your aircraft armaments to Stingray missiles at the game start, details on that below.
Players should exert caution and pick and choose their air battles carefully. You will not be able to bring down every single enemy UFO. Sometimes attempting high risk interceptions against tough targets would be detrimental to your campaign due to the highly unpredictable nature of the engagements at the start of the game. Your early game goal should be to get experience for some of your pilots and advance your air-warfare technology in order to keep aliens at bay on the battleground for the Earth's skies. In case you overreach too early, you might quickly find yourself crippled with long repair times and unable to stop alien operations.
There are Research and Engineering projects that will assist in aerial sorties. There are multiple foundry projects to improve your interceptors. There are also three consumables that remain from Vanilla.
As you progress, each type of UFO's statistics also increase, from general 'health' to firing rates, as to keep you on your toes; so don't expect to ever truly dominate the skies. Plus with the added variables to air-interception, there is no clear-cut "UFO X can be brought down by Interceptor Y" table. As such, the Long War's UFO page will be your general guide for how--- or if-- to attempt to engage these potent UFOs.
If the aliens send a UFO and it is damaged, destroyed or lost, the aliens will pay resources for it, limiting their options in the next month.
Damaging UFOs
It is not necessary to shoot down enemy UFOs in order to prevent them from completing their mission. Doing damage to them is sometimes enough to spoil their plans or reduce their effectiveness. The damage that UFO sustains is stored between interceptions, therefore multiple interception attempts is a good idea to limit the damage to your own Air Force. When a player does more than 50% damage to a UFO, you will start seeing explosion effects around it.
Some UFOs will wander about a country's airspace before zooming off. For these, it is sufficient to get the yellow effect described above. Those effects signify that UFO sustained enough damage to prevent it from completing its mission, such as an Anti-Satellite hunt. Note however that you still have a chance to prevent the UFO's mission while doing less than 50% damage, which is simply linear (i.e., the UFO abort mission chance is 0% at full health, 100% at 50% health, and in 2x% general at (100-x)% health). Otherwise, when they leave detectable airspace (whether you have a satellite over the target country or not), there will be a notification of the damage they did in the minor notices that play alongside the Hologlobe during in-game time progression.
Other UFOs will have a set flight path, and a narrow window of opportunity to intercept: to disrupt these missions entirely, these need to be shot out of the sky. Cases like this include Assault Carriers and Abductors.
Long War mod brings back a mechanic from previous generations of XCOM: UFOs can now have full DOA crashes (with minimal Alloy recovery, and no corpses or other artifacts), so in some cases you may want to pull your punches. To compensate, the Council will give cash rewards for UFOs obliterated in flight. The harder hitting weapons have a greater chance of reducing UFOs to a pile of smelted alloys: specifically, it is the strength of the killshot that determines the UFO's survival.
According to johnnylump on the Nexus Forums,
- When a UFO lands it is either conducting a harvest mission (gain resources) or a research mission (gain research). Research missions happen only in countries with satellites -- this is an alien recon-in-force that's a direct attempt to engage XCOM.
- Harvest missions try to avoid countries with satellites, with a greater chance when alien aggro is high, but they pay a resource penalty when they do (representing a second-best, safer option.)
- Damage to UFOs, or losses on the ground, have no bearing on research points or resources gained from the mission ... if the UFO survives, it gets full value.
- Damage to UFOs in the air does deduct resources as a repair cost, which is calculated separately from harvest gains.
Interceptor Weapons and Stances
Air-to-air weapons now have three main damage statistics - Damage, Rate of Fire, and Armor Penetration. UFOs have different armor levels, which reduces the damage done by a weapon if its armor penetration isn't high enough. For example, you start with a choice between Avalanche missiles (medium damage, low armor penetration) and Stingray missiles (low damage, medium armor penetration). Avalanches will be better against unarmored and very lightly armored UFOs, while Stingrays will be better against more armored UFOs.
When launching you can set a combat stance for your interceptors as they launch on a mission:
- Aggressive gives +15% to hit for both you and the UFO. You may not use the dodge consumable when aggressive.
- Balanced plays out like normal.
- Defensive gives -15% to hit for both you and the UFO. You may not use the auto-hit consumable when defensive.
Mathematically and not accounting for interception time, this means that Aggressive is the most efficient stance when your Interceptor aim is lower than UFO aim, while Defensive is strongest when your Interceptor aim is higher than UFO aim. These effects are stronger the bigger the difference. However, Interception time is an issue as UFOs will just leave after some time. Obviously, Aggressive is the most time-effective stance.
UFO Flight Patterns
UFOs can fly at three altitudes: "High", "Low" and "NOE" ("Nap of the Earth,"). The altitude is a clue of what mission the UFO is going on - UFOs flying at NOE altitude are most likely to land, are performing bombing runs, or will generate an Abduction or Terror mission immediately upon arriving at their destination. UFOs at high altitude are most likely to be hunting satellites. UFOs at low altitude are likely to be scouting satellites, so they must be dealt with. Unless playing in Ironman, you may want to see if a UFO will land before shooting it down (and reload if it does not): while a landed UFO is always more dangerous, an intact UFO and it's material components is a valuable prize, given how fragile Power Sources and Flight Computers are from being shot down in Long War.
Once you successfully raid a UFO type, either landed or crash landed, you can research that craft for a damage bonus against it in future.
Strategic Plan
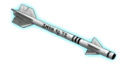
- You start with the Avalanche and Stingray missiles. These will work for small and medium craft for a while until Aliens research better upgrades for their craft.
- After some time, sticking with conventional weapons will leave you totally outgunned. Next you'll want to upgrade to Laser and Phoenix cannons: Laser Cannons are built for accuracy, so a pilot can still reliably hit UFOs on Balanced or Defensive stances, while the Phoenix Cannon is built for armor penetration and higher rate of fire. You would likely need multiple interceptions with frequent use of boost modules to reliably bring down larger UFOs.
- Eventually, you may be able to purchase the Guass/Coilgun and Supercapacitor Foundry projects for the Phoenix and Laser Cannon: these vastly upgrade every aspect of these mid-level aerial weapons
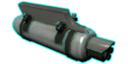
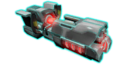
- The Plasma Cannons need to be built from Alien Rifles. Once the Mutons start fielding them, you would want to build up a cache of those items to convert to plasma cannons for your Interceptors. The EMP Cannon is built from 1 Sectopod wreck each. It has a higher rate of fire and lower damage than Plasma which increases the chance of UFOs not being destroyed outright. It also increases the chance for more resources to remain intact for UFO crash-site missions.
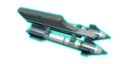
- Last, but certainly not least, the Fusion Lance is the most powerful air to air weapon that can only be used by Firestorms. They're built from Fusion Cores, and the only way to get Fusion Cores is to take down Battleships and Assault Carriers... or save the cores from Slingshot mission. Though once you do get them set up, you would have a good chance to disrupt even the Terror Mission ships.
Interception Strategy
- You can have more than six interceptors when you defend one continent. store your spare interceptors on the other continents and make them rotate.
- Choose an appropriate stance based on your equipped weapon, researched upgrades, and UFO type.
- Always be prepared to cancel an interception if the engagement is not going well for you. Losing an aircraft with an expensive weapons can be devastating to your resources.
- Consider aborting interception if your first shot hits while UFO misses. You can refuel within an hour and try again or send another bird out with the same hit and run tactics.
- Pressing escape instantly after aborting, reselecting mission control and the UFO will allow you to send a new interceptor out without having to wait for the first one to fly back to base. If the interceptor you aborted with wasn't damaged, you can even send the same interceptor back mid-air and instantly re-engage, without having to fly back & forth and refuel.
- Consider aborting when a satellite hunter displays explosion effects. You have prevented the destruction of the satellite, so you might not want to risk additional damage.
- Use modules in tough situations when you need an extra boost to get the job done.
- Although Wingtip Sparrowhawks are an expensive investment, they are an option to consider pushing for as soon as you can:
- Their Foundry project can be unlocked fairly early.
- They don't have any artifact costs, like rare Power Sources or a high number of corpses.
- The long development time means you want to get them underway as soon as you can.
- The mass-firing tactic they present for inaccurate pilots helps in early-game, when just causing damage is difficult.
- Especially for dealing with Satt-hunting UFOs: when you just need to get them to 50% health as soon as you can so they leave your satellites alone, while giving the aliens less time to damage your own craft (ie: DPS race).
- Lastly: they are a permanent upgrade to all current and future XCOM craft, which only needs to be made once, and can't be lost alongside downed interceptors.
- Have an idea of how many interceptions are possible before UFO completes its mission or attempts to escape. For example Scouts usually can only be engaged twice with Ravens.
- If/once you get enough EMP Cannons to be distributed throughout each continent's squadron, remember that higher damage weapons have a greater chance to outright destroy enemy craft. Plan your engagements around that fact and consider which ground tactical missions you would rather go on.
- Consider saving craft equipped with more damaging weapons to go against larger UFOs, while EMPing the smaller craft may be a better risk/reward scenario, given that their full compliment of aliens won't be much larger than if shot down with other weapons.
- Late-game, you may find that the aliens favor sending more and the larger UFOs to one continent/country in particular (more commonly whichever continent/country has the highest Panic level, but attention of whichever one has XCOM HQ is also to be expected), meaning that you'll remained burdened by repair times: simply cycle out damaged fighters with fresh fighters from other continents.
- Transit time puts repair times on pause, but transfer time will almost always be far less than the days it'll take to repair a single fighter.
- This will also help you by evening out experience between your pilots, and spreading them out between each continent, so you don't get blindsided by, say, a Battleship appearing in a continent with an inexperienced squadron.
- The modules are much more worthwhile-- nearly essential-- in Long War. As said, Dodge cannot be used in an aggressive stance and Aim cannot be used in a defensive stance. And as they do take time to build, it pays to maintain a stock of them.
- The Aim module is fairly cheap, and is useful throughout a campaign. Keep a large stock of Floater corpses to make these. While an aggressive stance means that all shots have more accuracy, using an Aim module early in a normal stance dogfight means drawing first blood while being a little harder to be hit yourself.
- The Boost module can be used in any stance, and only extends time (as all air-to-air weapons now are counted as 'long range', approach reduction time no longer is affected). More useful in early game, when you need more time to do enough damage with the weaker weapons and less experienced pilots.
- The Dodge module is exceedingly useful, and still hard to make, due to the necessity of Cyberdisc wrecks needed to construct them.
- As mentioned, the aliens will most often focus their efforts on wherever they have the greatest foothold: expect Terror Ships and Assault Carriers on any country that's in the red, as the aliens commit Terror Missions in order to send a country over the edge to withdraw from the Council. So, be prepared to swap out any of your aircraft with those stationed in other continents, even if it only got dinged on a smaller UFO: this screening tactic the aliens may use can lead to you trying to fend off the larger UFOs with insufficient weapons and craft.
- Ergo: If repair time is longer than transit time, swap it.
- That goes double if it's been a while since you downed one of the larger UFOs: that may be a sign that they're making the down payment on the resource cost to send something big your way.
- So once you got a Firestorm built: guess where it should go?
By swatting UFOs out of the sky, you may be able to keep Panic tempered down: a UFO brought crashing to the ground is a pack of aliens not completing missions in the cities, and a smoking impact crater is a mission your soldiers don't need to get fatigued/injured on: heavy weapons obliterating the smaller UFOs may be desirable, at least to avoid the 'Fatigue Spiral.' If you've managed to take by the sky for a month, you may have a easier time in the next, as the aliens recoup their losses... unless you've managed to really piss them off. In which case, expect them to come a-knockin' on your base's door soon...
Damage Calculations
- Armor Mitigation = 0.05 * (Target Armor - Armor Penetration)
- 0 is the minimum Armor Mitigation and 0.95 is the maximum
- Base Damage = Weapon Damage * (1 - Armor Mitigation)
- Crit Chance = (Armor Penetration - Target Armor) / 2
- 5% is the minimum Crit Chance and 25% is the maximum
- A successful Crit multiplies damage by 2
- total damage is then randomized to between 100% and 150% of its current value.
- For XCOM Aircraft:
- If the appropriate UFO analysis has been researched, total damage is multiplied by 1.1
- total damage is also multiplied by (Pilot Kills / 100) + 1
Examples:
- Avalanche Missiles (340 damage, 0 armor penetration) vs Fighter (armor 12): no armor is penetrated, so 12×5=60% of damage is blocked, and the avalanche has an effective damage of 136-204.
- Laser Cannon (290 damage, 5 armor penetration) vs Fighter (armor 12): armor mitigation value of 12-5=7. Consequently, 7×5=35% of the damage is blocked, and the cannon has an effective damage of 188-282.
- Stingray Missiles (200 damage, 10 armor penetration) vs Fighter (armor 12): armor mitigation value of 12-10=2. Only 10% of damage is blocked, the stingray has an effective damage of 180-270.
Note that in the above example while the Laser Cannon and Stingray Missiles are about equal on a per-hit basis, the Laser Cannon is more effective in combat due to its higher rate of fire and higher accuracy.
Tables
UFO Types
| UFO Type | Durability | Armor | Firepower | Description |
|---|---|---|---|---|
 |
Low | None | Low | The speedy Scout-class UFO is fortunately within Earth's native capabilities to shoot down ... on occasion. It appears to be used for general reconnaissance, resource-gathering and research. |
 |
Low | Light | Moderate | The alien Fighter, while similar in outward appearance to the Scout, is much better protected. Armor-piercing weapons like our Stingray Missiles will be helpful in bringing these craft down. This class of craft is used primarily for air raids and anti-satellite operations. |
 |
Moderate | Very Light | Moderate | The Raider class of UFO seems to be a multirole craft that thus suffers in combat power. The aliens appear to use it for reconnaissance, research and resource-gathering operations. |
 |
Moderate | Moderate | High | The deadly Destroyer present a much greater threat to our aircraft than its sister class of ships. Armor-piercing weapons are required to defeat this craft. It appears to primarily be used for air raids and anti-satellite operations, although we may see it conduct reconnaissance missions as well. Our analysts note the presence of unused hardpoints on some images of this craft, so we should look out for upgraded versions with even more killing power. |
 |
High | Heavy | High | Abductors appear to be much better protected than other ships of this size. Perhaps the aliens particularly value the abduction and research missions they are used for. |
 |
High | Moderate | Moderate | The Harvester class of UFO seems to have one role - to recover important biological materials and minerals from Earth in support of other alien operations. We should try to interdict alien harvest operations whenever possible to slow the alien advance. These craft may be vulnerable to a concentrated attack. |
 |
Very High | Heavy | Moderate | This ponderously slow craft will be a tough nut to crack. It appears to be primarily used in alien terrestrial resource-gathering but could also be used in support of other major alien operations. |
 |
Very High | Heavy | Very High | The rarely encountered Terror Ship appears suited for rapid deployment of alien shock troops. They appear to presage alien terror missions, but they may be used for alien research on XCOM as well. |
 |
Highest | Heavy | Very High | The Assault Carrier, while built on a battleship hull, lacks some of its sister's firepower and may be easier to shoot down. Nevertheless, we expect to see the aliens use this craft only against high-value targets, so it should be taken seriously whenever it is detected. |
 |
Highest | Very Heavy | Highest | An unbelievably dangerous piece of hardware, these UFOs never appear to land but are used in bombing, anti-satellite and air superiority roles. |
 |
High | Very Heavy | Very High | This class of ship appears to be used as a airborne command center for the Ethereal race of alien. Only our strongest weapons will be able to penetrate its armor. |
Aircraft
| Name | Health | Armor | Penetration | Speed | Prerequisites | Cost | Maintenance | ||||||
|---|---|---|---|---|---|---|---|---|---|---|---|---|---|
| Other | |||||||||||||
 Skyranger |
Can't be damaged or destroyed | XCOM starts with one, unable to produce more | 20 | ||||||||||
 Satellite |
Increases funding and provides unique bonuses | 10 | 200 (300) |
0 (7) |
25 days (12.5 days) |
||||||||
 Interceptor |
2500 | 5 | 10 | 200 | 3 days | 40 | |||||||
 Firestorm |
4000 | 25 | 5 | 15 | Alien Propulsion | 75 | 750 (1125) |
180 (270) |
120 (180) |
10 (30) |
8 UFO Flight Computers 4 UFO Power Sources |
28 days (14.0 days) |
50 |
Interceptor Weapons
| Name | Hit chance | Damage | Penetration | Firing cooldown |
Prerequisites | Cost | Sell value | ||||||
|---|---|---|---|---|---|---|---|---|---|---|---|---|---|
| Other | |||||||||||||
 Avalanche Missiles |
25% / 40% / 55% | 340 (170 per second) |
2.0 second | XCOM starts with an unlimited supply | |||||||||
 Stingray Missiles |
25% / 40% / 55% | 200 (133 per second) |
10 | 1.5 second | XCOM starts with an unlimited supply | ||||||||
 Phoenix Cannon |
25% / 40% / 55% | 140 (183 per second) |
5 | 0.75 second | Alien Materials | 15 | 120 (180) |
12 (18) |
0 (5) |
10 days (5.0 days) |
48 | ||
| Phoenix Coilgun | 230 (307 per second) |
18 | Phoenix Coilguns (Foundry) | ||||||||||
 Laser Cannon |
40% / 55% / 70% | 290 (290 per second) |
5 | 1.0 second | Advanced Beam Lasers | 25 | 160 (240) |
30 (45) |
0 (6) |
10 days (5.0 days) |
64 | ||
| Pulse Cannon | 300 (400 per second) |
11 | 0.75 second | Supercapacitors (Foundry) | |||||||||
 Plasma Cannon |
25% / 40% / 55% | 650 (650 per second) |
22 | 1.0 second | Vehicular Plasma Weapons | 95 | 500 (750) |
50 (75) |
60 (90) |
5 (19) |
1 Alien Rifle | 14 days (7.0 days) |
200 |
 EMP Cannon |
15% / 30% / 45% | 310 (563 per second) |
30 | 0.55 second | Electromagnetic Pulse Weapons | 100 | 575 (862) |
60 (90) |
160 (240) |
0 (16) |
1 Sectopod Wreck | 20 days (10.0 days) |
230 |
 Fusion Lance |
15% / 30% / 45% | 1200 (960 per second) |
26 | 1.25 second | Fusion Weapons | 120 | 800 (1200) |
70 (105) |
120 (180) |
40 (62) |
1 Fusion Core | 25 days (12.5 days) |
320 |
Modules
| Name | Special properties |
Prerequisites | Cost | Sell value | ||||||
|---|---|---|---|---|---|---|---|---|---|---|
| Other | ||||||||||
UFO Tracking (Boost) |
Increases the duration of this air combat | Alien Materials Aircraft Boosters |
12 | 15 (22) |
1 (1) |
1 (3) |
2 Drone Wrecks | 5 days (2.5 days) |
6 | |
 Defense Matrix (Dodge) |
Dodges the next two incoming attacks | Cyberdisc Autopsy Aircraft Boosters |
50 | 25 (37) |
2 (3) |
1 (3) |
2 Cyberdisc Wrecks | 5 days (2.5 days) |
10 | |
 Uplink Targeting (Aim) |
Automatically hits the next two attacks | Floater Autopsy Aircraft Boosters |
35 | 20 (30) |
1 (1) |
1 (1) |
1 (3) |
3 Floater Corpses | 5 days (2.5 days) |
8 |