Difference between revisions of "Alien Life Forms (LWR)"
SweetMochi (talk | contribs) m (→Outsider) |
|||
| Line 428: | Line 428: | ||
'''Outsiders''' are quite dangerous. They have passive HP regeneration, high aim, and decent HP. You'll first encounter them shepherding their UFOs, waiting inside for you to approach (unless you play on Brutal or Impossible difficulties where they will also be present on the first mission). Their DR, HP pool, and regeneration means that it will take a concerted effort from the whole squad to take them down early game. Be careful though, they all have the [[Abilities_List_(LWR)#Close_Combat_Specialist|Close Combat Specialist]] perk, meaning moving too close to them can be extremely dangerous. | '''Outsiders''' are quite dangerous. They have passive HP regeneration, high aim, and decent HP. You'll first encounter them shepherding their UFOs, waiting inside for you to approach (unless you play on Brutal or Impossible difficulties where they will also be present on the first mission). Their DR, HP pool, and regeneration means that it will take a concerted effort from the whole squad to take them down early game. Be careful though, they all have the [[Abilities_List_(LWR)#Close_Combat_Specialist|Close Combat Specialist]] perk, meaning moving too close to them can be extremely dangerous. | ||
| − | Their ''Growth'' ability causes them to gain increased stats as the mission goes on, beginning from the start of mission. Leaving them alone until the end of the mission is ill-advised as they can become too strong to fight. On larger UFOs, Outsiders will be much more common, sometimes appearing in large groups. They will occasionally patrol and are not always found in the command room. | + | Their ''Growth''* ability causes them to gain increased stats as the mission goes on, beginning from the start of mission. Leaving them alone until the end of the mission is ill-advised as they can become too strong to fight. On larger UFOs, Outsiders will be much more common, sometimes appearing in large groups. They will occasionally patrol and are not always found in the command room. |
| − | When you first meet them, fighting Outsiders in a war of attrition across cover is a bad idea, since their HP regen, relatively high damage, and accuracy with their Alien Carbines means they may well win. Neutralizing the Outsider with | + | When you first meet them, fighting Outsiders in a war of attrition across cover is a bad idea, since their HP regen, relatively high damage, and accuracy with their Alien Carbines means they may well win. Neutralizing the Outsider with concussion grenades and ''suppression'' while you move your troops up to set up for a one turn kill is more effective. Note that their regenerative abilities will increase over the course of your game. |
| − | <span> | + | <span>* </span>The Outsider growth chance is based on difficulty and can be found [[Difficulty_(LWR)#Difficulty_Levels|here]]. |
'''Bounty''': 1 Meld | '''Bounty''': 1 Meld | ||
Revision as of 19:27, 13 September 2020
Alien Pods
Pods
Pods are typically comprised of one Squad Leader (often possessed with noticeably more stats and perks) & several regular troopers whose type is related to the leader and who have a chance to receive various upgrades dependent upon Alien Level. Later in the game, bosses with noticeably larger models and massive HP pools make an appearance in missions.
Pod composition is dependent upon the leader, with leaders tending to contain supporting troopers of the same or lesser type. For instance, Mechtoid pods tend to contain several Sectoids, whose Mind Merge ability can empower the Mechtoid with a powerful Psi Shield, while Cyberdisc pods tend to contain Drones which focus on repairing damage dealt to the Cyberdisc; conversely, pods led by Thinmen or Sectoids only contain units of the same type as the leader. The quantity of aliens in a pod is dependent upon overall Alien Level as well as the total number of aliens on mission; pods are rolled randomly and random numbers of aliens are added to said pods until all available units have been assigned. The number of aliens on missions is slightly influenced by Alien Resources.
While members of a given pod do not coordinate among themselves any better than disparate aliens from different pods will, there is one significant mechanic which is pod-dependent: retreat mode. If a large portion of aliens of a given pod are destroyed (usually all but 1-3, depending on the original size), the surviving members of the pod will begin to fall back, retreating out of sight of XCOM and toward good cover or other, unactivated pods. The aliens will remain in retreat mode until they enter back into vision of XCOM again, though destroying more units from the pod is sufficient to resume the retreat. Aliens entering into retreat mode will be identified by visual and auditory cues; the camera will pan toward the alien shouting or talking, and one of your soldiers will mention that they're falling back.
Conversely, if XCOM is pushed back by the aliens, they'll call for reinforcements to hunt them down. In general, if active aliens exist on the map, aren't in retreat mode, and none of them has any XCOM operatives in sight range at the end of the aliens turn, they'll call all unactivated pods on the map (aside from the Command Pod, if any) to help them hunt down XCOM. Each unactivated pod will begin moving toward XCOMs current location inexorably, and short of retreating or being wiped out the only escape is to defeat all such enemies.
Pod Size & Distribution
Pods have a number of aliens that are directly dependent upon current Alien Level:
- Small (Alien Level 1+): 2-4 aliens per pod
- Medium (Alien Level 3+): 3-6 aliens per pod
- Large (Alien Level 6+): 4-8 aliens per pod
While increases in pod sizes do not necessarily lead to more aliens on missions, extra aliens rolled that can't fit into any available pod are discarded. This has the largest effect during early Large UFOs, which typically call for way more aliens than can fit in their Small Pods. To partially compensate, missions taking place while pod sizes are small typically get an extra pod or two to work with. Larger pod sizes typically means the same amount of aliens overall, just compacted into less pods.
Pod Types
Pods come in three basic types: Soldier Pods, Terror Pods, and Command Pods. Soldier pods pull from a pool of most aliens and comprise the vast majority of pods encountered on all missions; Terror Pods pull from a slightly different pool. Command Pods only appear in UFOs and have relatively rigid compositions. Lastly, for Covert Operations, Exalt have special mechanics which govern the quantity and size of their pods.
- Soldier Pods: Soldier Pods are the most common type of pod, appearing as the majority pod type in every mission except Terror Sites & Covert Operations.
- Terror Pods: Terror pods are a special type of pod that only appear in Terror Sites, Large UFOs, Alien Base Assault, and Retaliation missions. They tend to have a greater probability of being higher-mobility aliens and are the only pod which contains Chryssalids. Exalt also make an appearance in later months.
- Command Pods: UFOs additionally have a special pod called the Command Pod which contains a fixed number of aliens based on UFO type. They consist entirely of Outsiders. Larger UFOs can contain multiple Command Pods. Be warned: if a Command Pod spots XCOM and activates, it will immediately call all remaining alien forces on the map to its current location; this makes an early engagement against the command pod a risky affair.
- EXALT Pods: While EXALT have a chance of appearing in Terror Pods, they appear most often in Covert Operations. All covert operations include drop ins of lone EXALT operatives who may or may not appear in cover and may or may not overwatch (Note: On Normal and Classic difficulty they will never overwatch).
Alien Appearances
Each pod created in the game has a chance to consist of different alien types. This changes the higher the Alien Level is (based on accumulated alien research). Below are the Alien Appearance Tables that describes the chance each alien has of appearing at each Alien Level.
In the Alien Appearance Weightings table, the number in brackets beside each alien type is their relative weighting. As an example, at Alien Level 3, the chance a pod will be a seeker pod is: (9 + 1) / (10 + 3 + 1 + 1 + 9 + 9 + 1 + 1 + 14 + 9 + 1) = 10 / 59 = 0.169. So each pod will have a ~17% chance of being a seeker pod at Alien Level 3. You can see all the calculated appearance chances in the Alien Appearance Chances table.
Alien Appearance Weightings
| Alien Appearance Weightings | |||||
|---|---|---|---|---|---|
| Alien Level | Cumulative Weighting | Alien Type (Relative Weighting) | |||
| Level 1 | 15 | Sectoid (10) | Drone (3) | Thinman (1) | Floater (1) |
| Level 2 | 35 | Floater (9) | Thinman (9) | Muton (1) | Seeker (1) |
| Level 3 | 59 | Muton (14) | Seeker (9) | Cyberdisc (1) | |
| Level 4 | 75 | Cyberdisc (14) | Mecthoid (1) | Berserker (1) | |
| Level 5 | 104 | Mechtoid (14) | Berserker (14) | Sectoid Commander (1) | |
| Level 6 | 125 | Sectoid Commander (19) | Heavy Floater (1) | Muton Elite (1) | |
| Level 7 | 146 | Muton Elite (19) | Heavy Floater (19) | Sectopod (1) | |
| Level 8 | 166 | Sectopod (19) | Ethereal (1) | ||
| Level 9 | 175 | Ethereal (9) | |||
| Level 10 | 185 | Ethereal (10) | |||
Alien Appearance Chances
| Alien Appearance Chances | ||||||||||||||||
|---|---|---|---|---|---|---|---|---|---|---|---|---|---|---|---|---|
| Alien Level | Alien Type (Chance to Appear) -- rounded to nearest percentage | |||||||||||||||
| Level 1 | Sectoid | 67% | ||||||||||||||
| Drone | 20% | |||||||||||||||
| Thinman / Floater | 7% | |||||||||||||||
| Level 2 | Sectoid / Thinman / Floater | 29% | ||||||||||||||
| Drone | 9% | |||||||||||||||
| Muton / Seeker | 3% | |||||||||||||||
| Level 3 | Muton | 24% | ||||||||||||||
| Seeker / Sectoid / Thinman / Floater | 17% | |||||||||||||||
| Drone | 5% | |||||||||||||||
| Cyberdisc | 2% | |||||||||||||||
| Level 4 | Cyberdisc / Muton | 20% | ||||||||||||||
| Seeker / Sectoid / Thiman / Floater | 20% | |||||||||||||||
| Drone | 4% | |||||||||||||||
| Mechtoid / Berserker | 2% | |||||||||||||||
| Level 5 | Mechtoid / Berserker / Cyberdisc / Muton | 14% | ||||||||||||||
| Seeker / Sectoid / Thinman / Floater | 10% | |||||||||||||||
| Drone | 3% | |||||||||||||||
| Sectoid Commander | 1% | |||||||||||||||
| Level 6 | Sectoid Commander | 16% | ||||||||||||||
| Mechtoid / Berserker / Cyberdisc / Muton | 14% | |||||||||||||||
| Seeker / Sectoid / Thinman / Floater | 8% | |||||||||||||||
| Drone | 2% | |||||||||||||||
| Heavy Floater / Muton Elite | 1% | |||||||||||||||
| Level 7 | Muton Elite / Heavy Floater / Sectoid Commander | 14% | ||||||||||||||
| Mechtoid / Berserker / Cyberdisc / Muton | 10% | |||||||||||||||
| Seeker / Sectoid / Thinman / Floater | 7% | |||||||||||||||
| Drone | 2% | |||||||||||||||
| Sectopod | 1% | |||||||||||||||
| Level 8 | Sectopod / Muton Elite / Heavy Floater / Sectoid Commander | 12% | ||||||||||||||
| Mechtoid / Berserker / Cyberdisc / Muton | 9% | |||||||||||||||
| Seeker / Sectoid / Thinman / Floater | 6% | |||||||||||||||
| Drone | 2% | |||||||||||||||
| Ethereal | 1% | |||||||||||||||
| Level 9 | Sectopod / Muton Elite / Heavy Floater / Sectoid Commander | 11% | ||||||||||||||
| Mechtoid / Berserker / Cyberdisc / Muton | 9% | |||||||||||||||
| Ethereal / Seeker / Sectoid / Thinman / Floater | 6% | |||||||||||||||
| Drone | 2% | |||||||||||||||
| Level 10 | Ethereal / Sectopod / Muton Elite / Heavy Floater / Sectoid Commander | 11% | ||||||||||||||
| Mechtoid / Berserker / Cyberdisc / Muton | 8% | |||||||||||||||
| Seeker / Sectoid / Thinman / Floater | 5% | |||||||||||||||
| Drone | 2% | |||||||||||||||
Alien Types
Sectoid
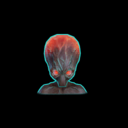
Sectoids have low mobility, HP, and aim. They have access to Mind Fray, Psi Panic, and Mind Merge. All Sectoids have the Ranger perk so they have no aim penalty when shooting with their plasma pistols at a distance.
Their signature Mind Merge ability is significantly more powerful, now granting the target +25 to aim, crit, and will, but has a long cooldown.
Sectoid squad leaders get Psi Mastery, allowing them to double their damage output. This makes them significantly more dangerous.
Bounty: 1 Elerium
Drone
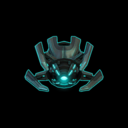
Drones can be encountered right from the beginning of the game. They can come in groups of their own or attached to Sectoid squads, and later they will accompany more powerful mechanized units like Cyberdiscs and Sectopods.
Their holo rounds are effective at making your units easier to hit and they can be quite deadly against early game SHIVs due to their anti-mechanical perks (especially the early leader Assault Drones).
Drones, like all mechanized units, have some damage reduction and are hardened. Their constant light cover from flying with damage reduction and ability to mutually repair can make them difficult to kill.
Bounty: 1 Alloy
Thinman
Thinmen have high mobility, mediocre aim, and low will. The can also jump to any height making them extremely dangerous when fighting at varying elevations. They can spit acid clouds at your units, leading to a corrosion effect that lowers aim and mobility by 20%, removes flat DR, and prevents passive healing for the remainder of the battle.
Thinmen also have the Snapshot ability, making overwatch ineffective against their shots. While overwatch is still effective against them if they move, it is often best to steady and/or shoot at them instead.
Council missions tend to have disproportionally high numbers of thinmen -- it is advised to bring ample medikits on these missions to help remove corrosion from your units.
Bounty: 1 Weapon Fragment
Floater
Floaters tend to fly (granting +30 defense) and gain the Tactical Mobility ability, granting them +15 defense while in flight or in cover. This makes them quite elusive. They also get +20 bonus aim when at an elevation meaning their aim can be quite high. In combination they can be quite deadly as accurate and difficult to hit enemies.
When engaging floaters at a distance, steadying your weapons can make it easier to hit them when they are flying high. Additionally, the Bullseye perk will grant additional aim against them when they are flying. Another effective counter is using rockets as none of the floater's defense will help it against explosives.
Bounty: 1 Meld
| Leader Name | Leader Level |
Cumulative Damage |
Cumulative HP |
Cumulative Aim |
Cumulative Will |
Additional Perks (carries into higher leader levels) |
|---|---|---|---|---|---|---|
| Floater Squad Leader | 1 | +2 | +5 | +10 | +10 | |
| Floater Sentry | 3 | +3 | +10 | +15 | +18 | |
| Floater Reaver | 6 | +5 | +30 | +40 | +28 | |
| Reaver Lord | 9 | +7 | +40 | +60 | +38 | |
Outsider
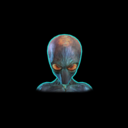
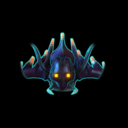
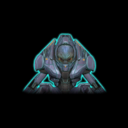
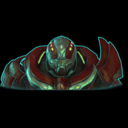
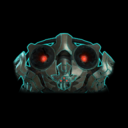
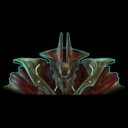
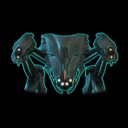
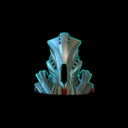
Outsiders are quite dangerous. They have passive HP regeneration, high aim, and decent HP. You'll first encounter them shepherding their UFOs, waiting inside for you to approach (unless you play on Brutal or Impossible difficulties where they will also be present on the first mission). Their DR, HP pool, and regeneration means that it will take a concerted effort from the whole squad to take them down early game. Be careful though, they all have the Close Combat Specialist perk, meaning moving too close to them can be extremely dangerous.
Their Growth* ability causes them to gain increased stats as the mission goes on, beginning from the start of mission. Leaving them alone until the end of the mission is ill-advised as they can become too strong to fight. On larger UFOs, Outsiders will be much more common, sometimes appearing in large groups. They will occasionally patrol and are not always found in the command room.
When you first meet them, fighting Outsiders in a war of attrition across cover is a bad idea, since their HP regen, relatively high damage, and accuracy with their Alien Carbines means they may well win. Neutralizing the Outsider with concussion grenades and suppression while you move your troops up to set up for a one turn kill is more effective. Note that their regenerative abilities will increase over the course of your game.
* The Outsider growth chance is based on difficulty and can be found here.
Bounty: 1 Meld
Chryssalid
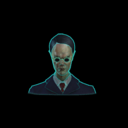
Chryssalids have great mobility and defense, and gain the Hardened ability, making them extremely agile armored threats. They also deal significant damage and will corrode any unit they hit, meaning you should attempt to kill them before they can get too close.
Explosives remain an effective counter to Chryssalids, since they'll frequently charge in a tightly packed group on first sight, and are difficult to hit with most weapons. Similarly, Concussion Grenades can debilitate a whole group of Chryssalids by reducing their mobility -- this means they won't be able to move and attack any units on the next turn if there are no units close to them. Chryssalids are immune to acid, so Acid Grenades won't reduce their mobility. A Close Combat Assault can frequently finish off weakened Chryssalids. The MEC Flamethrower is also quite effective; aside from the damage (especially with the Jellied Elerium upgrade) it can cause the Chryssalids to panic, and they may then run away from your soldiers instead of towards them.
Damaging them can drastically reduce their lethality thanks to Red Fog lowering their mobility and melee damage.
Bounty: 1 Alloy
Zombie
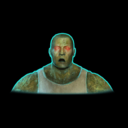
Zombies are melee units with a large health pool. However, they are not hardened and do not take cover so you can usually crit them for high amounts of damage. They can occasionally spawn as a member of Chryssalid pods on any mission, and it is also be possible to encounter them as a special pod spawn during Terror missions.
Damaging them can drastically reduce their lethality thanks to Red Fog lowering their mobility and melee damage.
They also will corrode any unit they hit, making their melee attacks even more dangerous.
Seeker
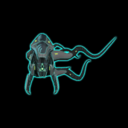
Seekers can be found both in pods made up entirely of Seekers, and accompanying squads of other aliens. This makes them dangerous, since a Seeker itself isn't much threat, but a Seeker supporting other aliens can be a deadly distraction. As mechanized units they have some damage reduction and are hardened. However, if they happen to get close to your units they may strangle them, incapacitating them and gaining +2 DR when strangling. Each turn the incapacitated units that are being strangled will take more and more damage. It is advised to try to kill them before they strangle as it can be difficult to remove them when strangling due to their increased resiliency.
Battle Scanners and the Proximity Sensor item can detect and uncloak nearby Seekers, providing an early counters to Seekers. They have a habit of going into Overwatch while in stealth, so if you're waiting out Seekers without a Battle Scanner, try moving a soldier, one might reveal itself to take a pot shot at you. Any explosive/area effect attacks (bar the MEC Flamethrower; Seekers are fireproof - though an 'IMMUNE' popup will still appear) that catch an invisible Seeker in their area will force them to decloak.
Bounty: 1 Alloy
Muton
Mutons are sturdy aliens that gain a lot of DR when protected by cover. They start with Alien Carbines and later upgrade to Alien Rifles.
Muton leaders have a Deflection Shield ability which activates when they end their turn on a move or with AP remaining, granting them defense and crit resistance against ranged attacks that scales with distance. They have access to the Blood Call ability which will grant various stat increases to allies in range, including double mobility. This can catch an unwary player off guard as a Muton moves many tiles to flank one of their soldiers.
Overall, Mutons create resilient roadblocks in the enemy formations that are best dealt with by flanking or removing their cover.
Unlike some of the other aliens, Muton intelligence is low and can lead to poor strategies like: running out into the open, performing poor attacks, or even retreating early if some of their squad mates have been killed.
Bounty: 1 Weapon Fragment
Cyberdisc
Cyberdiscs are usually accompanied by two to three Drones, and usually prefer to throw their grenade if an eligible soldier is in range rather than shooting.
Cyberdiscs pose a significant threat throughout the game due to high aim and high damage. They can transform between open and closed states: their open state is required to act and their closed state will grant them hardened and +6 DR. If they take damage in their open state, they will automatically close. However, they must open in order to act. Thus, they are best dealt with through high damage single attacks (e.g. a Mayhem sniper) when open.
Their movement range can take you off guard as it's close to that of a Chryssalid; if they're not dealt with quickly or retreated from, they are very likely to flank and hit you with raw firepower or simply fire long-range explosives at you.
The Drones escorting a Cyberdisc are quite dangerous as well, for two reasons. First, they can tag a target with Holo Rounds, making it easier for the parent Cyberdisc (and any other enemies, for that matter) to hit the victim. Second, they can fix any damage you have done to the Cyberdisc with their Repair ability.
Bounty: 10 Alloys
Mechtoid
Mechtoids will appear with Sectoid escorts, and later with Sectoid Commanders. They are very resilient units that deal high damage and have moderate aim.
Mechtoids are one of the few "big" units vulnerable to psionics - Mind Fray will restrict their movement and prevent them from charging to flank as well as reducing their accuracy. Psi Panic will completely disable a Mechtoid. Their will is a little higher than regular troops, but not stellar, so they are excellent targets for psionic abilities. Chem Grenades are also useful as Mechtoids have a significant amount of flat DR and the corrosion will lower their accuracy.
The Psi Shield granted to Mechtoids by Mind Merge grants a massive amount of temporary health. As a result, it is ideal that you find and kill the Sectoid that set up the link (helpfully indicated by the purple streams) before targeting the Mechtoid.
While Mechtoids do not explode for damage, a Mechtoid that falls backwards in a fight it will crush cover it lands on. Be careful not to destroy your own cover in close quarters combat.
Bounty: 20 Meld, 20 Alloys
Berserker
Berserkers commonly appear as Squad Leaders, meaning the first Berserkers you see could have terrifying amounts of health.
Like Chryssalids and Zombies, anything you can do to slow down a Berserker will greatly reduce its threat. They are Hardened and as such, will have a reasonable amount of DR. They are particularly weak to psionics due to their low will (though the leader Berserkers are not so susceptible). Concussing a Berserker will reduce its movement range to well below Concussion throw range, so is a good way to neutralize a Berserker you're not ready to kill.
Berserker Leaders have the Overpower ability, which grants them an overpowering aura. Non-SHIV XCOM units within their line of sight perform a will test against their will after each move or action taken. Failing this will test ends the unit's turn immediately. This means low will multi-action units are much less effective when there is a Berserker leader present. This can be countered with psionics, either by reducing their will or causing them to panic. Additionally, the Steadfast ability (can be gained by equipping an alien trophy) grants some resistance to being overpowered.
Be careful staying in cover near a Berserker as it may encourage a Bull Rush attack, destroying the cover and dealing significant damage from range.
Bounty: 1 Meld
Sectoid Commander
| Skills | |
Sectoid Commanders represent a substantial step up from their early game counterparts, and a substantial step up in terms of difficulty. An unprepared player could easily have their entire squad decimated by a Sectoid Commander.
They carry new psionic abilities as well as much better statistics. Sectoid Commanders are brave, and greatly prefer using psionic abilities over shooting, making them even more effective in their role. They all have the Psi Mastery ability, and will be able to use multiple psionic abilities each turn.
Their Greater Mind Merge is now quite powerful, granting multiple targets both +100 aim and +100 crit in addition to the +25 will and healing. They can also use Mind Control which will turn one of your soldiers against you.
They also gain the Distortion ability which distorts reality around them, making non-psionic attacks deal 65% less damage against them, and granting nearby allies +10 defense. In addition, Distortion will prevent squadsight shots from being able to target them.
Everything considered, these will likely be the most difficult aliens you fight when they are first revealed.
Bounty: 20 Elerium
Heavy Floater
| Skills | |
The Heavy Floater is a significant improvement over the original Floater. Unlike regular Floaters, Heavy Floaters can throw grenades.
They also have Rapid Reaction granting them the ability to trigger overwatch against units they can't originally see, and do so 3x per turn.
They also have Critical System Targeting and hit quite hard (often with high aim due to elevation), so tanking their shots with mechanical units is quite costly.
Bounty: 1 Meld
Muton Elite
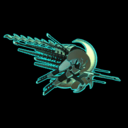
Muton Elites are looking similar to Mutons, but with a red armor and a helmet.
They have a lot of firepower at their disposal. Their heavy plasma weapons are both destructive and highly damaging, and they still benefit from Blood Call. They all have the Shredder ability which means your hardened units should take care to avoid their shots.
They are even sturdier then their regular and beserker counterparts as they have more defensive perks and more innate DR.
Bounty: 10 Meld
Sectopod
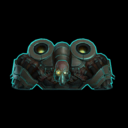
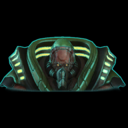
Sectopods are massive mechanical war machines. They represent one of the two late game enemies that are extremely dangerous. Taking them down without suffering casualties may not be possible. As with all aliens, their strength and power progresses with time, making them even more dangerous as the war drags on.
They have 3 main attacks: their chest cannon, their green turret cannon, and their cluster bomb rockets. The green turret cannon does -50% weapon damage and will activate for reaction shots. The cluster bomb rockets will require a turn to prepare and you'll receive a popup warning you of the imminent attack but deals +10 extra damage.
Sectopods have extremely high damage and extremely high aim. Tanking their shots should only be done by very resilient units, and they will still likely lose the majority of their health.
Not only do they output incredible offensive power, their HP and flat DR is extremely high. It is almost mandatory to bring some form of corrosion when fighting them in order to do reasonable amounts of damage.
By the time you encounter these units, you should hopefully be well on your way to finishing your campaign!
Bounty: 80 Alloys
Ethereal
The Ethereals are the floating psionic leaders of the alien race -- they represent the pinnacle of danger a Commander will encounter. Using a Psionic Lance attack that does damage based on will and hit chance based on aim, as well as the feared Mind Control and Rift abilities, Ethereals represent the pinnacle of psionic deadliness. Moreover, with Psi Mastery they can perform 2 attacks each turn.
Just like Sectoid Commanders they have the Distortion ability, granting immunity to squadsight and reducing any damage dealt to them. They also regenerate health, have innate defense, and the Overpower ability. Overall, this makes them extremely resilient.
They are the other late game enemy that is extremely dangerous and likely to cause fatalities and/or full squad defeats. Fighting an ethereal often results in a pyrrhic victory, if a victory at all. Take great care when engaging one as there are no aliens more deadly.
Bounty: 80 Elerium
