Ideal DOSBox Settings (UFO/TFTD)
This page will explain how to install and to set DOSBox up in order play both UFO: Enemy Unknown and Terror from the Deep (almost) flawlessly without any slowdowns, sound popping and with a perfect pixel output instead of washed out (filtered) pixel graphics. All of these settings, with the exception of the recommended Sound/Music settings, work the same on both UFO and TFTD.
DOSBox
The latest DOSBox Version can be downloaded for free from following site: https://www.dosbox.com/
The most up-to-date Version (as of 26.July.2019) is "0.74-3", though this guide will work identically for all "0.74" versions.
Simply download the Installer-Version and install DOSBox to your desired directory by following the on-screen instructions, i.e. "C:\Games\DOSBox\".
When the installation is finished, start up DOSBox for it to create all necessary files for this guide, then close it again.
Additionally, I recommend to manually create a new folder inside the "DOSBox"-folder named "Games".
This guide will be based on that "Games"-folder, if you don't create it you will have to adjust this guide for yourself accordingly.
DOSBox Config-File Settings
Short explanation, each DOSBox-Section has a title in brackets, i.e. [midi] and so on. Make sure you are in the correct section before you change values.
Anything in DOSBox that has a "#" at the start of a row will be ignored by DOSBox and is considered a comment, this is handy to leave yourself notes which configuration values to use for which game.
--
Enter your DOSBox-directory (i.e. "C:\Games\DOSBox\") and double click on the "DOSBox 0.74 Options.bat"-file to open the DOSBox Configuration-Textfile. (this step requires you to have started and closed DOSBox at least once!)
Change all values you find there to the following ones:
(Comments marked with "#" are additional information and must not be added into the Config-file.)
(Initial configuration is optimized for FullHD Monitors, however this guide has you covered up to 4K resolution.)
(To change between Fullscreen and Windowed Mode, press ALT+Enter while having DOSBox active.)
[sdl]
fullscreen=false
fulldouble=true
fullresolution=1920x1000
windowresolution=1600x1000
output=openglnb
autolock=true
sensitivity=100
waitonerror=true
priority=highest,normal
mapperfile=mapper-0.74.map
usescancodes=true
vsyncmode=host
vsyncrate=60
#If you prefer for DOSBox to start in Fullscreen, change "fullscreen=" to "fullscreen=true".
#openglnb will give you an unfiltered video output, some older cards may have problems with that, in this case "overlay" is an alternative to use.
#WQHD Monitors for Fullscreen "2560x1400" and for Windowed "2240x1400".
#4K Monitors for Fullscreen "3840x2000" and for Windowed "3200x2000".
#For ideal resolutions to use visit the "Game Resolution Choices"-section of this guide!
#vsyncrate should be whatever your monitors Hz is set to, i.e. 60, 75, 120, 144, etc.
#vsyncmode and vsyncrate are not initially included in the DOSBox-Config file and you have to manually enter them. Both can help reducing screen tearing on some games but not all of them.
--
[dosbox]
language=
machine=svga_s3
captures=capture
memsize=63
#memsize must not be higher than 63!
--
[render]
frameskip=0
aspect=false
scaler=normal3x
#change aspect to false, otherwise the pixels will be forced into a 4:3 ratio, weirdly stretching them horizontally.
--
[cpu]
core=pentium_slow
cputype=auto
cycles=41500
cycleup=1000
cycledown=1000
#These settings are most important to make the game run fluently and not too fast.
#Cycles can be manually increased/decreased during the game by pressing "CTRL+F11" (down) and "CTRL+F12" (up).
--
[mixer]
nosound=false
rate=49716
blocksize=8192
prebuffer=8192
#blocksize and prebuffer will prevent sound popping from occuring, however they will also add a slight delay to the sound effects, with Turn Based games like UFO/TFTD/JA1 this however doesn't matter and is barely noticable.
#If however you are bothered by that you can reduce the number to "4096", but then you will have to live with possible sound popping, especially during text promts (naming, game saving...).
--
[midi]
mpu401=intelligent
mididevice=win32
midiconfig=0
#Proper Midi-Setup is explained further down this guide at the "Roland MT-32"-section, to use other Midi-Devices "midiconfig" has to have its value changed respectively.
#To see which Midi-Devices are available and which number to use, open DOSBox and enter following into the "Z:"-promt: mixer /listmidi and confirm by pressing "Enter".
--
[sblaster]
sbtype=sb16
sbbase=220
irq=7
dma=1
hdma=5
sbmixer=true
oplmode=opl3
oplemu=compat
oplrate=49716
#opl3 is recommended along with the highest oplrate for best audio output.
--
[gus]
gus=true
gusrate=49716
gusbase=240
gusirq=5
gusdma=3
ultradir=C:\ULTRASND
#DO NOT SET "gus=true" unless you have Gravis Ultrasound properly installed for DOSBox. A guide can be found further down in this guide. Until then leave it at "gus=false".
--
[speaker]
pcspeaker=true
pcrate=49716
tandy=auto
tandyrate=49716
disney=true
#PC Speaker is not used and is only included here in case you want to play other games that use it, only change is to increase the audio rate.
--
Joystick, Serial, DOS and IPX are skipped as they do not require any changes for UFO/TFTD to work.
--
#The following [autoexec]-section is important to not only set up your game directory but also the CD Rom Drive to use
#In this example DOSBox was installed into following directory on my PC: "C:\Games\DOSBox\", adjust that part accordingly to your install-directory if yours differs.
[autoexec]
mount c c:\Games\DOSBox\Games\
mount d f:\ -t cdrom -usecd 0
#The additional "Games"-folder inside the "DOSBox"-Folder was created by myself, I would recommend you to do the same. That folder will be used as "C:\" in DOSBox and all your games will be installed there.
#The CD Rom Drive has to be mounted as "D:\" as shown above. In my case, Windows 10 designates any mounted .iso-file with the letter "F:\", change this according to whatever letter your Windows chooses for the CD/.iso-file.
#As example, if your CD Rom Drive or mounted ".iso" has the letter "E:\" assigned by Windows, then the DOSBox-mount-command-line should be as follows: "mount d e:\ -t cdrom -usecd 0".
---
DOSBox is now fully set up for UFO: Enemy Unknown and Terror from the Deep to be played on a FullHD Monitor.
The only remaining things to do now are to install the games, use the games setup file to set the correct sound card and then start the game. Both these steps are explained in the following sections of this guide.
Optionally, I heavily recommend to install "Gravis Ultrasound" to use with Terror from the Deep.
For those playing on a WQHD or 4K monitor, further down this guide you will find the ideal settings to use for those screen resolutions.
Same goes for those of you that want to record gameplay footage for Let's Play's on YouTube and the like.
For first timers, DOS can be a puzzling mess. This guide here is to help you to get games installed/started after having set your DOSBox-Config-File as shown above.
In all coming examples DOSBox will be installed to following directory: "C:\Games\DOSBox\"
Also, there will be a manually created folder called "Games" inside of the DOSBox-folder which is designated as the "C:\>"-directory. "C:\Games\DOSBox\Games\"
The Hard Drive C:\ in DOSBox is mounted as "C:\Games\DOSBox\Games\".
The CD Rom Drive D:\ in DOSBox is mounted as "F:\" and will display whatever .iso/CD is currently inserted/loaded before DOSBox has been opened.
When you start up DOSBox for the second time, you will be greeted with a promt at the bottom of the screen:
Z:\>
This promt will allow you to navigate through folders and execute files.
The Z:\ letter however will not be relevant for you, instead you must now change to the "C:\"-drive that you have defined above.
To do this, simply enter "C:" and then press "Enter:
Z:\>c:
Enter
C:\>
Now "C:\>" will appear as promt on the bottom of the screen. This is where all of your games will be installed on.
If you enter the command "DIR" and confirm with "Enter", DOSBox will list all folders and files currently inside of that directory:
C:\>dir
Enter
Let's say you already have UFO installed, a folder called "MPS" should be listed after typing in "DIR".
To change into that folder you will have to use the "cd" command and again confirm with "Enter".
C:\>cd MPS
Enter
C:\MPS>
Now you are inside of the "MPS"-folder, as the new promt shows. UFO is usually installed inside another folder (...MPS\UFO\), requiring you to enter 2 folders to get to the "exe."file to start the game.
From "C:\MPS>" you can now simply type "cd UFO" and confirm with "Enter" to get to following promt: C:\MPS\UFO>.
From "C:\>" you also have the option to type "cd MPS\UFO", confirm with "Enter" and you will be directly in the folder you need to be to start the game as indicated by the promt "C:\MPS\UFO>".
To go back a folder you can use the "cd.." command. As example to get back to "C:\>" from "C:\MPS\UFO>":
C:\MPS\UFO>cd..
Enter
C:\MPS>cd..
Enter
C:\>
You can also change to any other drive that you have assigned a letter to in the DOSBox-Config-File.
In this case we also have a CD Rom Drive as "D:\". As in the first step, you can simply type "d:" and confirm with "Enter" to change to the CD Rom Drive.
If your CD Rom Drive is a by Windows 10 mounted ".iso"-file, make sure the file is mounted and the ".iso"-Drive is displayed in the "Windows Explorer" before you open DOSBox.
C:\>d:
Enter
D:\>
When installing UFO or TFTD from their CD/.iso-file, changing to the CD Rom Drive is the first step you have to do.
The installation of the games is explained in the next section of the guide.
---
After having installed UFO and TFTD, in order to start the game after freshly starting DOSBox, use following commands:
UFO Enemy Unknown:
Z:\>c:
Enter
C:\>cd MPS\UFO
Enter
C:\MPS\UFO>UFO.exe
Enter

Terror from the Deep:
Z:\>c:
Enter
C:\>cd MPS\TFTD
Enter
C:\MPS\TFTD>TERROR.exe
Enter

You do not need to type in the ".exe", simply typing "UFO" or "Terror" and then confirming with "Enter" will be enough and the game will instantly start.
Short summary for commands:
"C:" and "D:" to change drives. C: is always HDD, D: is always CD ROM.
"cd" to change into a folder, "cd.." to change to parent directory.
"dir" to display all files/folder in current directory.
"Enter" to confirm command.
"xxxxx.exe" + "Enter" to start a programme/game, the ".exe" is not needed to type in.
DOS Installation and Setup Settings
UFO & TFTD: Insert the CD of the game into your PC's CD Rom drive. Alternatively, create an .iso file (i.e. with ImgBurn) and mount that file by right clicking it and using the Windows 10 provided mounting feature.
Start DOSBox and change to the CD Rom Drive:
Z:\>d:
Enter
D:\>hdinst
Enter
Type in D: into DOSBox and confirm by pressing "Enter", then type in "hdinst", again press "Enter", and follow the on-screen instructions.
UFO will be installed into the "C:\MPS\UFO\"-directory and TFTD will be installed into "C:\MPS\TFTD\"-directory.
After the installation change go into the UFO or TFTD folder, depending on which game you want to play. First change into "C:\>" then enter the folder of the game with the "cd"-command.
Alternatively, if you own the Steam version of TFTD, you can simply copy the "TFTD" folder from your Steam directory into your DOSBox's mounted "C:" drive. Here I also recommend putting it into the "...MPS\"-folder, in case you want to use oldschool DOS editors that require the game to be in that specific directory.
Now to setting the game properly up:
UFO:
Enter the UFO Setup by changing into the UFO directory "C:\MPS\UFO>", then type "setup" and confirm by pressing "Enter".
Now you are inside the setup programme.
For UFO Enemy Unknown following sound/music settings are recommended and will result in best audio output:
Choose Sound Board: Sound Blaster 16
Choose Music Board: AdLib/SoundBlaster FM
Navigate to each respective sound card option with the up- and down-arrow-key, press "Enter" and then confirm all "red" prompts with additional "Enter" presses. You do not need to change any of the numbers from the "red"-promts, as DOSBox is already pre-configured for them.
Other options such as Gravis Ultrasound, Roland MT-32 (and other Roland devices), General Midi, though mostly superior in other games, will sound inferior to the "AdLib/SoundBlaster FM" music option when it comes to UFO Enemy Unknown, as the Midi-Files Instrument Assignments haven't been properly optimized to even come close to the depth and feeling of the "AdLib/SoundBlaster FM" music option.
Therefore I heavily recommend using only "AdLib/SoundBlaster FM" as music output for the best and most atmospheric experience of the game.
If a Roland CM-32L / CM-64 / CM-500 device is being used, a police siren can be heard in the intro cinematic as the MicroProse logo fades out.
TFTD: For Terror from the Deep the games music has been specifically composed and optimized with Gravis Ultrasound in mind. However, a bug in the games setup prevents the cinematic videos to play if Gravis Ultrasound is chosen for both "Sound" and "Music" as sound card. Therefore, to get the improved Gravis Ultrasound music and to still have the cinematics play, choose following settings during the setup:
Enter the TFTD Setup by changing into the TFTD directory "C:\MPS\TFTD>", then type "setup" and confirm by pressing "Enter".
Now you are inside the setup programme.
Choose Sound Board: Sound Blaster 16
Choose Music Board: Gravis Ultrasound **or** AdLib/SoundBlaster FM
An elaborate guide on how to get Gravis Ultrasound working in DOSBox can be found at GUS_Music_in_Dosbox.
A short guide will be included further down in this guide.
Do not choose Gravis Ultrasound if you have not installed it, otherwise no music will play.
Game Resolution Choices
The native resolution of UFO and TFTD (and most other DOS games) is 320x200px. Therefore any resolution that is not a multiplier of that (2x, 4x, 6x, etc. aka "Integer Scaling") will result in scrambled / weirdly stretched pixels or require you to use one of the graphics outputs of DOSBox (i.e. opengl) that add an unsharp filter on the entire screen to even out the pixels.
320x200px has an aspect ratio of 16:10 while most modern monitors use a 16:9 ratio, this makes it impossible to get a proper full screen output of the game unless you are willing to sacrifice visual quality by using a filtered output or living with scrambled pixel mess.
Here is a list of recommended resolutions to use for a perfect pixel output of the game:
320x200 \ 640x400 \ 1280x800 \ 1920x1200 \ 2560x1600 \ 3200x2000 \ 3840x2400
For users with a FullHD (1920x1080px) monitor, the recommended resolution would be 1280x800px for the windowed mode, while the fullscreen resolution should be set to 1920x800px.
The change from 1280 to 1920 will center the game in the middle of your monitor instead of having it locked to the top left of the screen, that way it is still being output as 1280x800 as far as the games pixels go.
The same also applies for higher resolution monitors.
For example in WQHD (2560x1440px) the recommended resolution to use would be 1920x1200px in windowed mode, while when playing in fullscreen the resolution should be set to 2560x1200px in the DOSBox configuration file.
While all of these options will leave a black bars around the game, it'll be the best option if you want the best visual quality while playing and I heavily recommend to stay with these resolutions while using the unfiltered "openglnb" DOSBox graphics output option.
FullHD 1080p:
Windowed 1280x800px
Fullscreen 1920x800px
WQHD 1440p:
Windowed 1920x1200px
Fullscreen 2560x1200px
4K:
Windowed 3200x2000px
Fullscreen 3840x2000px
--
FullHD Windowed vs Fullscreen:

1280x800px, openglnb, Windowed Mode

1280x800px, openglnb, Windowed Mode
1280x800px, openglnb, Windowed Mode


1920x800px, openglnb, Fullscreen Mode

1920x800px, openglnb, Fullscreen Mode

1920x800px, openglnb, Fullscreen Mode


WQHD Windowed vs Fullscreen:
1920x1200px, openglnb, Windowed Mode

1920x1200px, openglnb, Windowed Mode

1920x1200px, openglnb, Windowed Mode


2560x1200px, openglnb, Fullscreen Mode
2560x1200px, openglnb, Fullscreen Mode

2560x1200px, openglnb, Fullscreen Mode


Ingame Settings
Now with the essentials done, the only settings that require adjustment are the ingame settings of UFO and TFTD.
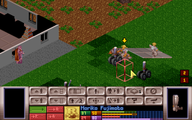
For both games you will need to enter the Tactical Screen and then click on the "?"-Icon located on the Icon-Bar.
There use following settings to optimize the animation speed:
"Scroll Speed: 1"
"Fire Speed: 1"
"X-COM Movement Speed: 2"
"Alien Movement Speed: 2"

Both "Scroll Speed" and "Fire Speed" should never be higher than "1", otherwise the animations played will be way too fast to enjoy the game.
Both Movement Speeds, for X-Com and Aliens, are alright to also be put at setting "3", however anything above setting "2" will hurt the immersion and atmosphere of the game and not really improve on the gameplay pace at all.
YouTube & Game Resolution & OBS Settings
If you like to record Let's Plays or uncommented Longplay-like videos, many DOS Games will turn out quiet blurry on YouTube.
As YouTube only properly supports aspect ratios of 4:3 and 16:9, any recorded 16:10 game footage will get scaled down to 16:9, causing the video to become slightly blurry.
Therefore, to have your YouTube video still retain as much quality as possible, following resolutions are recommended to record your footage in:
YouTube FullHD 1080p: 1920x1200 (downscale to 1728x1080)
YouTube WQHD 1440p: 2560x1600 (downscale to 2304x1440)
YouTube 4K: 3840x2400 (downscale to 3456x2160)
--
Another note: If you only have a FullHD/WQHD monitor but you also want to record in "2560x1600" to get a 1440p YouTube video, simply use your graphics cards control panel to help you out.
With AMD Cards, you can activate the "Virtual Super Resolution" in the "Radeon Settings", that way even on a FullHD monitor you can set resolutions up to 5K, allowing you to run and record DOSBox in 2560x1600 up to even 3840x2400 for 4K videos on YouTube.
nVidia Cards also have a similar option called "Dynamic Super Resolution" (DSR), which functions the same. Activate it in order to set your desktops resolution to 4K or 5K and then set DOSBox to the desired resolution you want your YouTube video to be in.
--
While editing your video, it is recommended to downscale the video to a 16:9 ratio with the downscale resolutions listed above. If you let YouTube do the downscaling by uploading in 1920x1200px, the video will have slightly more compression artifacts.
Here are 2 quality comparison videos, both uploaded with the same bitrate of 30000:
https://www.youtube.com/watch?v=C5uMe4i7qEw (YouTube downscale from 1920x1200px to 1728x1080px ; uploaded in 1920x1200px)
https://www.youtube.com/watch?v=vvTsLhw0cvA (Manual downscale with OBS from 1920x1200px to 1728x1080px ; uploaded in 1728x1080px)
OBS:
If OBS (Open Broadcaster Software) is used to record your footage you can instantly downscale the footage while recording. Just have the base canvas set to your desired resolution, i.e. for FullHD 1080p "Base Canvas" should be 1920x1200 and then use the "Lanczos" filter and manually enter following resolution for "Output" 1728x1080.
Of course, if you are using an editing programme to finalize your video, it might be better to use that programmes downscale routine over OBS's Lanczos to prevent further compression, as you will have to additionally encode the video again regardless.
However, it's up to you to test which option here will result in better quality. To do so simply record generic footage in 1920x1200 and 1728x1080 with identical bitrates, then encode both videos in your video editing software (manually scaling the 1920x1200 down to 1728x1080) with both set to the same bitrate and with the same edits, upload it to YouTube and compare both videos next to eachother after YouTube is done processing them.
--
For FullHD videos on YouTube your footage should be uploaded with at least a bitrate of 20000 to 30000.
For WQHD videos the bitrate should at least be 30000.
Gravis Ultrasound
An already existing, elaborate guide can be found here: GUS_Music_in_Dosbox
Only recommended for Terror from the Deep and some other DOS Games, here is a quick guide on how to set up Gravis Ultrasound on DOSBox:
Firstly, you require the Gravis Ultrasound files, these cannot be legally downloaded and either require you to own a physical GUS Card along with its Driver CD or "other means" to aquire them. This short guide is for those that already have these required files.
Usually you will have the choice between 2 folders called "ULTRASND411" and "ULTRASNDPPL161" if you use the internet to get the required files.
"411" being the original factory settings and "PPL161" a fan-optimized (unofficial) version that changes how some instruments sound. You can choose either as it doesn't really matter, I personally use the original "411" version as it comes closest to how it would sound on genuine hardware. Try for yourself which of both you like more when it comes to how it sounds and simply use that one then.
Move the "ULTRASND411"-folder or "ULTRASNDPPL161"-folder into your in DOSBox mounted "C:"-directory and rename the folder to simply "ULTRASND".
For example: If "C:\Games\DOSBox\Games\" is your "C:\>" directory the folder should be in "C:\Games\DOSBox\Games\ULTRASND\"
Then enter the DOSBox Config-File and apply following settings (as already listed above) to the [gus]-section of the Config-File:
gus=true
gusrate=49716
gusbase=240
gusirq=5
gusdma=3
ultradir=C:\ULTRASND
And you are done. Now you can freely choose any DOSBox Game to use Gravis Ultrasound with.
Roland MT-32 (and other Roland devices)
Keep in mind that the Roland MT-32 setting is inferior for both UFO and TFTD as music option compared to the recommended SB/GUS settings above, while Roland MT-32 usually is the best music option to use for most other DOS Games (i.e. Jagged Alliance, Colonization, Monkey Island, Dune 2, all Sierra Games, etc.) this is not the case for UFO/TFTD.
Also UFO (v 1.4) requires a Roland MT-32 fix before it works, which can be found here: https://www.vogons.org/viewtopic.php?t=21542&start=32
Otherwise no music will be played when you start the game.
The easiest way to get Roland MT-32 as well as other Roland devices to work with your DOSBox games is to use the Roland MT-32 emulator called "MUNT".
It can be downloaded from this site for free: https://sourceforge.net/projects/munt/
You also require the original Roland MT-32 ".ROM"-files named "MT32_CONTROL.ROM" and "MT32_PCM.ROM"" for it to work. These cannot be legally downloaded and require you to own physical Roland MT-32 machine with its Driver CD or aquire them by "other means".
After installing MUNT, simply move the ".ROM"-files into your MUNT directory.
Start "MUNT" by double-clicking its icon, then at the top bar click on "Options" and then on "ROM Configuration...".
There, make sure there is a checkmark on both "MT32_CONTROL.ROM"- and "MT32_PCM.ROM"-files, press "OK" and you are done with setting up MUNT.

Additionally, you will have to change a few settings in DOSBox to activate it.
Firstly, to see if it installed correctly, open DOSBox and type in "mixer /listmidi" and confirm with "Enter".

It should now ideally list 2 Midi-Devices. One being the generic "0 Microsoft GS WaveTable Synth (General Midi)" and the other one being "1 MT-32 Synth Emulator", both assigned with a number that you will need for the DOSBox Config-File.
Open the DOSBox Config-File and go to the [midi]-section. There change the "midiconfig" attribute from "midiconfig=0" to "midiconfig=1".
With that done and with the other changes to [midi]-section from the "DOSBox Config-File Settings"-Section, you are good to go to play with the Roland MT-32 music setting for any DOS Game that offers "General Midi / Roland MT-32" support.
--
MUNT doesn't have to be opened if you want Roland MT-32 music to play. You can leave it closed at all times. However, if you want to adjust the Midi-Music Volume, you will have to open MUNT before you open DOSBox. Then start a game that uses the Roland MT-32 and simply move the Volume-Slider as you like.
Game Settings Reset Bug
In both, UFO and TFTD (due to a bug), if an alien or alien controlled unit throws a grenade, the "fire rate" option is reset back to 3.
With the above DOSBox settings this means that every time this happens, you are advised to set the "fire rate" back to 1, in order to not suffer from the way too fast animations that take away from the games atmosphere.