Difference between revisions of "Squads (EU2012)"
m |
|||
| (33 intermediate revisions by 2 users not shown) | |||
| Line 1: | Line 1: | ||
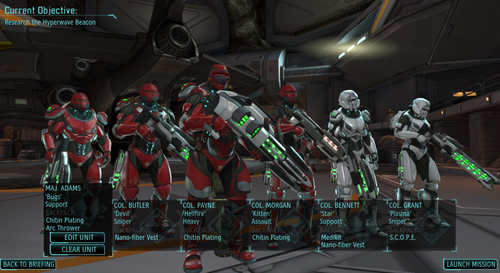
| − | + | [[image:XCOM Squad.png|500px|right]]Squads composed of up to 6 units are the standard tactical unit deployed by XCOM in the battlefield. All squads have a [[Soldiers (EU2012)|soldier]] designated as the squad leader and it is possible to only bring 1 trooper to missions. The starting squad size will be of 4 units, although it is possible to increase this number through the [[Officer Training School (EU2012)|Officer Training School]]. Squads can be composed of any soldier [[Classes (EU2012)|classes]] or even only 1 class and may also include [[S.H.I.V. (EU2012)|S.H.I.V.s]]. | |
| − | |||
| − | + | == Squad Size & Deployment == | |
| + | During the mission loadout screen it is possible (and advisable) to determine the starting position of the soldiers assigned to the squad. The below chart shows how the slots on the loadout screen correspond to tactical deployment. This setup applies to most [[Maps (EU2012)|maps]], although there will be exceptions. | ||
| − | The majority of your units this early will be rookies and therefore not have a class. Once you obtain sufficient ranked soldiers, you can start adjusting your squads for the missions you're embarking upon. The standard "one of each" is a typical approach here. | + | {| class="wikitable" width="100%" |
| + | |- | ||
| + | ! width="20%" align="center" | Squad Types | ||
| + | ! width="55%" align="center" | Notes | ||
| + | ! width="25%" align="center" | Deployment | ||
| + | |- style="vertical-align:top;" | ||
| + | |- | ||
| + | | align="center" | '''Default Squad'''<br>[[image:Squad 4 units.png|300px|right|Default Squad mission and tactical screens]] || The four-man squad is the default squad size.<br>The majority of your units this early will be rookies and therefore not have a class. Once you obtain sufficient ranked soldiers, you can start adjusting your squads for the missions you're embarking upon. The standard "one of each class" is a typical approach here. || align="center" | '''Equip Screen'''<br>2 3 4 5 <br><br>'''Mission Start'''<br>3 4<br>2 5 | ||
| + | |- | ||
| + | | align="center" | '''Squad Size I'''<br> [[image:Squad 5 units.png|300px|right|Squad Size I mission and tactical screens]] || The squad can be added with a 5th slot after purchasing the Squad Size I ability from the [[OTS_(EU2012) | Officer Training School]]. <br>Besides the additional firepower adding the 5th squad member also makes it safer to bring a rookie/squaddie for training, in addition to the four classes.<br> There are several possible deployment patterns using 5 unit squads. || align="center" | '''Equip Screen'''<br> 1 2 3 4 5<br><br> '''Mission Start'''<br>3 4 1 OR 3 5 4<br>2 5 ---- (2) 1 | ||
| + | |- | ||
| + | | align="center" | '''Squad Size II'''<br> [[image:Squad 6 unit.png|300px|right|Squad Size II mission and tactical screens]]|| The final six-man squad is unlocked after purchasing the Squad Size II ability from the [[OTS_(EU2012) | Officer Training School]].<br>Besides the additional number, The sixth soldier makes it safer to split the squad into two similar elements with separate roles during a fight. For instance, while one element of three soldiers keeps a pack of aliens pinned down, the second element maneuvers itself for a close assault or flanking shots.|| align="center" | '''Equip Screen'''<br> 1 2 3 4 5 6<br><br> '''Mission Start'''<br> 3 4 1<br> 2 5 6 | ||
| + | |- | ||
| + | |} | ||
| + | ===Squad Leader=== | ||
| + | [[image:Squad Leader.png|100px|right]] | ||
| + | One of the squad's soldiers will be assigned the leader, and will have a yellow star imposed upon its rank icon. Its importance on during missions is that soldiers will have a lesser chance of panicking as long as it remains alive and uninjured. | ||
| + | The leader is selected according to the following criteria: | ||
| + | # Rank - the highest ranking soldier will always be selected, regardless of position or stats | ||
| + | # Mission Loadout slot - if there are two (or more) soldiers of the same highest ranking, the one closest to the front will be selected. | ||
| + | # Kills/Will - if the foremost position is occupied by a lower rank, then the number of missions/kills and/or the Will stat seem to determine the squad leader. | ||
| + | <br> | ||
| + | [[File:ABILITY LEAD BY EXAMPLE (EU2012).png|75px|right]] | ||
| + | On the [[XCOM: Enemy Within DLC (EU2012)|Enemy Within DLC]], you'll be able to see who is the squad leader for the mission after you've purchased the [[OTS (EU2012)|OTS]] '''Lead By Example''' upgrade. During the pre-mission loadout screen, the current squad leader will have the Lead By Example icon on its list of abilities. | ||
| − | + | ==Squad Types== | |
| − | + | The composition of a squad will depend on its number of [[Abilities (EU2012)|abilities]], their [[Classes (EU2012)|classes]], individual soldier [[Abilities (EU2012)|abilities]] and any [[Equipment (EU2012)|equipment]], as well as the presence of [[S.H.I.V. (EU2012)|S.H.I.V.]] units, as well as the [[Missions (EU2012)|mission]] type and objectives. | |
| − | |||
| − | |||
| − | |||
| − | |||
| − | |||
| − | = | ||
| − | + | The starting squad composition is the [[Assault (EU2012)|Assault]], [[Sniper (EU2012)|Sniper]], [[Heavy (EU2012)|Heavy]], [[Support (EU2012)|Support]] combination, although it can be a rare occurrence during the early game stage due to combat losses and injuries. It is usually required to build the [[Officer Training School (EU2012)|OTS]] to increase the squad size and enlarge the pool of trained soldiers before more specialization is possible. After that the differences will be on the number of soldiers of each class present. | |
| − | + | Since each squad may have up to 6 soldiers, it is possible to combine the squads described below, by fielding an Assault/Heavy squad or a Sniper/Assault squad, whichever suits better your playstyle. | |
| − | |||
| − | |||
| − | |||
| − | |||
| − | |||
| − | |||
| − | |||
| − | |||
| − | + | ===Heavy Squad=== | |
| − | + | Heavy squads have two or more Heavy soldiers and are useful on missions facing superior [[Aliens (EU2012)|Alien]] firepower/numbers. They are focused on deploying their weapons, specially the [[Rocket Launcher (EU2012)|Rocket Launcher]] against packs of enemies and dealing massive damage or removing their cover and leave the kill for the rest of the squad. | |
| − | + | The Heavy's primary weapons can be very useful for Overwatch ambushes against the weaker aliens, with the Rapid Reaction perk, or for close combat with the Bullet Swarm ability. It is also possible to bring two Heavies and combine together the Holo-Targeting and Bullet Swarm abilities if they are both present. | |
| − | |||
| − | |||
| − | |||
| − | |||
| − | + | '''Tactical Use''' | |
| − | + | *When tougher aliens are expected or encountered for the first time. | |
| − | === | + | ===Sniper Squad=== |
| − | + | These squads are built around the principle of Scout and Snipe - scouting units move ahead to spot alien packs and remove their cover for the Snipers on the back to take out using the Squad Sight ability. They can be very powerful in open maps, specially if the Snipers are equipped with Archangel Armor. | |
| + | With two Snipers, both can either have the Squad Sight ability and be in safe positions, or, 1 has Squad Sight and the other Snap Shot, and most important, Battlescanner. Until you've researched and built [[Ghost Armor (EU2012)|Ghost Armor]], Battlescanner is simply a life saver since it allows the Commander to quickly assess the situation ahead, without alerting the aliens to XCOM's presence, and determine the best way to engage alien pods. | ||
| − | + | '''Tactical Use''' | |
| + | *Open maps, without the need for close range fighting. | ||
| − | + | ===Assault Squad=== | |
| − | + | With two or more Assaults, this squad is good for maps with cover that require/allow [[Flanking (EU2012)|Flanking]] maneuvers or for fighting inside the larger [[UFOs (EU2012)|UFOs]]. The Assaults can be used as a pair or separately, allowing for more pincer movements, although at a loss of firepower. | |
| − | + | Assault squads are also very useful on Bomb Disposal missions due to the Assault's Run & Gun ability - they can Dash, disarm a node and Fire/Overwatch, allowing for quick movement. | |
| − | |||
| − | |||
| − | |||
| − | + | '''Tactical Use''' | |
| + | * Assaults can be used as Rifleman (with Assault Rifles) or Breachers (with Shotguns) or a mix. | ||
| + | * Usually in maps that allow for wide flanking movements, with cover. | ||
| + | * Enclosed maps like the large UFOs or urban areas. | ||
| − | + | ===Support Squad=== | |
| − | + | This squad is built upon the principle of squad endurance, with the Support soldiers responsible for injury/poison recovery (Field Medic) and squad security (Sprinter for Scouting, Covering Fire/Sentinel for sentries, Smoke and Mirrors/Dense Smoke for cover, etc.). | |
| + | Support squads usually have lesser firepower than any of the others but their advantage is that they are built to keep the squad fighting as long and effective as possible. They can also be fast squads for use on Council missions after Laser/Plasma weapons are developed and deployed since the firepower/armor isn't anymore an issue when facing the lower tier aliens. | ||
| − | + | '''Tactical Use''' | |
| + | * In prolonged fights (large maps/UFOs). | ||
| + | * On Council missions after advanced weapons/armor are developed and deployed. | ||
| − | + | ===Combined Squad=== | |
| − | + | Finally this squad is a mixture of two of the squads listed above, by adding 2 soldiers of different classes to the basic four. There's several different combinations possible, depending on the player's choices. These are the most common squads fielded because of their versatility. | |
| − | |||
| − | |||
| − | |||
| − | |||
| − | |||
| − | === | + | ==Squad Formations== |
| + | These formations are used specially on open [[Maps (EU2012)|maps]] where there's more freedom of movement. Some sort of cover is usually required but that depends on the tech disparity between both sides - it's quite possible to deploy your [[Soldiers (EU2012)|soldiers]] out in the open and not risk KIAs, depending on the battlefield circumstances. There are three main types of formations: '''Wedge, Line/File and Fire Teams'''. | ||
| − | + | ===Axis of Movement=== | |
| − | + | The squad axis of movement is the general direction(s) which the squad is moving within the mission's Area of Operations (AO). The axis is one of the main factors to consider when moving your squad in formation. It can be useful to set the game camera pointing upwards towards the axis to help remember the main route the squad is following. When deciding which axis should be set for a unit or the whole squad, there are different types of areas spread around the map to consider. | |
| − | + | [[Image:Area Operations (EU2012).png|right|300px|Red = Danger, Yellow = Unknown, Blue = Safe]] | |
| − | + | * '''Safe''' (blue area): these are areas scouted recently and clear of [[Aliens (EU2012)|aliens]]. It is always necessary to keep track of the Squad's safe areas since they can provide concealment and avoid activating more packs of X-Rays. Safe areas with full [[Cover (EU2012)|cover]] available are the best one since they all for soldiers to set [[Overwatch (EU2012)|Overwatch]] traps, conduct flanking maneuvers, reload their [[Weapons (EU2012)|weapons]], [[Medikit (EU2012)|heal]] themselves, or pull back to avoid being crushed by the aliens. | |
| + | * '''Unknown''' (yellow area): all out of sight areas of the map where aliens might be present, either dormant or active. As the squad moves away from the [[Skyranger (EU2012)|Skyranger]] it will start revealing more of the unknown part of the Area of Operations and risk either activating dormant aliens or run into their Overwatch traps. | ||
| + | * '''Danger''' (red areas): locations where they aliens can target any allied units and hit/kill them during their turn. As the aliens move during their turn or are activated during XCOM's turn they'll create new danger zones. | ||
| + | ====Other Areas==== | ||
| + | [[Image:Other Areas (EU2012).png|right|300px|Skyranger EVAC Area with Sniper in position]] | ||
| + | * '''Fall Back''': the rectangle close to the Skyranger that allows evacuation of any squad units present on it. | ||
| + | * '''Objective(s)''': these are areas that need to be defended/captured, as required the [[Missions (EU2012)|mission]]'s objectives. Examples are the [[Bomb Disposal (EU2012)|Bomb Disposal]] Council missions, where it is required to reach the bomb's location, or the bridge chamber on the [[Storyline Missions (EU2012)#Alien Base Assault|Alien Base]] mission. However, a squad can also set short-term tactical objectives such as capturing/securing good map positions for a [[Sniper (EU2012)|Sniper]] or to secure a particular position to outflank an enemy. | ||
| + | <br clear="all"> | ||
| − | === | + | === Wedge === |
| + | [[Image:Wedge (EU2012).png|right|300px|Wedge formation]] | ||
| + | * This are the starting squad positions and they are usually used at the start to advance the [[Soldiers (EU2012)|soldiers]] all together and try to kill [[Aliens (EU2012)|alien]] patrols with combined [[Overwatch (EU2012)|Overwatch]] shots. | ||
| + | * It's a typical formation as the XCOM squad moves away from the Skyranger and starts exploring the AO to find the aliens. | ||
| + | * This formation can be used over and over, as long as there aren't any active aliens (i.e. that have seen you and made the "run for cover" animation). It is also possible to use this formation against 1 or 2 active aliens if the soldiers have enough [[Armor (EU2012)|armor]] to prevent being killed from 1 or 2 alien shots. | ||
| + | <br clear="all"> | ||
| + | ==== Scouting ==== | ||
| + | [[Image:Scouting (EU2012).png|right|300px|Scout advances]] | ||
| + | * The basic movement is for 1 high movement unit to advance 1 action for scouting and then the rest of the squad rejoins it and all units end their turn in [[Overwatch (EU2012)|Overwatch]] for the reaction shots in case an alien patrol wanders by. | ||
| + | * The key is to coordinate the squad's movement as one. All members use 1 action to move, one by one, then the whole squad Overwatches together. | ||
| + | * Some units best used on this role include: | ||
| + | ** [[S.H.I.V. (EU2012)|S.H.I.V.s]] because of their durability. | ||
| + | ** [[Support (EU2012)|Supports]] with Sprinter ability or [[Sniper (EU2012)|Snipers]] equipped with Battle Scanner; | ||
| + | ** Supports/Heavies with Suppression to suppress any discovered alien and restrict its movements; | ||
| + | ** After contact with the aliens is initiated the squad usually switches to the Line formation. | ||
| + | <br clear="all"> | ||
| + | === Line === | ||
| + | [[Image:Line (EU2012).png|right|300px|After contact squad breaks into a Line]] | ||
| + | * After contact with the enemy is established, the line is used to secure the squad's location and prevent the aliens from advancing or flanking your units. Your soldiers will be spread in a line behind cover and with enough space between them to avoid several units being hit by [[Alien Grenade (EU2012)|Alien Grenades]] or [[Thin Man (EU2012)|Thin Man]] poison. | ||
| + | * The Line allows flexibility to deal with threats from multiple directions and to perform frontal assaults. | ||
| + | * However, it may not be possible to establish a line if the whole squad finds itself on the middle of a danger zone or if the aliens are threatening to outflank it. In those situations the squad may switch into a '''File'''. | ||
| + | * If frontal advances are too costly, the File may instead break itself into two semi-independent '''Fire Teams'''. | ||
| + | <br clear="all"> | ||
| + | ====Choosing Cover==== | ||
| + | [[Image:Good Cover (EU2012).png|right|300px|Soldier in good cover]] | ||
| + | The cover locations should also not danger zones. In order to determine if a tree, van or wall is safe, consider the following: | ||
| + | * How many aliens can presently see the soldier behind [[Cover (EU2012)|cover]]; | ||
| + | * How many more will be able to see him/her if they advance on the next turn; | ||
| + | * If your Overwatch fire can bring any advancing enemies down; | ||
| + | * If the unit is at a risk of being [[Flanking (EU2012)|flanked]] and receiving a [[Critical Hits (EU2012)|critical hit]]; | ||
| + | * If the object proving cover can be destroyed by gunfire or explosives; | ||
| + | * If the object can explode by its own (usually cars). | ||
| + | <br clear="all"> | ||
| + | ====Rules of Engagement==== | ||
| + | When moving or firing a unit you should always consider the same principle defined in the Scouting section: your squad should move and fight as one. There are exceptions to this rule, but the key aspect is that all the moves should be coordinated and the 2 actions of a unit shouldn't be used one after the other. As an example with a 4 soldier squad (Heavy, Assault, Sniper, Support): | ||
| + | * Assault moves and spots enemy, stops moving; | ||
| + | * Heavy (with Bullet Swarm) fires and misses; | ||
| + | * Sniper (with Squad Sight) also fires and misses; | ||
| + | * Support moves to a position with full cover but has a low Aim probability; | ||
| + | * Assault either fires, goes on Overwatch or retreats; | ||
| + | * Heavy advances to a better position for the next turn; | ||
| + | * Support uses Smoke Grenade to cover either Assault or Heavy, if required, or also goes to Overwatch; | ||
| + | * Turn ends. | ||
| + | This way you can combine the synergy of the different [[Classes (EU2012)|classes]] and their [[Abilities (EU2012)|abilities]] together more efficiently, without taking unnecessary risks. | ||
| + | ===File=== | ||
| + | [[Image:File (EU2012).png|right|300px|Squad pulls back into a File to reach a safe area]] | ||
| + | A File is used to retreat from a bad position or to quickly reach a map position. | ||
| + | * The main emphasis of a file is to avoid contact/engagements with the aliens, by moving/dashing through secure locations, with 1 or more units moving ahead of everybody else to scout the path to the rest of the squad. | ||
| + | * [[Assault (EU2012)|Assaults]] can be one of the best units for this role since their '''Run & Gun''' ability allows them to respond to any threats found within the axis of advance. Assaults are also typically found on the flanks of a squad to try to outflank the aliens and can switch quickly to this role. | ||
| + | * A squad can usually quickly switch between a File and a Line. | ||
| + | <br clear="all"> | ||
| + | ====Tactical Retreats==== | ||
| + | [[Image:Retreating (EU2012).png|right|300px|Should this soldier retreat?]] | ||
| + | Many times the question is "when to retreat" after you've encountered several aliens or started suffering casualties. To evaluate the situation you should consider how many enemies will be left standing, after you've played your turn, according to the the following guidelines : | ||
| + | * A single Alien that needs 2 shots to kill one of your soldiers is a nuisance. | ||
| + | * 2 or more Aliens that need 2 shots to kill one of your soldiers are a threat. | ||
| + | ** The same for 1 Alien that only needs 1 shot and has your soldier on its sights. | ||
| + | * 2 or more Aliens that need only 1 shot each to kill a soldier is risking disaster for the entire squad. | ||
| + | <br clear="all"> | ||
| − | + | ===Fire Teams=== | |
| − | + | [[Image:Fire Teams (EU2012).png|right|300px|Squad breaks into two fire teams]] | |
| − | + | * Another possibility is to divide your squad into two separate teams, each fulfilling a different role while moving and [[Aim (EU2012)|firing]] in coordination. A fire team's composition is usually made up on the occasion and largely depends on its role. | |
| − | + | * This formation is used to advance by flanking the enemies's position, with 1 fire team holding the aliens in position while the other advances through a different direction, or to draw the aliens to Overwatch traps, with 1 team withdrawing to draw the aliens into the sights of the second team. | |
| − | + | * While this formation allows great flexibility for a squad, its main drawback is that a player will be splitting its firepower and risking that the aliens overcome either team. | |
| − | + | <br clear="all"> | |
| − | + | ====Bounding Overwatch==== | |
| − | + | [[Image:Bounding Overwatch (EU2012).png|right|300px|Rear element on Overwatch try to kill a Sectoid]] | |
| + | Use of Fireteams also provides the opportunity to catch advancing enemies on Overwatch traps while retreating. While the forward element of the Squad dashes to safety, the rear element can set itself in positions where it can safely Overwatch without the risk of drawing fire from several enemies. | ||
| + | This tactic can be difficult to master because it will also depend a lot on the characteristics of the aliens encountered. [[Sectoid (EU2012)|Sectoids]], for instance, will usually retreat if they are fired upon while advancing, but [[Muton (EU2012)|Mutons]] will play more aggressively and melee/robotic units like [[Chryssalid (EU2012)|Chryssalids]], [[Berserker (EU2012)|Berserkers]], [[Cyberdisc (EU2012)|Cyberdisc]] or [[Sectopod (EU2012)|Sectopods]] will simply advance or fire upon the rear element. | ||
| + | <br clear="all"> | ||
| − | |||
| − | |||
| − | |||
| − | |||
| − | |||
| − | |||
| − | |||
| − | |||
| − | |||
| − | |||
| − | |||
| − | |||
| − | |||
| − | == | + | ==See Also== |
| − | + | * [[Missions (EU2012)|Mission Types]] | |
| − | + | {{XCOM Units (EU2012)}} | |
[[Category: Enemy Unknown (2012)]] | [[Category: Enemy Unknown (2012)]] | ||
| + | [[Category: Soldiers (EU2012)]] | ||
| + | [[Category: Tactical Guide (EU2012)]] | ||
Latest revision as of 14:02, 10 February 2014
Squads composed of up to 6 units are the standard tactical unit deployed by XCOM in the battlefield. All squads have a soldier designated as the squad leader and it is possible to only bring 1 trooper to missions. The starting squad size will be of 4 units, although it is possible to increase this number through the Officer Training School. Squads can be composed of any soldier classes or even only 1 class and may also include S.H.I.V.s.
Squad Size & Deployment
During the mission loadout screen it is possible (and advisable) to determine the starting position of the soldiers assigned to the squad. The below chart shows how the slots on the loadout screen correspond to tactical deployment. This setup applies to most maps, although there will be exceptions.
| Squad Types | Notes | Deployment |
|---|---|---|
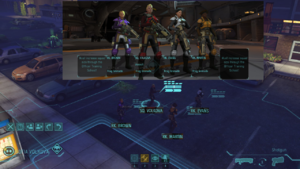
| Default Squad |
The four-man squad is the default squad size. The majority of your units this early will be rookies and therefore not have a class. Once you obtain sufficient ranked soldiers, you can start adjusting your squads for the missions you're embarking upon. The standard "one of each class" is a typical approach here. |
Equip Screen 2 3 4 5 Mission Start 3 4 2 5 |
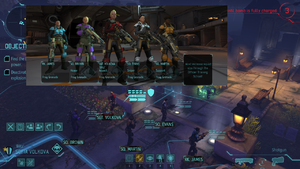
| Squad Size I |
The squad can be added with a 5th slot after purchasing the Squad Size I ability from the Officer Training School. Besides the additional firepower adding the 5th squad member also makes it safer to bring a rookie/squaddie for training, in addition to the four classes. There are several possible deployment patterns using 5 unit squads. |
Equip Screen 1 2 3 4 5 Mission Start 3 4 1 OR 3 5 4 2 5 ---- (2) 1 |
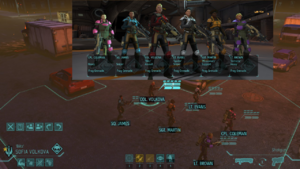
| Squad Size II |
The final six-man squad is unlocked after purchasing the Squad Size II ability from the Officer Training School. Besides the additional number, The sixth soldier makes it safer to split the squad into two similar elements with separate roles during a fight. For instance, while one element of three soldiers keeps a pack of aliens pinned down, the second element maneuvers itself for a close assault or flanking shots. |
Equip Screen 1 2 3 4 5 6 Mission Start 3 4 1 2 5 6 |
Squad Leader
One of the squad's soldiers will be assigned the leader, and will have a yellow star imposed upon its rank icon. Its importance on during missions is that soldiers will have a lesser chance of panicking as long as it remains alive and uninjured. The leader is selected according to the following criteria:
- Rank - the highest ranking soldier will always be selected, regardless of position or stats
- Mission Loadout slot - if there are two (or more) soldiers of the same highest ranking, the one closest to the front will be selected.
- Kills/Will - if the foremost position is occupied by a lower rank, then the number of missions/kills and/or the Will stat seem to determine the squad leader.
On the Enemy Within DLC, you'll be able to see who is the squad leader for the mission after you've purchased the OTS Lead By Example upgrade. During the pre-mission loadout screen, the current squad leader will have the Lead By Example icon on its list of abilities.
Squad Types
The composition of a squad will depend on its number of abilities, their classes, individual soldier abilities and any equipment, as well as the presence of S.H.I.V. units, as well as the mission type and objectives.
The starting squad composition is the Assault, Sniper, Heavy, Support combination, although it can be a rare occurrence during the early game stage due to combat losses and injuries. It is usually required to build the OTS to increase the squad size and enlarge the pool of trained soldiers before more specialization is possible. After that the differences will be on the number of soldiers of each class present.
Since each squad may have up to 6 soldiers, it is possible to combine the squads described below, by fielding an Assault/Heavy squad or a Sniper/Assault squad, whichever suits better your playstyle.
Heavy Squad
Heavy squads have two or more Heavy soldiers and are useful on missions facing superior Alien firepower/numbers. They are focused on deploying their weapons, specially the Rocket Launcher against packs of enemies and dealing massive damage or removing their cover and leave the kill for the rest of the squad. The Heavy's primary weapons can be very useful for Overwatch ambushes against the weaker aliens, with the Rapid Reaction perk, or for close combat with the Bullet Swarm ability. It is also possible to bring two Heavies and combine together the Holo-Targeting and Bullet Swarm abilities if they are both present.
Tactical Use
- When tougher aliens are expected or encountered for the first time.
Sniper Squad
These squads are built around the principle of Scout and Snipe - scouting units move ahead to spot alien packs and remove their cover for the Snipers on the back to take out using the Squad Sight ability. They can be very powerful in open maps, specially if the Snipers are equipped with Archangel Armor. With two Snipers, both can either have the Squad Sight ability and be in safe positions, or, 1 has Squad Sight and the other Snap Shot, and most important, Battlescanner. Until you've researched and built Ghost Armor, Battlescanner is simply a life saver since it allows the Commander to quickly assess the situation ahead, without alerting the aliens to XCOM's presence, and determine the best way to engage alien pods.
Tactical Use
- Open maps, without the need for close range fighting.
Assault Squad
With two or more Assaults, this squad is good for maps with cover that require/allow Flanking maneuvers or for fighting inside the larger UFOs. The Assaults can be used as a pair or separately, allowing for more pincer movements, although at a loss of firepower. Assault squads are also very useful on Bomb Disposal missions due to the Assault's Run & Gun ability - they can Dash, disarm a node and Fire/Overwatch, allowing for quick movement.
Tactical Use
- Assaults can be used as Rifleman (with Assault Rifles) or Breachers (with Shotguns) or a mix.
- Usually in maps that allow for wide flanking movements, with cover.
- Enclosed maps like the large UFOs or urban areas.
Support Squad
This squad is built upon the principle of squad endurance, with the Support soldiers responsible for injury/poison recovery (Field Medic) and squad security (Sprinter for Scouting, Covering Fire/Sentinel for sentries, Smoke and Mirrors/Dense Smoke for cover, etc.). Support squads usually have lesser firepower than any of the others but their advantage is that they are built to keep the squad fighting as long and effective as possible. They can also be fast squads for use on Council missions after Laser/Plasma weapons are developed and deployed since the firepower/armor isn't anymore an issue when facing the lower tier aliens.
Tactical Use
- In prolonged fights (large maps/UFOs).
- On Council missions after advanced weapons/armor are developed and deployed.
Combined Squad
Finally this squad is a mixture of two of the squads listed above, by adding 2 soldiers of different classes to the basic four. There's several different combinations possible, depending on the player's choices. These are the most common squads fielded because of their versatility.
Squad Formations
These formations are used specially on open maps where there's more freedom of movement. Some sort of cover is usually required but that depends on the tech disparity between both sides - it's quite possible to deploy your soldiers out in the open and not risk KIAs, depending on the battlefield circumstances. There are three main types of formations: Wedge, Line/File and Fire Teams.
Axis of Movement
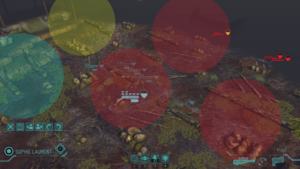
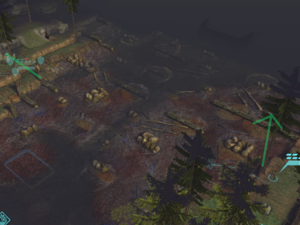
The squad axis of movement is the general direction(s) which the squad is moving within the mission's Area of Operations (AO). The axis is one of the main factors to consider when moving your squad in formation. It can be useful to set the game camera pointing upwards towards the axis to help remember the main route the squad is following. When deciding which axis should be set for a unit or the whole squad, there are different types of areas spread around the map to consider.
- Safe (blue area): these are areas scouted recently and clear of aliens. It is always necessary to keep track of the Squad's safe areas since they can provide concealment and avoid activating more packs of X-Rays. Safe areas with full cover available are the best one since they all for soldiers to set Overwatch traps, conduct flanking maneuvers, reload their weapons, heal themselves, or pull back to avoid being crushed by the aliens.
- Unknown (yellow area): all out of sight areas of the map where aliens might be present, either dormant or active. As the squad moves away from the Skyranger it will start revealing more of the unknown part of the Area of Operations and risk either activating dormant aliens or run into their Overwatch traps.
- Danger (red areas): locations where they aliens can target any allied units and hit/kill them during their turn. As the aliens move during their turn or are activated during XCOM's turn they'll create new danger zones.
Other Areas
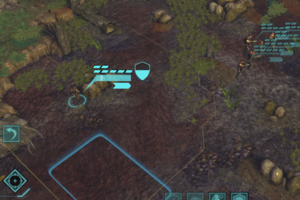
- Fall Back: the rectangle close to the Skyranger that allows evacuation of any squad units present on it.
- Objective(s): these are areas that need to be defended/captured, as required the mission's objectives. Examples are the Bomb Disposal Council missions, where it is required to reach the bomb's location, or the bridge chamber on the Alien Base mission. However, a squad can also set short-term tactical objectives such as capturing/securing good map positions for a Sniper or to secure a particular position to outflank an enemy.
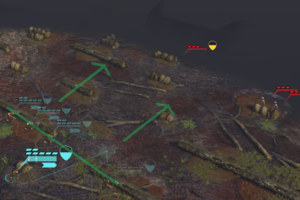
Wedge
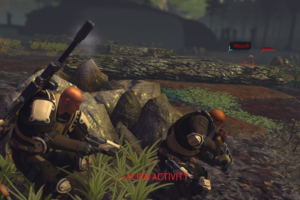
- This are the starting squad positions and they are usually used at the start to advance the soldiers all together and try to kill alien patrols with combined Overwatch shots.
- It's a typical formation as the XCOM squad moves away from the Skyranger and starts exploring the AO to find the aliens.
- This formation can be used over and over, as long as there aren't any active aliens (i.e. that have seen you and made the "run for cover" animation). It is also possible to use this formation against 1 or 2 active aliens if the soldiers have enough armor to prevent being killed from 1 or 2 alien shots.
Scouting
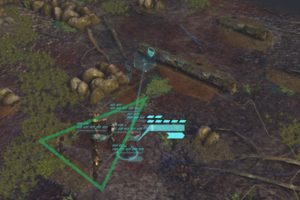
- The basic movement is for 1 high movement unit to advance 1 action for scouting and then the rest of the squad rejoins it and all units end their turn in Overwatch for the reaction shots in case an alien patrol wanders by.
- The key is to coordinate the squad's movement as one. All members use 1 action to move, one by one, then the whole squad Overwatches together.
- Some units best used on this role include:
Line
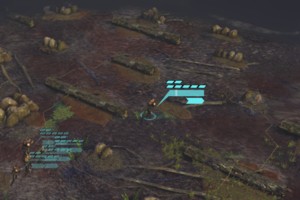
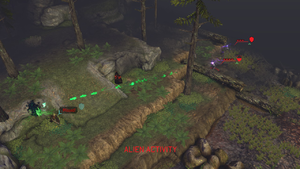
- After contact with the enemy is established, the line is used to secure the squad's location and prevent the aliens from advancing or flanking your units. Your soldiers will be spread in a line behind cover and with enough space between them to avoid several units being hit by Alien Grenades or Thin Man poison.
- The Line allows flexibility to deal with threats from multiple directions and to perform frontal assaults.
- However, it may not be possible to establish a line if the whole squad finds itself on the middle of a danger zone or if the aliens are threatening to outflank it. In those situations the squad may switch into a File.
- If frontal advances are too costly, the File may instead break itself into two semi-independent Fire Teams.
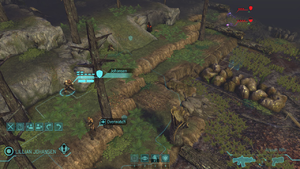
Choosing Cover
The cover locations should also not danger zones. In order to determine if a tree, van or wall is safe, consider the following:
- How many aliens can presently see the soldier behind cover;
- How many more will be able to see him/her if they advance on the next turn;
- If your Overwatch fire can bring any advancing enemies down;
- If the unit is at a risk of being flanked and receiving a critical hit;
- If the object proving cover can be destroyed by gunfire or explosives;
- If the object can explode by its own (usually cars).
Rules of Engagement
When moving or firing a unit you should always consider the same principle defined in the Scouting section: your squad should move and fight as one. There are exceptions to this rule, but the key aspect is that all the moves should be coordinated and the 2 actions of a unit shouldn't be used one after the other. As an example with a 4 soldier squad (Heavy, Assault, Sniper, Support):
- Assault moves and spots enemy, stops moving;
- Heavy (with Bullet Swarm) fires and misses;
- Sniper (with Squad Sight) also fires and misses;
- Support moves to a position with full cover but has a low Aim probability;
- Assault either fires, goes on Overwatch or retreats;
- Heavy advances to a better position for the next turn;
- Support uses Smoke Grenade to cover either Assault or Heavy, if required, or also goes to Overwatch;
- Turn ends.
This way you can combine the synergy of the different classes and their abilities together more efficiently, without taking unnecessary risks.
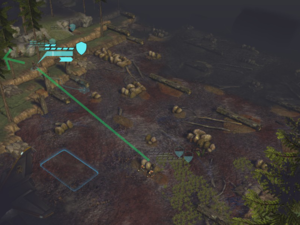
File
A File is used to retreat from a bad position or to quickly reach a map position.
- The main emphasis of a file is to avoid contact/engagements with the aliens, by moving/dashing through secure locations, with 1 or more units moving ahead of everybody else to scout the path to the rest of the squad.
- Assaults can be one of the best units for this role since their Run & Gun ability allows them to respond to any threats found within the axis of advance. Assaults are also typically found on the flanks of a squad to try to outflank the aliens and can switch quickly to this role.
- A squad can usually quickly switch between a File and a Line.
Tactical Retreats
Many times the question is "when to retreat" after you've encountered several aliens or started suffering casualties. To evaluate the situation you should consider how many enemies will be left standing, after you've played your turn, according to the the following guidelines :
- A single Alien that needs 2 shots to kill one of your soldiers is a nuisance.
- 2 or more Aliens that need 2 shots to kill one of your soldiers are a threat.
- The same for 1 Alien that only needs 1 shot and has your soldier on its sights.
- 2 or more Aliens that need only 1 shot each to kill a soldier is risking disaster for the entire squad.
Fire Teams
- Another possibility is to divide your squad into two separate teams, each fulfilling a different role while moving and firing in coordination. A fire team's composition is usually made up on the occasion and largely depends on its role.
- This formation is used to advance by flanking the enemies's position, with 1 fire team holding the aliens in position while the other advances through a different direction, or to draw the aliens to Overwatch traps, with 1 team withdrawing to draw the aliens into the sights of the second team.
- While this formation allows great flexibility for a squad, its main drawback is that a player will be splitting its firepower and risking that the aliens overcome either team.
Bounding Overwatch
Use of Fireteams also provides the opportunity to catch advancing enemies on Overwatch traps while retreating. While the forward element of the Squad dashes to safety, the rear element can set itself in positions where it can safely Overwatch without the risk of drawing fire from several enemies.
This tactic can be difficult to master because it will also depend a lot on the characteristics of the aliens encountered. Sectoids, for instance, will usually retreat if they are fired upon while advancing, but Mutons will play more aggressively and melee/robotic units like Chryssalids, Berserkers, Cyberdisc or Sectopods will simply advance or fire upon the rear element.
See Also
| Soldiers: | |
| S.H.I.Vs: | S.H.I.V.• Alloy S.H.I.V. • Hover S.H.I.V. |
| Attributes: | Classes • Class Builds • Abilities • Stats • Nicknames • Gene Mods (EW DLC) • Medals (EW DLC) |
| Loadout: | Weapons • Armor • Equipment • MEC Suit (EW DLC) |
| Barracks: | Officer Training School • Psi Lab • Memorial • Genetics Lab (EW DLC) • Cybernetics Lab (EW DLC) |
| Other: | Volunteer • Heroes • Zhang (Slingshot DLC) • Annette (EW DLC) • Covert Operative (EW DLC) • Training Roulette (EW DLC) |
