Difference between revisions of "Supply ship"
m (Again, some minor house-cleaning.) |
|||
| Line 5: | Line 5: | ||
You usually don't want to shoot these down, as most of them actually land for supply missions to alien bases. You can get a nice steady supply of [[Elerium-115|elerium]] this way. | You usually don't want to shoot these down, as most of them actually land for supply missions to alien bases. You can get a nice steady supply of [[Elerium-115|elerium]] this way. | ||
| − | + | This ship has 3 [[UFO Power Source|power sources]] and 4 [[UFO Navigation|navigations]]. | |
| − | + | The race aboard this ship is the same thats inside the base under resupply. --[[User:60.241.66.150|60.241.66.150]] | |
| − | |||
| − | The | ||
==Plan Of Attack== | ==Plan Of Attack== | ||
Revision as of 05:03, 9 December 2005
General Information
The supply vessel is used during the construction of alien bases or for supplying existing bases. It carries alien food containers and reproduction chambers.
Additional Information
You usually don't want to shoot these down, as most of them actually land for supply missions to alien bases. You can get a nice steady supply of elerium this way.
This ship has 3 power sources and 4 navigations.
The race aboard this ship is the same thats inside the base under resupply. --60.241.66.150
Plan Of Attack
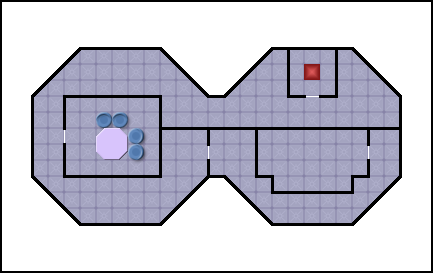
1. Ground floor: Power
Best tactic here involves a 2 stage attack on the ship: securing the doors and securing the lifts.
If the power sources have exploded due to a crash, there will be little left of the inner walls on this floor, and often holes in the ceiling exposing the middle floor. You shouldn't have shot it down, really.
Once you have moved soldiers onto each of the one-square lifts on the ground floor, you can prepare for the final assault at some leisure, due to the aliens' typical reluctance to shoot straight down a gravlift. You can, of course, shoot straight up at them.
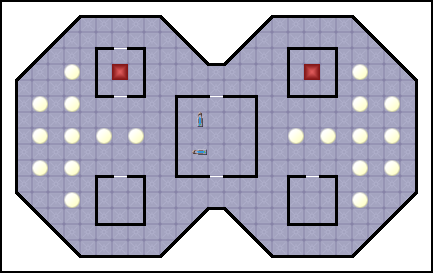
2. Middle floor: Supplies
The assault on the middle floor can be executed as a pincer attack from both lifts if you cut through the wall of the three-story lift with Heavy Plasma.
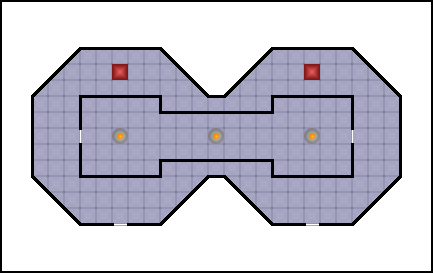
3. Top floor: Bridge
The assault on the bridge often proceeds like this:
- 1. Secure the lift exit with 3 or 4 soldiers. Check those corners!
- 2. Set up snipers to cover the north hallway with reaction fire.
- 3. Optionally send a team through the winding south hallway.
- 4. Use splash damage from Grenades to take down the bridge guards before you turn the corner.
- 5. Flank the bridge door. Bust in. Confront the leader cowering behind the navigation consoles and take him down as you see fit.
Alternatively, cut through interior walls with HE or plasma, nuke the nav tables with HE or grenades.
Alien Deployment
Rank       Beg./Exp.  Vet./Gen.    Super.
----       ---------  ---------    ------
Soldiers      5-11       6-12       7-13
Navigators     1          1          2
Engineers      1          1          2
Medics         1          1          2
Leaders        1          1          1
Floor Plans
See Also
Small Scout
Medium Scout
Large Scout
Abductor
Harvester
Terror Ship
Battleship


