Difference between revisions of "T'leth"
m (→Description) |
m (→Description) |
||
| Line 89: | Line 89: | ||
*same as in part 2. | *same as in part 2. | ||
| + | |||
| + | ===Complete Layout of T'Leth - Level 3=== | ||
| + | [[File:TFTD tleth3-L0.jpg|right|thumb|T'Leth Level 3 L0]]Map of t'Leth Level 3 - L0. <br clear="all"> | ||
| + | |||
| + | |||
| + | [[File:TFTD tleth3-L1.jpg|right|thumb|T'Leth Level 3 L1]]Map of t'Leth Level 3 - L1. <br clear="all"> | ||
==Tips== | ==Tips== | ||
Revision as of 08:36, 25 June 2014
General Information
T'Leth is the game's final mission where aquanauts must fight through three levels of enemies to reach the leader of the invasion fleet and put an end to it.
Note that this is a do-or-die mission. If you fail or hit abort at any time, the entire campaign is lost. Be sure to take the time to make all the necessary preparations and assemble the finest squad and equipment before launching this mission.
To access T'Leth, you need to have built a Leviathan sub and complete the "T'leth the alien's city" research topic. Once the research topic is complete, any Leviathan selected in the Geoscape will have an additional T'Leth button added beside the launch button.
Alien City Level 1
| T'Leth Level 1 Mission Briefing |
|
We are entering the unknown, from here on in there could be anything waiting for us. We know there are 2 further levels to the Alien city and your squad must race to the exit on this level to enter the next. Place all aquanauts on the exit and click the 'Abort Mission' icon to advance. Aborting elsewhere will terminate the mission. |
Source: Terror From The Deep T'Leth mission briefing
|
Description
This level looks like the second part of an Artefact Site mission, but the map layout is different and there are only two levels. You must kill all aliens as you move your units to the lift (bright yellow floor) and press the "abort mission" button. Note that this lift is on the upper level (l1).
The map consists of two or three very large rooms and a multitude of smaller chambers. Most of these are connected to 3-4 other chambers, which makes them good for setting ambushes - watch your back! The large rooms are usually filled alien power generators, hibernation chambers and the like, and are less likely to hold aliens. Instead, most aliens will reside in the smaller rooms, either patrolling around the lower floor or hiding on the upper one. The aliens are not very aggressive; most will hole up and MC your troops.
Because almost all the aliens have Disruptor Pulse Launchers and MC ability, it is prudent to use your SWSs for the initial scouting. After that you can use your own MC-capable aquanauts to take control over the Aquatoids and use them for scouting.
Aliens encountered:
- Aquatoid Navigators and Commanders (all M.C. capable) armed with Disruptor Pulse Launchers (most of your opponents on this level, some 15-20 of them)
- Hallucinoids
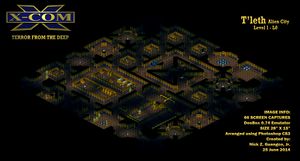
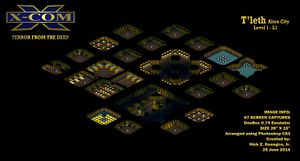
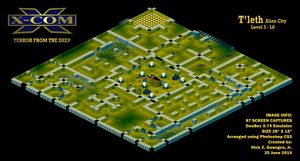
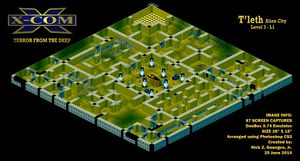
Complete Layout of T'Leth - Level 1
Map of t'Leth Level 1 - L0.
Map of t'Leth Level 1 - L1.
Alien city level 2
| T'Leth Level 2 Mission Briefing |
|
Further into the unknown, from here on in there could be anything waiting for us. We know there is a further level to the Alien city and your squad must race to the exit on this level to enter the next. Place all aquanauts on the exit and click the 'Abort Mission' icon to advance. Aborting elsewhere will terminate the mission. |
Source: Terror From The Deep T'Leth Mission Briefing Screen
|
(Note that the briefing is almost identical to the previous one)
Description
Looks like the the second part of a Colony Assault mission, but again there's only 2 levels. The map layout is fixed and is always the same from game to game.
Once again, you need to kill all aliens or find the access lift to the third level. This can be difficult, because to do it you must first climb to the upper level, cross to the corner of the map opposite your starting location, and then descend to the ground level. Another problem is that some of the corridors will be too narrow for your SWSs - use Sonic Cannons or Disruptor Pulse Launchers to widen the door and corridors.
This level is a real maze, and it can be time-consuming and frustrating to find the right way. Much of the path is linear, following a counter-clockwise spiral pattern into the central area. S
Use Disruptor Pulse Launchers carefully, so as not to make additional routes for the aliens to ambush you. Since the corridors are often narrow, it might not always be practical to use SWSs for scouting. Try to use MC-ed aliens instead. Luckily, none of the aliens on this level are MC-capable.
Note that the exit lift has only room for 25 aquanauts, so if you took a fully-crewed Leviathan to the mission you must either kill all the aliens or be prepared to leave someone behind. If it comes to that, the best choice is a SWS, because their mobility is greatly restricted in the third level. If you take the mission slowly and follow the route that you are meant to follow, and explore the occasional side paths, you should meet every alien there is to meet by the time you reach the exit.
Aliens encountered:
- Aquatoid Soldiers, armed with a mix of Disruptor Pulse Launchers and Thermal Shock Launchers
- Lobster Men Soldiers & Squad Leaders, armed with a mix of Disruptor Pulse Launchers and Thermal Shock Launchers
- Deep Ones (several)
- Tentaculats (a few)
- Hallucinoids (several)
- Xarquid (one or two)
Make sure to save RIGHT at the end of Part 2, because...
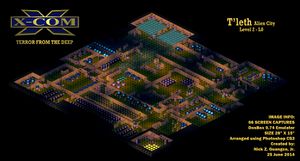
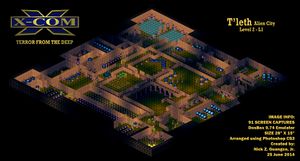
Complete Layout of T'Leth - Level 2
Map of t'Leth Level 2 - L0.
Map of t'Leth Level 2 - L1.
Alien city level 3
| T'Leth Level 3 Mission Briefing |
|
The end is in sight, from here on in we are searching for the crypt of the Ultimate Alien. Destroy the 8 power feeds to the tomb to finish off the Alien threat. Don't give up now! Aborting will terminate the mission. |
Source: Terror From The Deep T'Leth Mission Briefing Screen
|
Description
The map is roughly a spiral leading to the Ultimate Alien's coffin. Aside from not being able to save, your overhead map will not function properly! You won't be able to see the terrain, only your aquanauts, aliens and dropped items. Also, your SWSs can't move through the doors unless you knock them down with Disruptor Pulse Launchers. You'd need a LOT of ammo to knock down all the doors you need to pass to reach the end.
Fortunately, the map is mostly straightforward, with only a couple of dead-ends. It's also quite large, so your agents will run out of energy if you advance too quickly.
None of the aliens use MC-attacks, so this level is really kind of a pushover. It's certainly easier than the lower level of Cydonia.
When you reach the central chamber, be careful of Tentaculat ambushes. Remember that, unlike in Enemy Unknown, you can't kill the alien mastermind. Instead, destroy the power cylinders around him to win.
Aliens encountered:
- same as in part 2.
Complete Layout of T'Leth - Level 3
Map of t'Leth Level 3 - L0.
Map of t'Leth Level 3 - L1.
Tips
- It goes without saying, bring the best troops you have. As many as possible should have Mag. Ion Armour. You'll have a much easier time if your Aquanauts have high MC ratings. Because of the 80 item limit, 26 Aquanauts is probably impractical, so it's probably a good idea to take along 2-3 Displacers.
- You can take some MC-weaklings along, as long as you keep them unarmed (or armed with Gauss Pistols) on the first level. The vast majority of your opponents there will be Aquatoids, so you don't need powerful weapons anyway. After the first level there are no more MC-capable aliens, so your MC-weaklings are no longer in danger.
- The aliens are armed exclusively with Disruptor Pulse Launchers and Thermal Shok Launchers. This means you can't rely on scavenging Sonic weapons or ammo. So be careful, as your Sonic Cannons may run out of ammo if you don't bring reloads. Instead, grab every Shok launcher and Disrupter Pulse Launcher that you can carry with you as you make your way to the end.
- The 80 item limit really hurts. So make sure you only bring along stuff that's essential. As per the previous note, Disrupter Pulse Launchers and Thermal Shok Launchers are plentiful and can be scavenged off the aliens, so you will not need to bring great quantities of them in. Concentrate on the essentials like MC Disruptors, Medi-Kits, Sonic weapons, ammo and close combat weapons. Additionally, there are few Sonic Pulsers in the T'Leth levels, so be prepared to bring an extra helping of them if you wish to use them.
- Spread out! Especially on the first level. You don't want a Disruptor Pulse Launcher to take out half your squad, do you?
- There's more light than on Mars's surface, so incendiary ammo is less useful (though not completely useless).
- The level 2 map is always the same layout. If you have enough sonic cannons or disrupter pulse torpedoes, you can cut a short-cut through to the exit of this map. From the entry point, head south and once you reach the first large hallway with the rail on the upper level, head up and cut your way through the rail and through several walls to the east. In time you will arrive at the final stretch that leads to the exit chamber, a large brown room with an open floor and drums spaced evenly along the walls. Note taking this path instantly takes you through the most dangerous part of the map, the area where the tentaculats and deep-ones reside.
- The life support batteries around the coffin in level 3 can not be damaged by melee weapons or thermal shok bombs. Be absolutely sure that you reserve some ammunition or explosives to deal with them or else you will not be able to complete the final mission.
- Tactics to deal with specific enemies:
- Aquatoids: dangerous but very vulnerable. On the first level they all have MC abilities and Disruptor Launchers. Luckily, they almost always die in one hit, and won't survive even on the outskirts of an explosion. On the other two levels they're more of a nuisance, as no longer have MC and most have Thermal Shok Launchers. Still, one or two might be toting a Disruptor Pulse Launcher, so don't ignore them.
- Lobster Men: dangerous and very tough, but no MC ability. They usually survive even a direct hit from a Disruptor Pulse Launcher! Most of them are coincidentally armed with just that, but others wield Thermal Shok Launchers and are therefore less dangerous. Your best bet is to use MC attacks and Melee weapons against them. The Thermal Shok Launchers they carry are also useful at quickly disabling them, consider picking up a few along the way. Don't forget they have a natural melee attack!
- Tentaculats: as dangerous as ever, Tentaculats are surprisingly rare in T'leth. Just like in Colony Assaults, they tend to hide in small rooms and nooks and ambush nearby aquanauts. Particularly in the central area of level 2. Be alert, and let Displacers or MC-ed aliens do the scouting.
- Xarquid: rare on level 2, but feature heavily towards the end of level 3. Xarquids tend to keep their distance and snipe at your men.
- Deep Ones: a weak and common enemy in T'leth from level 2 and 3. Chances are you haven't seen them for a while. Unlike most aliens here, Deep Ones have neither explosives nor a melee attack. They're vulnerable to just about anything you throw at them, so they're unlikely to cause you any problems unless you are visible to them during their turn. Though a weak alien, their electrical attacks are very lethal to humans.
- Hallucinoids: although they have a strong melee attack, Hallucinoids are no more than a nuisance at this point. Just blast them with whatever is at hand. They are particularly vulnerable to area effect weapons.
See Also
| Mission Types | Alien Sub Crash Recovery • Alien Submarine Assault • Base Defense • Port Attack • Island Attack • Ship Rescue Mission • Artefact Site • Colony Attack Mission • T'leth |
| Information | Terror Missions • Two Part Missions |
