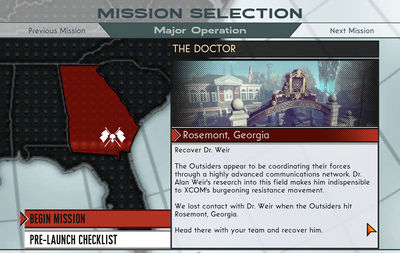
The Doctor (Bureau)
No, not that Doctor. Different alien invasion.
You'll be dropped off on the road. Head on, through a diner, and through a street littered with human corpses. Past a bus and a no-return drop in a totaled bulding, prepare for your first engagement with a ranking Zudjari, the Shield Commander. He's the priority target in this wave. When you've gotten them and move forward, a second wave and third wave will appear down the road, including drop pods and drones. Be aware that there is one Outsider in a ruined building's second floor on the right: there's an explosive barrel near him that you can use.
When done, watch out for the mines and head to the AA gun's bunker. You'll need to have an agent wait out and hot-wire the door. This is the trigger for two drop-podded waves, so you may want to push the alien barrel away from the bunker door and onto the street where you can use it against them as well.
Finish up, and the door will open. Turn off the AA gun, and head through. Go into the bank, where civilians are hiding in the vault, and have some dialogue. C'mon out and go through Sweeney Tod's Barber Shop, and you'll see the first Supply Drop; re-equip. Now, there's a no-return drop nearby, and a M14 rifle on the truck right on the edge: what you may want to do is swap weapons over and over so you can 'juggle' a gun over the edge of the drop, if you want an extra weapon choice for two skirmishes from now.
Because for after the drop, the next skirmish is with a few grunts, another Shield Commander, and some drones. Take them out-- then go back for that weapon you juggled, so you'll have a full weapon for the next battle, which includes the first Muton! Head through the bunker, make note of the grenade and ammo satchel along the way, and you'll be in the front yard to the campus: a cutscene will introduce the Muton-- fortunatley, he only has body armor, and not the full set of arm/leg grieves and helmet. One or two grenades right at his feet (and a Lift to keep him in place and maximize the effect) ought to soften him up. Don't forget he's got a squad of Sectoids and grunts to back him up, but the Muton is the big threat here. Take him out first, and take your time with the rest. Go back for that grenade and satchel, and head into the school. Go down the hall and into the break room, and you'll see a live human with his back turned to you (and look near the milk dispenser next to the door to see a hidden 1994 Sectoid on the cereal box).
He is Lawrence Bailey, Wier's assistant. Dialogue, radio, and then head through the doors. You'll find your first alien weapon, the Scatter Laser. It's a laser shotgun, same as the Muton just had. I'd be a good idea to take it. Up the stairs, there's a narrow area with a outsider Laser Turret at the end, and a number of Sectoids and grunts, and a few mines. If you got a scout, you need to get into the area to get him to hit an explosive barrel near the turret. There's another Scatter Laser near an energy pack where the turret was, and an ammo satchel next to the (locked) door to the building on the left. Head to the next area.
Another cutscene introduces the Sectopod: if you can get behind it, the scatter laser will work wonders on it's weak point (the green panels on the back). Otherwise, wail on it's canopy until it breaks, and attack the Sectoid pilot. There's a few Sectoids on foot that spawn on foot with the Sectopod, and eventually some Grunts will appear from over the far wall on the left (so careful if yo go that way to try to back-attack the Sectopod).
Go through a few corpse-ridden corridors, to the third Supply Drop and your first Backpack Schematic: the Sharpshooter Pack. Since it's the only one you got right now, just slap it on everyone. As for yourself: while a buffed Sniper Rifle headshot is good, you'll want high-capacity weapons for the rest of the mission.
Drop down and head onwards to a large Outsider structure, where you'll fight some grunts and a Laser Turret. Do what you can with the turret. In battle-focus, you may notice that explosive barrels are highlighted: keep their positions in mind if any aliens get near them. If you want to push forward to engage, be aware of multiple landmines in the area.
Head on through the back, and through some fancy scenery. Eventually, you'll go through an outsider hallway-- take note of the Scatter Lasers and energy packs on your right, and the campus courtyard on your left. That area is locked to you for the moment, but it is where you'll fight the boss of this mission, the first Gunship. Head on down to the observatory's lab (one more ammo satchel on a bench on the right), and watch the cutscene. When it's over, you'll engage the gunship and a number of outsider grunts in the courtyard (and the doors will switch, locking you in to the area, but letting you still access the Scatter Lasers). Take too long, and the gunship will drop several more grunts and a Shield Commander. Kill them all, and the mission is complete.
