Difference between revisions of "ADVENT Gunner (LWOTC)"
Jump to navigation
Jump to search

(Created page with "Back To Main Page {{Toc_(LWOTC)|40}}<div style="padding-left: 20px; float:right">256px|left</div>The '''ADVENT Gunner'''...") |
(update stats and add tips) |
||
| Line 1: | Line 1: | ||
| − | [[Long_War_of_the_Chosen|Back To Main Page]] | + | [[Long_War_of_the_Chosen|Back To Main Page]] [[ADVENT_(LWOTC)|Back To Units Page]] |
{{Toc_(LWOTC)|40}}<div style="padding-left: 20px; float:right">[[File:ADVENT_Gunner.jpg|256px|left]]</div>The '''ADVENT Gunner''' is a trooper variant that carries a machine gun. | {{Toc_(LWOTC)|40}}<div style="padding-left: 20px; float:right">[[File:ADVENT_Gunner.jpg|256px|left]]</div>The '''ADVENT Gunner''' is a trooper variant that carries a machine gun. | ||
| − | They serve a similar role as [[Gunner_(LWOTC)|XCOM's Gunner]], starting with | + | They serve a similar role as [[Gunner_(LWOTC)|XCOM's Gunner]], starting with [[Perk List (LWOTC)#Area Suppression|Area Suppression]], high damage and a large clip size, but they suffer from lower mobility. With upgraded versions that appear later on, they get perks to further improve their direct fire capabilities. |
| + | |||
| + | |||
==ADVENT Gunner (Rank 1)== | ==ADVENT Gunner (Rank 1)== | ||
{| class="wikitable" | {| class="wikitable" | ||
|- align="center" | |- align="center" | ||
| − | ! Difficulty !! [[File:LW2_Health.png|36px|Health]]<br>Health !! [[File:Status_armor.png|36px|Armor]]<br>Armor !! [[File:LW2_Aim.png|36px|Aim]]<br>Aim !! Crit Chance !! Flanking Crit Chance Bonus !! [[File:LW2 Defense.png|36px|Defense]]<br>Defense !! [[File:LW2 Dodge.png|36px|Dodge]]<br>Dodge !! [[File:LW2 Mobility.png|36px|Mobility]]<br>Mobility !! [[File:LW2 Will.png|36px|Will]]<br>Will !! [[File:LW2 Hacking.png|36px|Hack Defense]]<br>Hack Defense !! [[File:Status overwatch.png |36px|Detection Radius]]<br>Detection Radius | + | ! Difficulty !! [[File:LW2_Health.png|36px|Health]]<br>Health !! [[File:Status_armor.png|36px|Armor]]<br>Armor !! [[File:LW2_Aim.png|36px|Aim]]<br>Aim !! [[File:Icon_CriticalChance.png |Crit Chance]]<br>Crit Chance !! [[File:Icon_CriticalChance.png |Flanking Crit Chance Bonus]]<br>Flanking Crit Chance Bonus !! [[File:LW2 Defense.png|36px|Defense]]<br>Defense !! [[File:LW2 Dodge.png|36px|Dodge]]<br>Dodge !! [[File:LW2 Mobility.png|36px|Mobility]]<br>Mobility !! [[File:LW2 Will.png|36px|Will]]<br>Will !! [[File:LW2 Hacking.png|36px|Hack Defense]]<br>Hack Defense !! [[File:Status overwatch.png |36px|Detection Radius]]<br>Detection Radius (tiles) |
|- align="center" | |- align="center" | ||
| − | | '''Rookie''' || 4 || 0 || 60 || 0 || 33 || 0 || 0 || 11 || 45 || 125 || | + | | '''Rookie''' || 4 || 0 || 60 || 0 || 33 || 0 || 0 || 11 || 45 || 125 || 8 |
|- align="center" | |- align="center" | ||
| − | | '''Veteran''' || 5 || 0 || | + | | '''Veteran''' || 5 || 0 || 65 || 0 || 33 || 0 || 0 || 11 || 50 || 125 || 8 |
|- align="center" | |- align="center" | ||
| − | | '''Commander' | + | | '''Commander'5' || 5 || 0 || 65 || 0 || 40 || 0 || 0 || 11 || 50 || 125 || 8 |
|- align="center" | |- align="center" | ||
| − | | '''Legend''' || 6 || 0 || 65 || 0 || 40 || 0 || 0 || 11 || 55 || 125 || | + | | '''Legend''' || 6 || 0 || 65 || 0 || 40 || 0 || 0 || 11 || 55 || 125 || 8 |
|} | |} | ||
{| class="wikitable" | {| class="wikitable" | ||
|- align="center" | |- align="center" | ||
| − | ! Weapon !! [[File:LW2Damage.png|36px|Damage]]<br>Damage !! [[File:LW2CritDamage.png|36px|Crit Damage]]<br>Crit Damage !! [[File:Ammo.png|x32px|Clip Size]]<br />Clip Size | + | ! Weapon !! [[File:LW2Damage.png|36px|Damage]]<br>Damage !! [[File:LW2CritDamage.png|36px|Crit Damage]]<br>Crit Damage !! [[File:Ammo.png|x32px|Clip Size]]<br />Clip Size !! Other |
|- align="center" | |- align="center" | ||
| − | | ''' | + | | '''ADVENT Mag Cannon''' || 4-7 || 2 || 5 || - |
|} | |} | ||
{| class="wikitable" width=100% style="table-layout: fixed" | {| class="wikitable" width=100% style="table-layout: fixed" | ||
| Line 27: | Line 29: | ||
| colspan="4" |'''Force Level''' || 1 || 2 || 3 || 4 || 5 || 6 || 7 || 8 || 9 || 10 || 11 || 12 || 13 || 14 || 15 || 16 || 17 || 18 || 19 || 20 | | colspan="4" |'''Force Level''' || 1 || 2 || 3 || 4 || 5 || 6 || 7 || 8 || 9 || 10 || 11 || 12 || 13 || 14 || 15 || 16 || 17 || 18 || 19 || 20 | ||
|- align="center" | |- align="center" | ||
| − | | colspan="4" |'''Leader Spawn Weight''' || - || 1 || 1 || 1 || 1 || 1 || - || - || - || - | + | | colspan="4" |'''Leader Spawn Weight''' || - || 1 || 1 || 1 || 1 || 1|| -|| -|| -|| -|| -|| -|| -|| -|| -|| -|| -|| -|| -|| - |
|- align="center" | |- align="center" | ||
| colspan="4" |'''Follower Spawn Weight''' || - || 1 || 2 || 3 || 4 || 5 || 4 || 3 || 2 || 1 || 1 || 1 || 1 || 1 || 1 || - || - || - || - || - | | colspan="4" |'''Follower Spawn Weight''' || - || 1 || 2 || 3 || 4 || 5 || 4 || 3 || 2 || 1 || 1 || 1 || 1 || 1 || 1 || - || - || - || - || - | ||
| Line 40: | Line 42: | ||
| {{Shredder (LWOTC)| b_name = 1 | b_descr = 1 | b_info = 0}}<br>[[Dark_Events_(LWOTC)#Military_R.26D|16% chance of applying after completion]] | | {{Shredder (LWOTC)| b_name = 1 | b_descr = 1 | b_info = 0}}<br>[[Dark_Events_(LWOTC)#Military_R.26D|16% chance of applying after completion]] | ||
|} | |} | ||
| − | ==ADVENT Heavy Gunner (Rank 2) == | + | |
| + | |||
| + | ==ADVENT Heavy Gunner (Rank 2)== | ||
{| class="wikitable" | {| class="wikitable" | ||
|- align="center" | |- align="center" | ||
| − | ! Difficulty !! [[File:LW2_Health.png|36px|Health]]<br>Health !! [[File:Status_armor.png|36px|Armor]]<br>Armor !! [[File:LW2_Aim.png|36px|Aim]]<br>Aim !! Crit Chance !! Flanking Crit Chance Bonus !! [[File:LW2 Defense.png|36px|Defense]]<br>Defense !! [[File:LW2 Dodge.png|36px|Dodge]]<br>Dodge !! [[File:LW2 Mobility.png|36px|Mobility]]<br>Mobility !! [[File:LW2 Will.png|36px|Will]]<br>Will !! [[File:LW2 Hacking.png|36px|Hack Defense]]<br>Hack Defense !! [[File:Status overwatch.png |36px|Detection Radius]]<br>Detection Radius | + | ! Difficulty !! [[File:LW2_Health.png|36px|Health]]<br>Health !! [[File:Status_armor.png|36px|Armor]]<br>Armor !! [[File:LW2_Aim.png|36px|Aim]]<br>Aim !! [[File:Icon_CriticalChance.png |Crit Chance]]<br>Crit Chance !! [[File:Icon_CriticalChance.png |Flanking Crit Chance Bonus]]<br>Flanking Crit Chance Bonus !! [[File:LW2 Defense.png|36px|Defense]]<br>Defense !! [[File:LW2 Dodge.png|36px|Dodge]]<br>Dodge !! [[File:LW2 Mobility.png|36px|Mobility]]<br>Mobility !! [[File:LW2 Will.png|36px|Will]]<br>Will !! [[File:LW2 Hacking.png|36px|Hack Defense]]<br>Hack Defense !! [[File:Status overwatch.png |36px|Detection Radius]]<br>Detection Radius (tiles) |
|- align="center" | |- align="center" | ||
| − | | '''Rookie''' || 6 || 0 || 65 || 0 || 33 || 0 || 0 || 11 || 65 || 125 || | + | | '''Rookie''' || 6 || 0 || 65 || 0 || 33 || 0 || 0 || 11 || 65 || 125 || 9 |
|- align="center" | |- align="center" | ||
| − | | '''Veteran''' || 7 || 0 || | + | | '''Veteran''' || 7 || 0 || 70 || 0 || 33 || 0 || 0 || 11 || 70 || 125 || 9 |
|- align="center" | |- align="center" | ||
| − | | '''Commander''' || 8 || 0 || 70 || 0 || 40 || 0 || 0 || 11 || 70 || 125 || | + | | '''Commander''' || 8 || 0 || 70 || 0 || 40 || 0 || 0 || 11 || 70 || 125 || 9 |
|- align="center" | |- align="center" | ||
| − | | '''Legend''' || 9 || 0 || 70 || 0 || 40 || 0 || 0 || 11 || | + | | '''Legend''' || 9 || 0 || 70 || 0 || 40 || 0 || 0 || 11 || 70 || 125 || 9 |
|} | |} | ||
{| class="wikitable" | {| class="wikitable" | ||
|- align="center" | |- align="center" | ||
| − | ! Weapon !! [[File:LW2Damage.png|36px|Damage]]<br>Damage !! [[File:LW2CritDamage.png|36px|Crit Damage]]<br>Crit Damage !! [[File:Ammo.png|x32px|Clip Size]]<br />Clip Size | + | ! Weapon !! [[File:LW2Damage.png|36px|Damage]]<br>Damage !! [[File:LW2CritDamage.png|36px|Crit Damage]]<br>Crit Damage !! [[File:Ammo.png|x32px|Clip Size]]<br />Clip Size !! Other |
|- align="center" | |- align="center" | ||
| − | | ''' | + | | '''ADVENT Mag Cannon''' || 5-9 || 3 || 5 || Pierce: 1 (Except on Rookie) |
|} | |} | ||
{| class="wikitable" width=100% style="table-layout: fixed" | {| class="wikitable" width=100% style="table-layout: fixed" | ||
| Line 64: | Line 68: | ||
| colspan="4" |'''Force Level''' || 1 || 2 || 3 || 4 || 5 || 6 || 7 || 8 || 9 || 10 || 11 || 12 || 13 || 14 || 15 || 16 || 17 || 18 || 19 || 20 | | colspan="4" |'''Force Level''' || 1 || 2 || 3 || 4 || 5 || 6 || 7 || 8 || 9 || 10 || 11 || 12 || 13 || 14 || 15 || 16 || 17 || 18 || 19 || 20 | ||
|- align="center" | |- align="center" | ||
| − | | colspan="4" |'''Leader Spawn Weight''' || - || - || - || - || - || - || | + | | colspan="4" |'''Leader Spawn Weight''' || - || - || - || - || - || -|| -|| -|| -|| 1|| 1|| 1|| 1|| -|| -|| -|| -|| -|| -|| - |
|- align="center" | |- align="center" | ||
| colspan="4" |'''Follower Spawn Weight''' || - || - || - || - || - || - || 1 || 1 || 2 || 3 || 4 || 5 || 6 || 6 || 6 || 6 || 4 || 2 || 1 || 1 | | colspan="4" |'''Follower Spawn Weight''' || - || - || - || - || - || - || 1 || 1 || 2 || 3 || 4 || 5 || 6 || 6 || 6 || 6 || 4 || 2 || 1 || 1 | ||
|} | |} | ||
| − | {| class="wikitable" | + | {| class="wikitable" |
|- | |- | ||
|+ Abilities and Tactical Upgrades | |+ Abilities and Tactical Upgrades | ||
| Line 80: | Line 84: | ||
|} | |} | ||
| − | ==ADVENT Elite Gunner (Rank 3) == | + | |
| + | ==ADVENT Elite Gunner (Rank 3)== | ||
{| class="wikitable" | {| class="wikitable" | ||
|- align="center" | |- align="center" | ||
| − | ! Difficulty !! [[File:LW2_Health.png|36px|Health]]<br>Health !! [[File:Status_armor.png|36px|Armor]]<br>Armor !! [[File:LW2_Aim.png|36px|Aim]]<br>Aim !! Crit Chance !! Flanking Crit Chance Bonus !! [[File:LW2 Defense.png|36px|Defense]]<br>Defense !! [[File:LW2 Dodge.png|36px|Dodge]]<br>Dodge !! [[File:LW2 Mobility.png|36px|Mobility]]<br>Mobility !! [[File:LW2 Will.png|36px|Will]]<br>Will !! [[File:LW2 Hacking.png|36px|Hack Defense]]<br>Hack Defense !! [[File:Status overwatch.png |36px|Detection Radius]]<br>Detection Radius | + | ! Difficulty !! [[File:LW2_Health.png|36px|Health]]<br>Health !! [[File:Status_armor.png|36px|Armor]]<br>Armor !! [[File:LW2_Aim.png|36px|Aim]]<br>Aim !! [[File:Icon_CriticalChance.png |Crit Chance]]<br>Crit Chance !! [[File:Icon_CriticalChance.png |Flanking Crit Chance Bonus]]<br>Flanking Crit Chance Bonus !! [[File:LW2 Defense.png|36px|Defense]]<br>Defense !! [[File:LW2 Dodge.png|36px|Dodge]]<br>Dodge !! [[File:LW2 Mobility.png|36px|Mobility]]<br>Mobility !! [[File:LW2 Will.png|36px|Will]]<br>Will !! [[File:LW2 Hacking.png|36px|Hack Defense]]<br>Hack Defense !! [[File:Status overwatch.png |36px|Detection Radius]]<br>Detection Radius (tiles) |
|- align="center" | |- align="center" | ||
| − | | '''Rookie''' || 9 || 1 || 70 || 0 || 33 || 10 || 0 || 11 || 85 || 175 || | + | | '''Rookie''' || 9 || 1 || 70 || 0 || 33 || 10 || 0 || 11 || 85 || 175 || 8 |
|- align="center" | |- align="center" | ||
| − | | '''Veteran''' || 13 || 1 || 70 || 0 || 33 || 10 || 0 || 11 || 90 || 175 || | + | | '''Veteran''' || 13 || 1 || 70 || 0 || 33 || 10 || 0 || 11 || 90 || 175 || 8 |
|- align="center" | |- align="center" | ||
| − | | '''Commander''' || 14 || 1 || 75 || 0 || 40 || 10 || 0 || 11 || 90 || 175 || | + | | '''Commander''' || 14 || 1 || 75 || 0 || 40 || 10 || 0 || 11 || 90 || 175 || 8 |
|- align="center" | |- align="center" | ||
| − | | '''Legend''' || 15 || 1 || 75 || 0 || 40 || 10 || 0 || 11 || 95 || 175 || | + | | '''Legend''' || 15 || 1 || 75 || 0 || 40 || 10 || 0 || 11 || 95 || 175 || 8 |
|} | |} | ||
{| class="wikitable" | {| class="wikitable" | ||
|- align="center" | |- align="center" | ||
| − | ! Weapon !! [[File:LW2Damage.png|36px|Damage]]<br>Damage !! [[File:LW2CritDamage.png|36px|Crit Damage]]<br>Crit Damage !! [[File:Ammo.png|x32px|Clip Size]]<br />Clip Size | + | ! Weapon !! [[File:LW2Damage.png|36px|Damage]]<br>Damage !! [[File:LW2CritDamage.png|36px|Crit Damage]]<br>Crit Damage !! [[File:Ammo.png|x32px|Clip Size]]<br />Clip Size !! Other |
|- align="center" | |- align="center" | ||
| − | | ''' | + | | '''ADVENT Mag Cannon''' || 6-11 || 4 || 5 || Pierce: 2 (On Rookie: 1) |
|} | |} | ||
{| class="wikitable" width=100% style="table-layout: fixed" | {| class="wikitable" width=100% style="table-layout: fixed" | ||
| Line 104: | Line 109: | ||
| colspan="4" |'''Force Level''' || 1 || 2 || 3 || 4 || 5 || 6 || 7 || 8 || 9 || 10 || 11 || 12 || 13 || 14 || 15 || 16 || 17 || 18 || 19 || 20 | | colspan="4" |'''Force Level''' || 1 || 2 || 3 || 4 || 5 || 6 || 7 || 8 || 9 || 10 || 11 || 12 || 13 || 14 || 15 || 16 || 17 || 18 || 19 || 20 | ||
|- align="center" | |- align="center" | ||
| − | | colspan="4" |'''Leader Spawn Weight''' || - || - || - || - || - || - || - || - || - || - | + | | colspan="4" |'''Leader Spawn Weight''' || - || - || - || - || - || -|| -|| -|| -|| -|| -|| -|| -|| 1|| 1|| 1|| 1|| 1|| 1|| 1 |
|- align="center" | |- align="center" | ||
| colspan="4" |'''Follower Spawn Weight''' || - || - || - || - || - || - || - || - || - || - || - || - || - || - || - || 1 || 3 || 4 || 5 || 5 | | colspan="4" |'''Follower Spawn Weight''' || - || - || - || - || - || - || - || - || - || - || - || - || - || - || - || 1 || 3 || 4 || 5 || 5 | ||
|} | |} | ||
| − | {| class="wikitable" | + | {| class="wikitable" |
|- | |- | ||
|+ Abilities and Tactical Upgrades | |+ Abilities and Tactical Upgrades | ||
| Line 122: | Line 127: | ||
|} | |} | ||
| − | [[Category: ADVENT (LWOTC)]] | + | |
| + | == Tips == | ||
| + | * Like most flankable units, they will ideally try to find reasonable cover whenever flanked. This can be taken advantage of if you want to force enemies to move. | ||
| + | * Like most units with AOE moves, you ideally want to spread your soldiers out in order to greatly disssuade them from ever using them. But unlike other unit types, it may be beneficial to group up in order to incentivize the gunner to suppress your soldiers which will effectively remove their chance at a shot to deal potential damage. If doing this, it is ideal to have a way to disable their suppression in the next turn to truly make their turn a wasted one otherwise you pinned yourself down into a tougher turn. | ||
| + | |||
| + | [[Category:ADVENT (LWOTC)]] | ||
Revision as of 17:32, 25 August 2023
Back To Main Page Back To Units Page

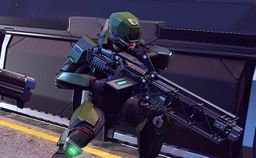
The ADVENT Gunner is a trooper variant that carries a machine gun.
They serve a similar role as XCOM's Gunner, starting with Area Suppression, high damage and a large clip size, but they suffer from lower mobility. With upgraded versions that appear later on, they get perks to further improve their direct fire capabilities.
ADVENT Gunner (Rank 1)
| Difficulty | Health |
Armor |
Aim |
Crit Chance |
Flanking Crit Chance Bonus |
Defense |
Dodge |
Mobility |
Will |
Hack Defense |
Detection Radius (tiles) |
|---|---|---|---|---|---|---|---|---|---|---|---|
| Rookie | 4 | 0 | 60 | 0 | 33 | 0 | 0 | 11 | 45 | 125 | 8 |
| Veteran | 5 | 0 | 65 | 0 | 33 | 0 | 0 | 11 | 50 | 125 | 8 |
| Commander'5' | 5 | 0 | 65 | 0 | 40 | 0 | 0 | 11 | 50 | 125 | 8 |
| Legend | 6 | 0 | 65 | 0 | 40 | 0 | 0 | 11 | 55 | 125 | 8 |
| Weapon | Damage |
Crit Damage |
Clip Size |
Other |
|---|---|---|---|---|
| ADVENT Mag Cannon | 4-7 | 2 | 5 | - |
| Force Level | 1 | 2 | 3 | 4 | 5 | 6 | 7 | 8 | 9 | 10 | 11 | 12 | 13 | 14 | 15 | 16 | 17 | 18 | 19 | 20 | |||
| Leader Spawn Weight | - | 1 | 1 | 1 | 1 | 1 | - | - | - | - | - | - | - | - | - | - | - | - | - | - | |||
| Follower Spawn Weight | - | 1 | 2 | 3 | 4 | 5 | 4 | 3 | 2 | 1 | 1 | 1 | 1 | 1 | 1 | - | - | - | - | - | |||
Fire a barrage that pins down multiple targets within a 4-tile radius, granting reaction fire against anyone that moves, and imposing a -25 penalty to all targets' aim until suppression is removed. Cannot be used when concealed. |
You do one additional point of base damage when using guns. 16% chance of applying after completion |
Missed shots with your primary weapon have an additional roll to become a graze. 25% chance of applying after completion |
Your primary weapon attacks shred armor. 16% chance of applying after completion |
ADVENT Heavy Gunner (Rank 2)
| Difficulty | Health |
Armor |
Aim |
Crit Chance |
Flanking Crit Chance Bonus |
Defense |
Dodge |
Mobility |
Will |
Hack Defense |
Detection Radius (tiles) |
|---|---|---|---|---|---|---|---|---|---|---|---|
| Rookie | 6 | 0 | 65 | 0 | 33 | 0 | 0 | 11 | 65 | 125 | 9 |
| Veteran | 7 | 0 | 70 | 0 | 33 | 0 | 0 | 11 | 70 | 125 | 9 |
| Commander | 8 | 0 | 70 | 0 | 40 | 0 | 0 | 11 | 70 | 125 | 9 |
| Legend | 9 | 0 | 70 | 0 | 40 | 0 | 0 | 11 | 70 | 125 | 9 |
| Weapon | Damage |
Crit Damage |
Clip Size |
Other |
|---|---|---|---|---|
| ADVENT Mag Cannon | 5-9 | 3 | 5 | Pierce: 1 (Except on Rookie) |
| Force Level | 1 | 2 | 3 | 4 | 5 | 6 | 7 | 8 | 9 | 10 | 11 | 12 | 13 | 14 | 15 | 16 | 17 | 18 | 19 | 20 | |||
| Leader Spawn Weight | - | - | - | - | - | - | - | - | - | 1 | 1 | 1 | 1 | - | - | - | - | - | - | - | |||
| Follower Spawn Weight | - | - | - | - | - | - | 1 | 1 | 2 | 3 | 4 | 5 | 6 | 6 | 6 | 6 | 4 | 2 | 1 | 1 | |||
Fire a barrage that pins down multiple targets within a 4-tile radius, granting reaction fire against anyone that moves, and imposing a -25 penalty to all targets' aim until suppression is removed. Cannot be used when concealed. |
Gain +20 aim and +10 crit for successive shots at the same enemy unit. | |
You do one additional point of base damage when using guns. 16% chance of applying after completion |
Missed shots with your primary weapon have an additional roll to become a graze. 25% chance of applying after completion |
Your primary weapon attacks shred armor. 16% chance of applying after completion |
ADVENT Elite Gunner (Rank 3)
| Difficulty | Health |
Armor |
Aim |
Crit Chance |
Flanking Crit Chance Bonus |
Defense |
Dodge |
Mobility |
Will |
Hack Defense |
Detection Radius (tiles) |
|---|---|---|---|---|---|---|---|---|---|---|---|
| Rookie | 9 | 1 | 70 | 0 | 33 | 10 | 0 | 11 | 85 | 175 | 8 |
| Veteran | 13 | 1 | 70 | 0 | 33 | 10 | 0 | 11 | 90 | 175 | 8 |
| Commander | 14 | 1 | 75 | 0 | 40 | 10 | 0 | 11 | 90 | 175 | 8 |
| Legend | 15 | 1 | 75 | 0 | 40 | 10 | 0 | 11 | 95 | 175 | 8 |
| Weapon | Damage |
Crit Damage |
Clip Size |
Other |
|---|---|---|---|---|
| ADVENT Mag Cannon | 6-11 | 4 | 5 | Pierce: 2 (On Rookie: 1) |
| Force Level | 1 | 2 | 3 | 4 | 5 | 6 | 7 | 8 | 9 | 10 | 11 | 12 | 13 | 14 | 15 | 16 | 17 | 18 | 19 | 20 | |||
| Leader Spawn Weight | - | - | - | - | - | - | - | - | - | - | - | - | - | 1 | 1 | 1 | 1 | 1 | 1 | 1 | |||
| Follower Spawn Weight | - | - | - | - | - | - | - | - | - | - | - | - | - | - | - | 1 | 3 | 4 | 5 | 5 | |||
Fire a barrage that pins down multiple targets within a 4-tile radius, granting reaction fire against anyone that moves, and imposing a -25 penalty to all targets' aim until suppression is removed. Cannot be used when concealed. |
Gain +20 aim and +10 crit for successive shots at the same enemy unit. |
Reaction shots confer an aim malus on enemies and can now be triggered by any enemy action, not just movement. | |
After taking a standard shot with your primary weapon with your first action, you may take an additional non-movement action. |
You do one additional point of base damage when using guns. 16% chance of applying after completion |
Missed shots with your primary weapon have an additional roll to become a graze. 25% chance of applying after completion |
Your primary weapon attacks shred armor. 16% chance of applying after completion |
Tips
- Like most flankable units, they will ideally try to find reasonable cover whenever flanked. This can be taken advantage of if you want to force enemies to move.
- Like most units with AOE moves, you ideally want to spread your soldiers out in order to greatly disssuade them from ever using them. But unlike other unit types, it may be beneficial to group up in order to incentivize the gunner to suppress your soldiers which will effectively remove their chance at a shot to deal potential damage. If doing this, it is ideal to have a way to disable their suppression in the next turn to truly make their turn a wasted one otherwise you pinned yourself down into a tougher turn.