Difference between revisions of "Bar (EU2012)"
Jump to navigation
Jump to search
m |
m |
||
| Line 16: | Line 16: | ||
File:BAR1 (EU2012).png|''Overview'' | File:BAR1 (EU2012).png|''Overview'' | ||
File:BAR2 (EU2012).png|''Opposite overview'' | File:BAR2 (EU2012).png|''Opposite overview'' | ||
| + | File:BAR7 (EU2012).png|''Meld Locations'' | ||
File:BAR TERROR (EU2012).png|''Terror Site loading screen'' | File:BAR TERROR (EU2012).png|''Terror Site loading screen'' | ||
File:BAR TERROR 3 (EU2012).png|''Terror Site Starting Areas'' | File:BAR TERROR 3 (EU2012).png|''Terror Site Starting Areas'' | ||
Latest revision as of 02:36, 14 January 2014
| Missions | Alien Abductions, Terror Site, Multiplayer |
| Length | 52 tiles |
| Width | 39 tiles |
| Area | 2028 tiles |
Notes
- There are two versions of this map, one is used for Abductions and Multiplayer, the other for the Terror Site mission.
- Roof access: there are two stairs, both on opposite sides of the Skyranger drop zone. The one with the least probability of alien encounters is the closest to the Skyranger (check images below for location).
- Map has plenty of starting cover.
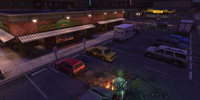
Loading screen

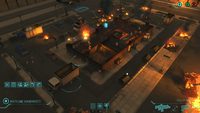
Overview
Opposite overview

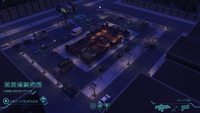
Meld Locations

Terror Site loading screen
Terror Site Starting Areas
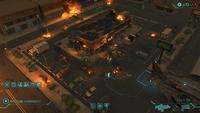
Terror Site Overview
.png)
.png)
.png)
.png)
.png)
.png)
.png)