Difference between revisions of "Boulevard (EU2012)"
Jump to navigation
Jump to search
m |
|||
| Line 1: | Line 1: | ||
| − | + | {{Map Data Box (EU2012) | |
| − | + | |missions=Abduction, Council | |
| − | + | |length=56 tiles | |
| − | + | |width=42 tiles | |
| − | + | |area=2352 tiles | |
| − | + | }} | |
| − | |||
| − | |||
| − | |||
| − | |||
| − | |||
'''Notes''' | '''Notes''' | ||
| + | * There are two versions of this map, one with European elements. | ||
| + | * The Council version is used for the Extract Anna Sing mission (alien abductee who escaped). | ||
* Anna Sing is located exactly on the opposite side of the extraction zone by the road work signs. | * Anna Sing is located exactly on the opposite side of the extraction zone by the road work signs. | ||
* There are two versions of this map, one with European elements. | * There are two versions of this map, one with European elements. | ||
* Going through the middle does not provide good cover. The bus on the right side is decent high cover and keeps your troops from getting attacked from two sides. | * Going through the middle does not provide good cover. The bus on the right side is decent high cover and keeps your troops from getting attacked from two sides. | ||
| − | + | <gallery widths=200px heights=150px perrow=5> | |
| − | + | File:BOULEVARD (EU2012).png|Loading screen | |
| − | + | File:BOULEVARD EURO (EU2012).png|Europe version loading screen | |
| + | File:BOULEVARD1 (EU2012).png|Boulevard overview | ||
| + | File:BOULEVARD3 (EU2012).png|Opposite overview | ||
| + | File:BOULEVARD2 (EU2012).png|Europe overview | ||
| + | </gallery> | ||
| + | |||
{{Template:Maps Navbar (EU2012)}} | {{Template:Maps Navbar (EU2012)}} | ||
{{EU2012 Style}} | {{EU2012 Style}} | ||
Revision as of 16:32, 16 September 2013
| Missions | Abduction, Council |
| Length | 56 tiles |
| Width | 42 tiles |
| Area | 2352 tiles |
Notes
- There are two versions of this map, one with European elements.
- The Council version is used for the Extract Anna Sing mission (alien abductee who escaped).
- Anna Sing is located exactly on the opposite side of the extraction zone by the road work signs.
- There are two versions of this map, one with European elements.
- Going through the middle does not provide good cover. The bus on the right side is decent high cover and keeps your troops from getting attacked from two sides.

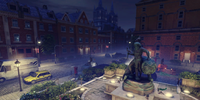
Loading screen
Europe version loading screen
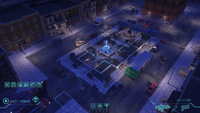
Boulevard overview

Opposite overview

Europe overview
.png)
.png)
.png)
.png)
.png)