Difference between revisions of "CemeteryGrand (EU2012)"
Jump to navigation
Jump to search
| (5 intermediate revisions by the same user not shown) | |||
| Line 1: | Line 1: | ||
| − | [[ | + | {{Map Data Box (EU2012) |
| − | + | |missions=[[Alien Abductions (EU2012)|Abductions]], [[Asset Recovery (EU2012)|Asset Recovery]], [[Bomb Disposal (EU2012)|Bomb Disposal]] | |
| − | + | |length=70 tiles | |
| − | + | |width=54 tiles | |
| − | + | |area=3780 tiles | |
| − | + | }} | |
| − | |||
| − | |||
| − | |||
| − | |||
| − | |||
'''Notes''' | '''Notes''' | ||
* Starting Location is at the top of a low set of stairs overlooking the large crypt in the center of the map. | * Starting Location is at the top of a low set of stairs overlooking the large crypt in the center of the map. | ||
| + | * This map is used for 2 [[The Council (EU2012)|Council]] missions, Bomb Defusal and Asset Recovery. | ||
'''Tactics''' | '''Tactics''' | ||
| − | * In Classic and Impossible difficulties the squad may not go far from the starting location, and have limited options for cover. Pulling back to the edge of the map and circling around to the right can drop the squad into an area with better cover. | + | * In Classic and Impossible [[Difficulty (EU2012)|difficulties]] the [[Squads (EU2012)|squad]] may not go far from the starting location, and have limited options for full [[Cover (EU2012)|cover]]. All cover can be destroyed. |
| − | * | + | * Pulling back to the edge of the map and circling around to the right can drop the squad into an area with better cover. |
| + | * Squad Sight [[Sniper (EU2012)|snipers]] can just camp on the terrace on the starting end of the map, and cover most of the [[Maps (EU2012)|map]] with ease; doing so keeps them well out of the way of any [[Thin Man (EU2012)|Thin Men]], including those that drop from the sky on the Bomb Disposal version of this map. | ||
| + | <br clear="all"> | ||
| + | <gallery widths=200px heights=150px perrow=4> | ||
| + | File:CemeteryGrand.png|Loading screen | ||
| + | File:CemeteryGrand1 (EU2012).png|Overview | ||
| + | File:CemeteryGrand2 (EU2012).png|Opposite overview | ||
| + | </gallery> | ||
| − | + | {{Template:Maps Navbar (EU2012)}} | |
| − | + | {{EU2012 Style}} | |
[[Category: Enemy Unknown (2012)]] | [[Category: Enemy Unknown (2012)]] | ||
[[Category: Maps (EU2012)]] | [[Category: Maps (EU2012)]] | ||
Latest revision as of 21:44, 12 October 2013
| Missions | Abductions, Asset Recovery, Bomb Disposal |
| Length | 70 tiles |
| Width | 54 tiles |
| Area | 3780 tiles |
Notes
- Starting Location is at the top of a low set of stairs overlooking the large crypt in the center of the map.
- This map is used for 2 Council missions, Bomb Defusal and Asset Recovery.
Tactics
- In Classic and Impossible difficulties the squad may not go far from the starting location, and have limited options for full cover. All cover can be destroyed.
- Pulling back to the edge of the map and circling around to the right can drop the squad into an area with better cover.
- Squad Sight snipers can just camp on the terrace on the starting end of the map, and cover most of the map with ease; doing so keeps them well out of the way of any Thin Men, including those that drop from the sky on the Bomb Disposal version of this map.

Loading screen
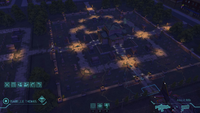
Overview

Opposite overview

.png)
.png)